Last updated: May 05, 2026
Recording drum kits has long been the most frustrating and time-consuming part of home recording. In fact, lately, very few people bother to record a real drum kit with the rise of sample-based drum sources and integrated drum machines controlled by sequencers. Though a large number still love the sound of a real drum. To achieve great drum sounds, you don’t have to shell out for a deluxe studio. You only need a structured approach, a good room, and the right equipment.
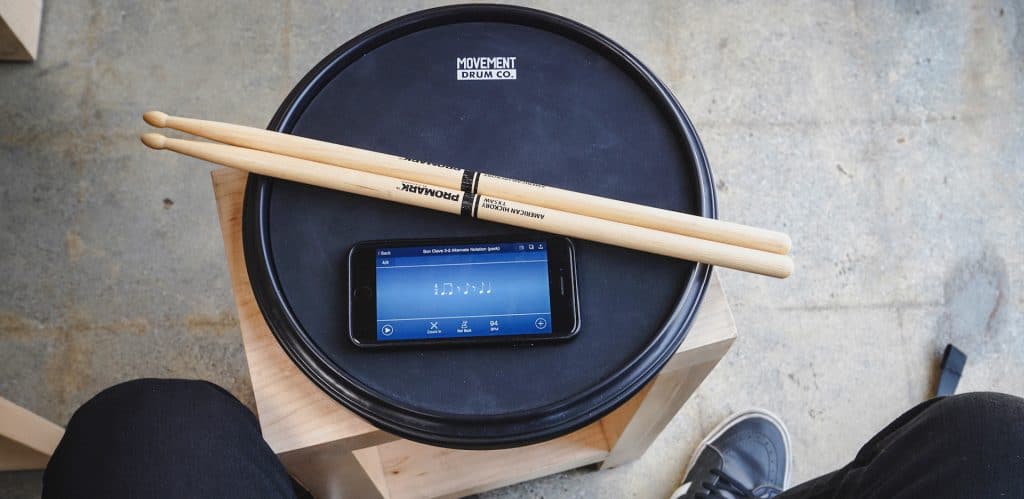
Some of the key things you need to gather before you learn how to record drums include; a drum mic kit, a well-tuned drum set, an audio interface or a physical mixer, and recording software. Ensure you pick a soundproofed or low-noise environment, then keep in mind that the secret to achieving great drum sounds is great preparation. If you put in the work when choosing and setting up your instruments and equipment like microphones, you can create and record virtually all kinds of drum parts in your home studio.
Once you have picked the right room and gathered the right equipment and instruments, you can get started on preparing to record your acoustic drums. Here are some useful pointers on how to about it.
 The first obvious thing to do is to choose a room. Ensure the room suits the sound you are interested in. You can change any room into a
recording studio
Trusted Source
How to Make a Recording Studio: 13 Steps (with Pictures) - wikiHow
Have a musical itch? Do you want to set up your own home recording studio? With all the gear required, it can be tough to know where to start. While studio-making can be overwhelming, the basics are actually pretty straightforward.
www.wikihow.com
depending on the sounds that you want to achieve. For instance, if you want to create loud and lively sounds with echo and more reverb, go for a large room with flat surfaces and less furniture like your garage. If you just want to record the drums, then maybe add the reverb later then a small and quiet room inside your house can do.
The first obvious thing to do is to choose a room. Ensure the room suits the sound you are interested in. You can change any room into a
recording studio
Trusted Source
How to Make a Recording Studio: 13 Steps (with Pictures) - wikiHow
Have a musical itch? Do you want to set up your own home recording studio? With all the gear required, it can be tough to know where to start. While studio-making can be overwhelming, the basics are actually pretty straightforward.
www.wikihow.com
depending on the sounds that you want to achieve. For instance, if you want to create loud and lively sounds with echo and more reverb, go for a large room with flat surfaces and less furniture like your garage. If you just want to record the drums, then maybe add the reverb later then a small and quiet room inside your house can do.
To get the right spot in the room that offers the sound quality you want, experiment by clapping your hands. Walk around the room clapping your hands, then listen to the sound quality every spot offers. Note the spots you would like to alter before you begin recording. If the room doesn’t offer you the sound quality, you want to change to another one.
The next thing to do is set up to
dampen
Trusted Source
3 Ways to Make a Drum Set Quieter - wikiHow
Learning how to make a drum set quieter is an essential process when playing a drum set in a shared house or apartment complex. There are several methods of doing this, ranging in expense, effort required, and effectiveness.
www.wikihow.com
the sounds of the drum set. You don’t have to dig deep into your pockets for this. You can use cheap insulating blankets, carpets, or furniture. Insulating blankets are a good option as they are incredibly affordable and accessible. Hang them over all the flat surfaces in the room, including walls and windows.
Lastly, to record liver drumming, use plywood to cover the walls of the recording room. You can place in front a kick drum as it will serve as a flat reflective surface that livens up the drum sounds.
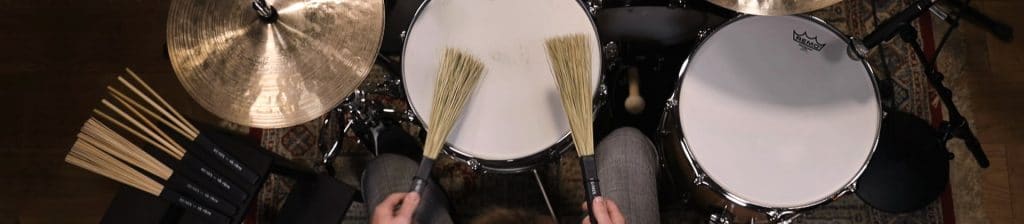
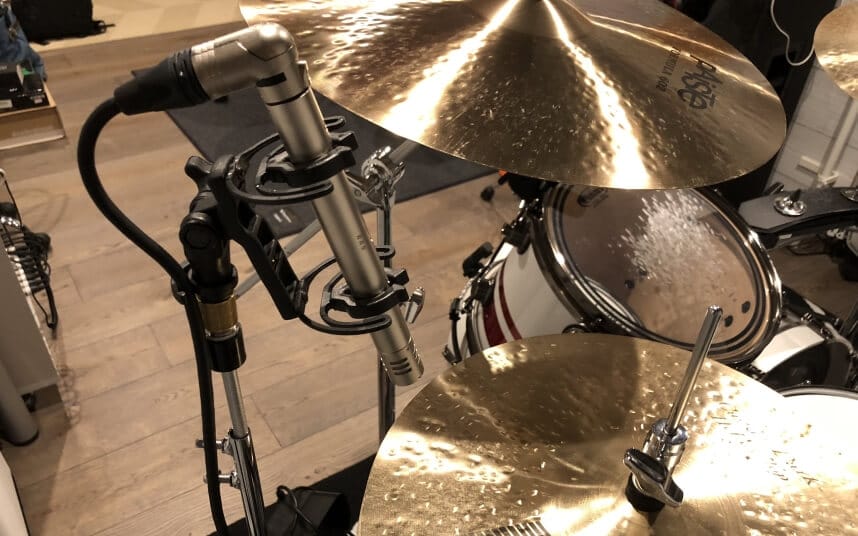
 Contrary to popular belief, you don’t need to have a range of mics to record the best drum sound quality. It is expensive and unnecessary; you just need 1 or 2 stellar overhead mics then if you feel you need to adjust the recording, you can add more mics to individual drums. Condenser mics are a perfect option to use as overhead mics because they pick up the entire drum kit’s sound.
One of the most acclaimed microphones on the market is the Behringer CS-2 condenser mic set. The two matched microphones can be used for stereo studio recording as well as live applications. They offer effective feedback elimination and superb sound reproduction.
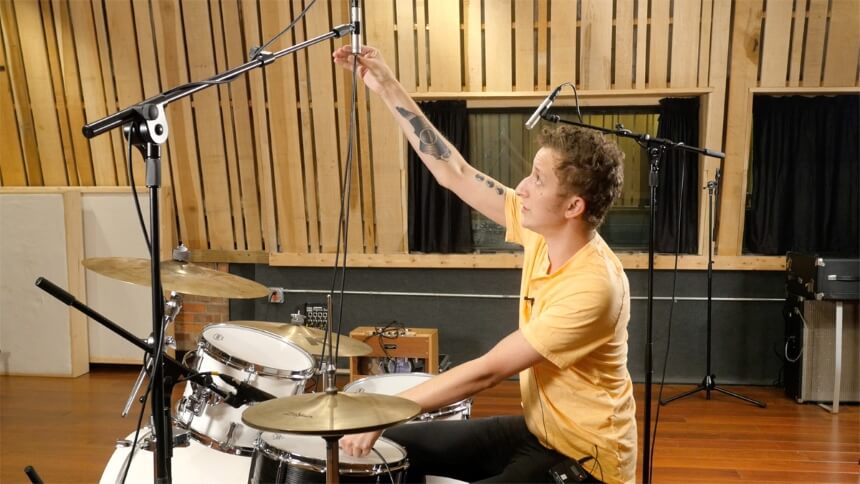
Place the overhead mic behind the drum kit on a stand over the drummer’s shoulder. Position it to point down towards the kick drum. If you are using 2 overhead mics, place them back to back on either side of the drum kit or behind the drummer.
For individual drums, you can use either dynamic mics or ribbon mics as they pick up the most volume and record smoother sounds, respectively. Dynamic mics are particularly great for recording kick drums and snare drums. Since recording a kick drum is a true challenge, the mic is normally placed inside it.
Just remember, you have absolutely no obligation to mic all the drums. You can mic 1 or 2 or none if you are happy with the sound. You can also place pressure zone mics around the room to pick up drums’ sounds as they travel.
Without a great sounding instrument, you can forget about a great sounding recording. Therefore, tuning your drum kit is one of the essential steps in setting up to record superb drum sounds.
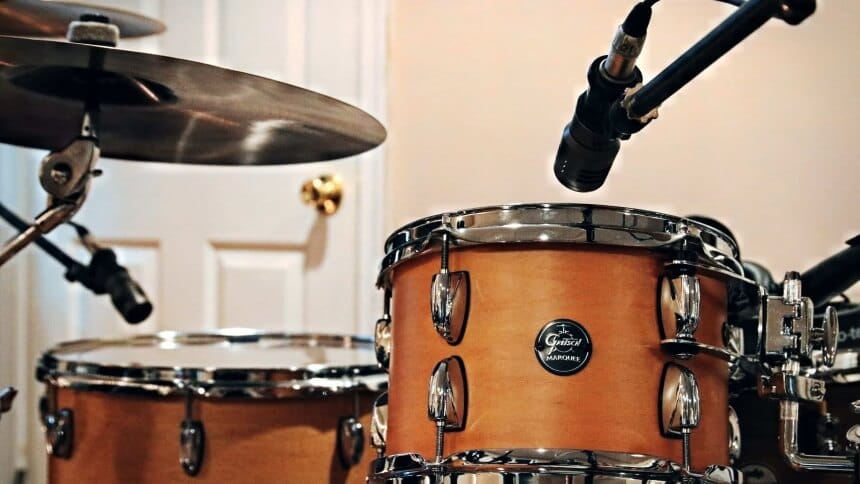
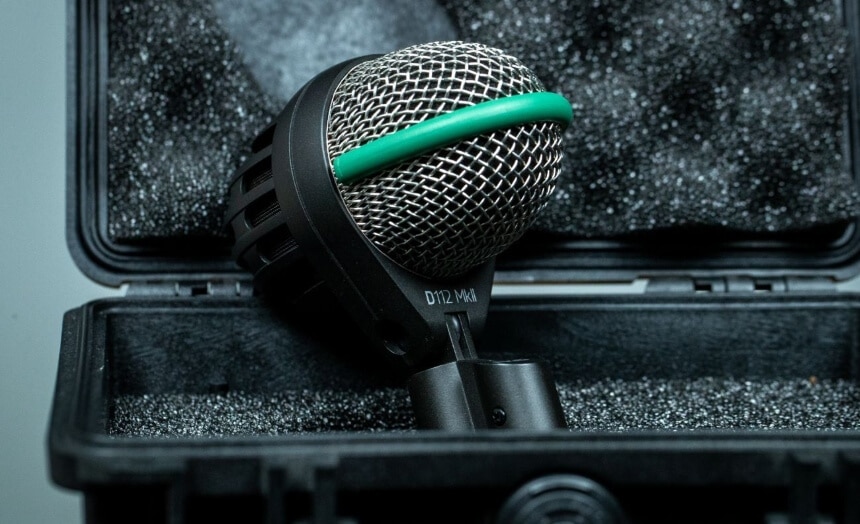 Kick drums are usually hard to record correctly hence the placement of purpose-designed dynamic microphones inside them. Experts recommend using special kick drum dynamic mics because they are specially designed to handle the kick drum’s low-frequency attack. The D112 MKII by AKG Audio Pro is the most popular kick drum mic because it delivers accurate low-frequencies and keeps noise to an absolute minimum.
There are many ways of micing a kick drum, and they all depend on the number of mics you intend to use and the design of the drum. The best optimal spot, especially for home recorders, is inside the outer head of the drum. If the drum has a hole or a circular cut-out in the outer head, tape the microphone inside it. This plays a huge role in blocking audio bleed from the other drums so that you get high precision sounds from the kick drum.
Alternatively, you can place the mic on a stand outside the drum pointed down near the outside head. Ensure the mic is far away from the porthole to curb any interference from the wind coming from the kick drum. Though a bit pricey, a high-quality ribbon mic would be the best outside kick drum option for capturing the low end accurately.
The snare is the backbone of the entire drum set. It gives the drum set character because it is the most prominent instrument. The most popular technique of micing a snare drum is the close-mic technique. It is simple, offers a good punch, and works well with virtually all genres. It also allows you to capture all the details and nuances of your playing, including soft hits and ghost notes.
To close-mic, set the mic at the edge and keep it about 4 or 5 inches away from the snare’s rim to capture the fullness of its hits. The mic’s angle will depend on your style of playing, but you can experiment until you get it right. You can close-mic with 1 or 2 mics, but it is advisable to do a 2 mic set up for rich and versatile possibilities. You can have a mic on top of the snare and another at the bottom. The one on top will be able to capture the attack of the snare, while the bottom one will capture the fizz.
 For more control during mixing, you need to add a microphone to the hi-hat. It will help you record the hi-hat sound separately and edit later. To mic a hi-hat, place a condenser mic at about 4 inches above it, pointing downwards. Angle it according to how you have placed the other mics. Ensure the tip of the mic is far enough to minimize any interference when you are playing.
You also must get the angling right to avoid snare bleed or any phase issues with the overheads. A small-diaphragm condenser mic is the most recommended because it produces a bright and clear sound. A dynamic mic would suffice, but it sounds rather mid-focused or brassy.
You must ensure the Toms are tuned for the best drum recording quality before you even mic your drums. You can use either a dynamic or condenser mic to mic your Toms. A dynamic mic will give you a solid thump sound, while a condenser mic will give you a warm and fuller sound.
For a fuller drum recording sound, then use one mic per Tom. It also offers great versatility when it comes to mixing and processing the recording.
For optimal results, place the mic 2 or 3 inches above the drum head at 45 degrees angle. The attack and sustain of the drum will depend on how close you place the mic. The closer the mic is to the drum, the more the attack and the lesser the sustain. If you move the mic further, the attack reduces but the sustain increases, so you have to experiment and keep adjusting until you find the right position.
Most recording engineers add a compression effect to drum recordings to level the overall dynamics. It is advisable to use the compression effect after the record is finished because once an audio signal is compressed during recording, it is impossible to get it back when mixing. Therefore, be sure to record the purest tone then save the compression for later.
What’s more, you can use preamp before sending audio into your mixing board. Be careful not to overdo preamps because they can cause some level of distortion. The Focusrite Octopre Octopre MkII is one of the best affordable fantastic sounding preamps you can get. It has 8 input channels, a digital output, and state-of-the-art clocking solutions.
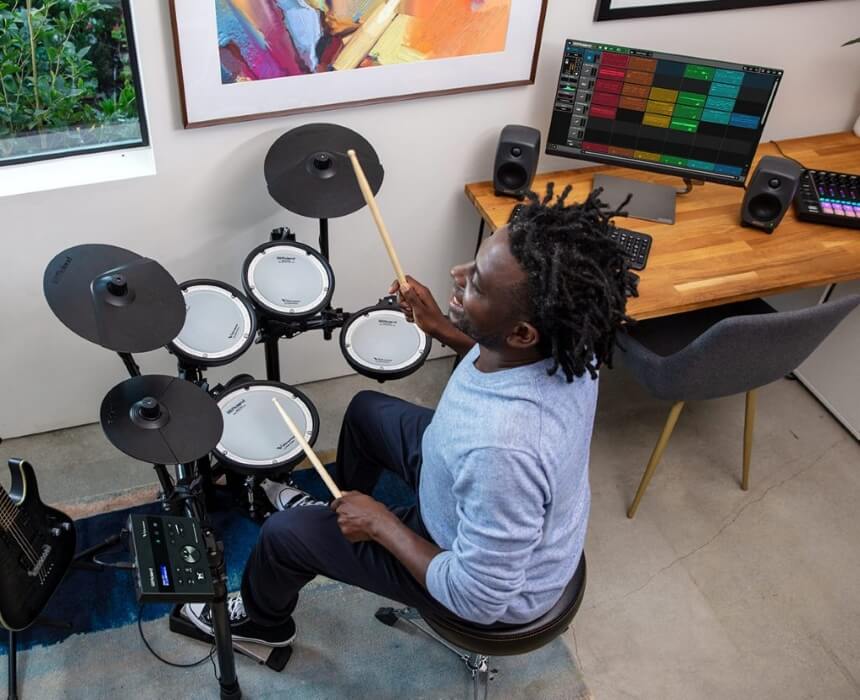
One huge upside to electronic drums is how easy they are to record. There are several ways of recording electronic drums, but you don’t have to limit yourself to one. For instance, you can combine MIDI and audio for more freedom and versatility when editing your tracks later. Here is how to record electronic drums. The techniques apply to most electronic drum pads or machines.
 Your electronic drum set has pads and cymbals that are all connected to the drum module, popularly known as the drum brain. The drum module is what actually creates the sounds. The pads and cymbals just trigger the sounds created by the drum module.
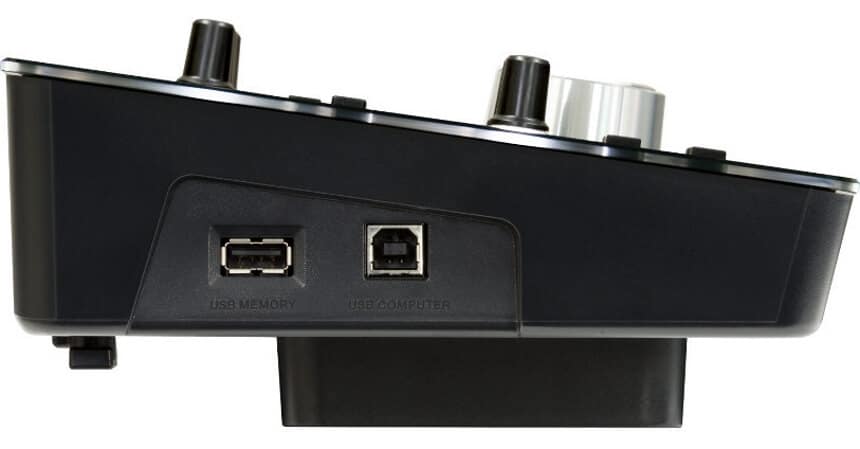
Some drums have a drum module that can act as their own audio interface. With such a drum module, you can easily connect to your computer via USB cable, install the necessary drivers, and start recording. It is one of the easiest and best ways to record drums. All you have to do is turn on your computer then use a USB cable to connect the audio outputs from the drum kit module. Next, connect the USB output from the drum kit module to the USB input on your computer, then launch the recording software application on your computer. Follow the directions on the application, then start drumming. If you see visual representations of audio waves, then you are doing okay.
 If you can’t transfer audio from your drum module to your computer via USB, you can record via an audio interface. You need a computer, an audio interface, audio cables, and recording software. Your computer doesn’t have to be fancy, and you can use any free audio software like audacity or Garageband.
The audio interface is what will transform the audio outputs from your electronic drum kit to a digital signal that your computer can interpret. To connect the audio interface to your computer, you will need a USB cable. You must be certain that an audio interface is compatible with your computer’s operating system before purchasing it. The operating system version of your computer must also be able to meet all other system requirements of the audio interface.
You don’t have to spend a pretty penny on an audio interface, but a decent one goes a long way. According to experts, the Presonus Studio 192 MOB is one of the best affordable audio interfaces out there, with a superior build and audio quality. It boasts a flawless analog signal path, 2 inputs, and 18 channels of digital I/O.
As for the audio cables, be sure to check the back of your drum modules for output connections. You can refer to your drum module’s manual or check the manufacturer’s website if you are unsure about the output connections.
If your drum module has two ¼ phone jack outputs for left and right, then buy two ¼-inch TS cables and use them to connect your module with the interface. The jack outputs should be similar to those usually connected to an electronic guitar or any other instrument.
If you see only one stereo output on your drum module, then get the TRS cable as it can support stereo signals. If the module only has a 1/8-inch output like the earphone slots on computers and phones, get a 1/8-inch to 1/4–inch TRS cable.
Here is a detailed step by step guide on how to record electronic drums via an audio interface:
The first obvious thing you need to do is turn on your computer. Use the audio cables you got to connect the audio outputs on your electronic drum module with your audio interface’s audio inputs. Ensure you turn up the volume knob on the audio interface for the signal to be passed through.
Next, grab a USB cable and connect the USB output on your audio interface with the USB input on your computer.
Run the recording software application on your computer, then follow its directions to record audio. If you don’t know how to record electronic drums on Audacity or Garageband, fret not because it is such a breeze. Most recording software usually consist of multiple tracks. All you need to do is select one audio track, then choose your audio interface’s name as the track’s audio input. You’ll be further directed to ‘arm’ the audio track for recording, then click record. The directions may vary, but this is usually it for most software.
Once you’ve hit the record button, you can start drumming. You should be able to see audio waves. They are an indication that you are successfully recording an audio signal from your electronic drum kit module.
This is another great approach to recording your electronics drum set, especially if you want great flexibility and editing freedom on your drum sounds. MIDI allows you to capture digital notes from cymbals and drum pads while being played. The digital notes can then be used to trigger drum synths and samples on audio software on your computer.
This article contains nearly all the essentials needed when learning how to record drums at home, in a deluxe studio, or just about anywhere. Once you have gathered what you need to record drums, it should be a pretty straightforward process. You might experience a few standard technical issues along the way, but once you master how to get past them, you’ll be recording seamlessly.
You don’t need any fancy equipment or multiple microphones as it is popularly believed. In fact, you can record drums with one, 2, or 3 mics and still get your desired sound. All you need an outstanding drum set, a well set up room, and keen adherence to all the pointers and guidelines we have provided in the article.