Last updated: May 31, 2026
The clarinet, a masterpiece of the woodwind family, is a fascinating instrument whose magic lies in the synergy of its many components. The beauty of its melodic sound, the versatility of its range, and the unique timbre are all products of a collection of intricate parts and their meticulously crafted design.
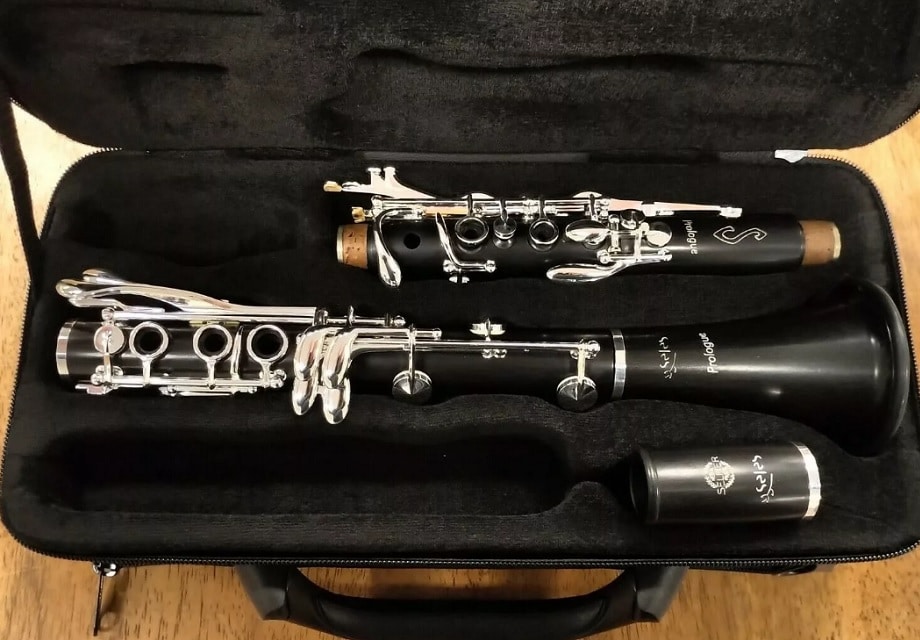
The various types of clarinets—ranging from the Bb and A soprano clarinets to the rare octo-contrabass clarinet—may have distinct sonic characteristics. Still, they all share a fundamental structure. Each clarinet divides into five fundamental sections: the mouthpiece, barrel, upper joint, lower joint, and bell. Additionally, several other parts come into play to make the instrument functional, such as keys, rings, corks, and more.
This article will dive into the details of the clarinet’s anatomy, covering every component from end to end. This comprehensive knowledge is paramount for anyone seeking to master this instrument.
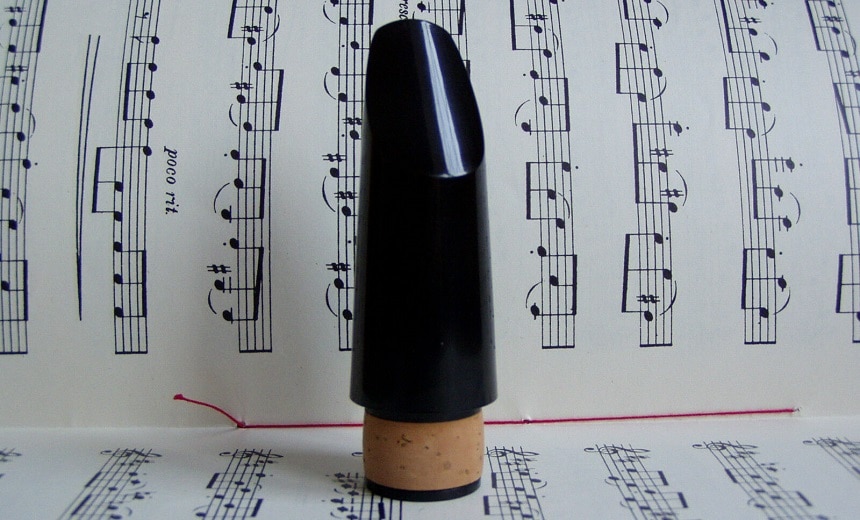
The mouthpiece, the first point of interaction between the player and the instrument, holds a crucial role in producing sound. It houses the reed, which vibrates when blown and initiates the musical journey that culminates in the unique tones of the clarinet.
The design of a mouthpiece—its length, width, and shape—influences the tonal quality and the player’s ability to create distinct sound colors. The material also plays a role: mouthpieces can be made from hard rubber, plastic, wood, crystal, or metal, each lending a different character to the sound.
The mouthpiece is protected and made more efficient by the ligature, a metal or fabric band that securely fastens the reed. It allows the reed to vibrate freely, thus affecting the instrument’s resonance and tone.
The clarinet barrel, serving as a connector between the mouthpiece and the upper joint, plays a critical role in shaping and guiding the sound down the instrument’s body. The interior shape of the barrel, known as the taper, significantly affects the instrument’s sound quality. It can be straight, standard, reverse, or double, with each type influencing the sound uniquely.
The material from which the barrel is made—often wood, but occasionally plastic or metal—also impacts the sound. For instance, a wooden barrel usually produces a warmer tone than a plastic one.
At the ends of the barrel, you may notice thin metal rings. These are the barrel rings responsible for maintaining the barrel’s integrity. They prevent the pressure exerted by the tenon corks from splitting the barrel apart.
While some clarinets may have cosmetic barrel rings or none at all, their importance for the durability and functionality of the instrument cannot be underestimated. A loosening or missing barrel ring is often a sign of a dry environment causing the barrel wood to contract, potentially leading to damage that would require professional attention.
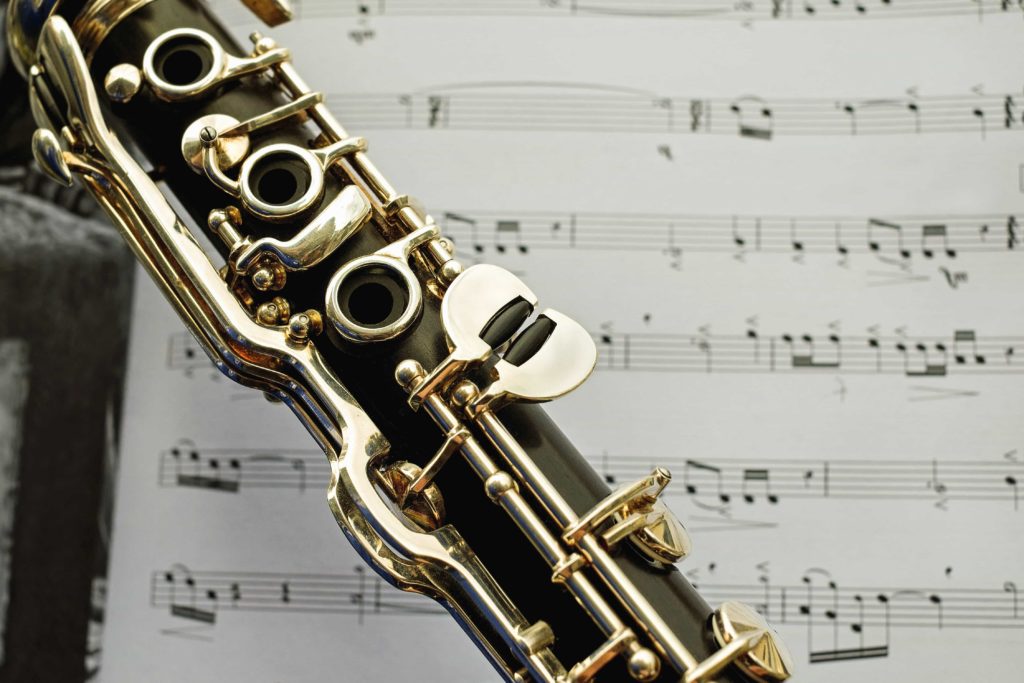
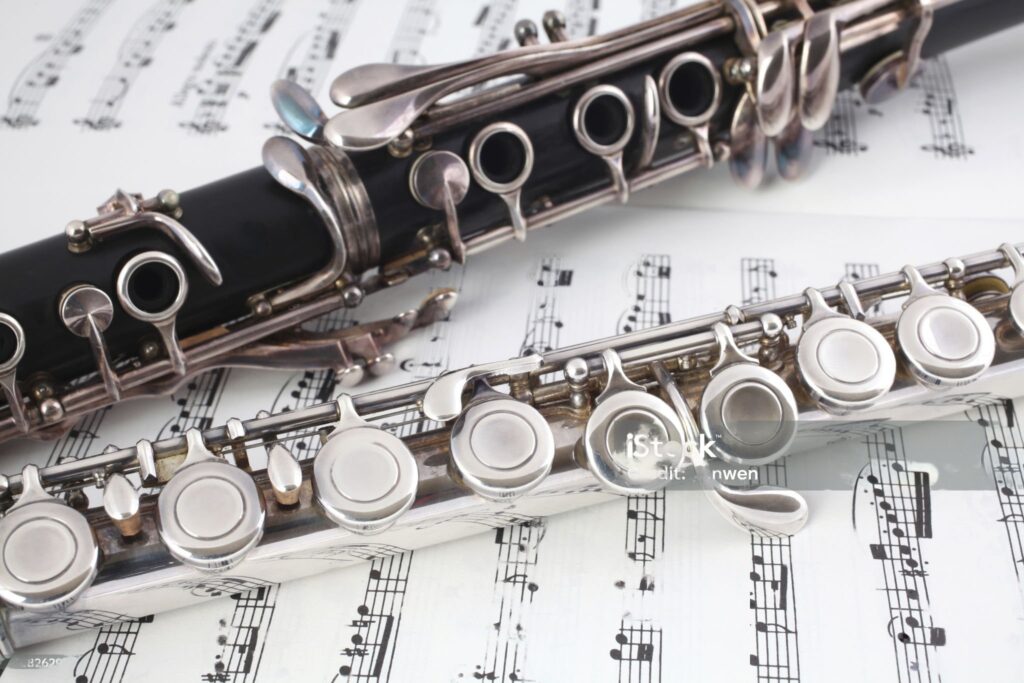
The upper joint and lower joint constitute the core of the clarinet, home to the instrument’s tuning holes and key system. The player sends air through the instrument, starting from the reed and mouthpiece, passing down through the barrel, and into these two joints.
The instrument’s pitch is controlled by manipulating the keys located on these joints, offering a remarkable range of around four octaves. With the upper joint traditionally managed by the left hand and the lower joint by the right, the player can create an impressive array of sounds and tonal variations.
Covering the clarinet’s body are numerous keys, small, padded metal rings, or levers mounted on metal rods. By pressing these keys, players can cover and uncover the tone holes, altering the flow of air and, consequently, the pitch of the sound.
Mastering the keys is one of the most significant challenges for a beginner, as an airtight seal is necessary to produce a full, accurate pitch. A slight leak can lead to a distracting squeak, detracting from the music’s beauty. Care should be taken to maintain the keys, as they can be easily bent, potentially rendering the clarinet unplayable.
Corks are essential for connecting the various parts of the clarinet securely and ensuring an airtight assembly. They cover each clarinet tenon, creating an airtight seal when inserted into the adjoining section.
The bell, located at the bottom end of the clarinet, serves as the final stage from where the sound is projected. Its design, including its length, flare, weight, and bore, can affect the instrument’s tonal characteristics. The bell ring, a thin metal strip on the bell’s upper end, performs a function similar to the barrel ring, preventing the bell from cracking or splitting.
Assembling a clarinet can be a delicate process. It requires patience and a gentle touch to prevent damage to the instrument. Here is a step-by-step guide on how to put together your clarinet properly.
Start by laying a clean, soft cloth on a flat surface. This will protect your clarinet from scratches and damage while you’re assembling it. Have your clarinet case near you, open and ready.
Begin with the reed, which should be soaked in a cup of lukewarm water for a few minutes before assembly. This softens the reed and makes it easier to play. Once the reed is sufficiently moistened, take the mouthpiece and slide the flat side of the reed onto the flat side of the mouthpiece. The tip of the reed should align with the tip of the mouthpiece. Secure the reed by sliding the ligature over it and tightening the screws. Be careful not to overtighten, as this could damage the reed or the ligature.
The next step is to connect the mouthpiece to the barrel. If necessary, apply a small amount of cork grease to the cork on the mouthpiece to help it slide into the barrel more easily. Hold the mouthpiece in one hand and the barrel in the other, and gently twist the two pieces together. Avoid forcing them, as this could damage the cork.
Now, apply some cork grease to the cork on the upper joint, if needed. Hold the barrel in your left hand and the upper joint in your right. Twist the two pieces together, ensuring the upper joint’s flat side aligns with the mouthpiece’s back. Again, avoid forcing the pieces together.
Apply cork grease to the cork on the lower joint. Hold the upper joint in your left hand and the lower joint in your right. The most significant key on the upper joint should align with the largest key on the lower joint. Twist the two pieces together gently.
Finally, apply cork grease to the cork on the bell, if needed. Hold the lower joint in your left hand and the bell in your right hand. Gently twist the bell onto the bottom of the lower joint. The bell curve should face the same direction as the keys on the lower joint.
Make sure all the keys are correctly aligned. The bridge key, which is the key that connects the upper joint to the lower joint, must be perfectly straight, not bent or twisted. If not, you should have your instrument serviced by a professional to avoid damage.
The clarinet’s anatomy is a remarkable design feat, incorporating a vast array of components to create a harmonious instrument. Each part, from the reed and mouthpiece to the keys and bell, contributes to the overall function of the clarinet. By understanding these individual parts, players can better appreciate the instrument and improve their playing skills.
Remember that every instrument requires regular maintenance and care; the clarinet is no different. Ensure your clarinet is regularly cleaned, adjusted, and protected to provide the best possible sound and preserve its longevity.
With this comprehensive understanding of the clarinet’s anatomy, you are now well-equipped to explore the magnificent world of clarinet playing and enjoy the enchanting sounds this instrument has to offer. Happy playing!