Last updated: April 20, 2026
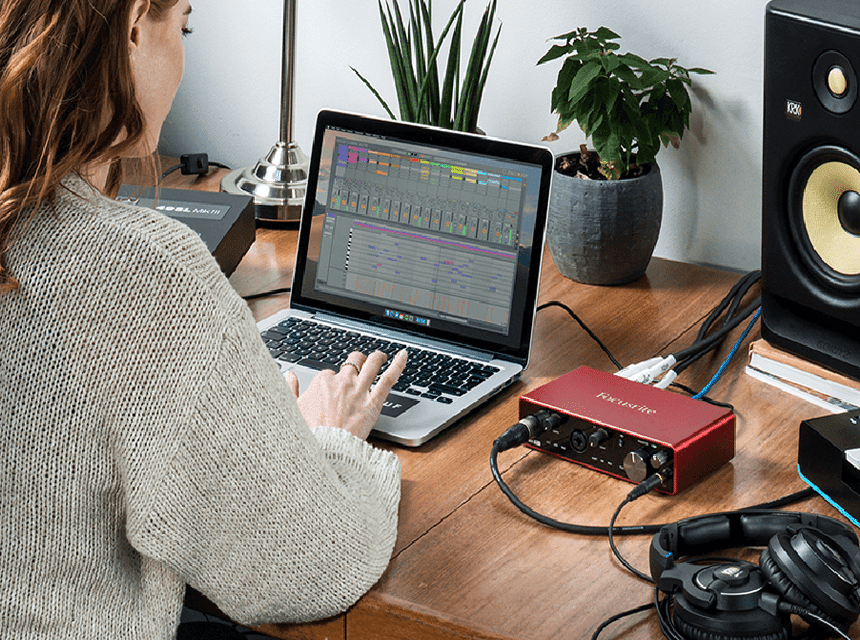
There are numerous types of audio mixers on the market designed to give a method to mix different audio sources together. These are used for recording, live performances, and even for DJs. In this guide, we’re looking into how to connect the mixer to an audio interface. An audio interface gives you the option to connect your mixer to a computer. It is a way for the audio channels from the mixer to be recorded directly.
For recording, you might be looking for how to connect a USB audio interface to a mixer board, as this allows you to record different instruments. If you are a DJ, you’re also likely to have a need to record multiple channels, as you will be mixing songs through a left and right deck and a central channel. We also explore how to connect DJ mixer to audio interface.
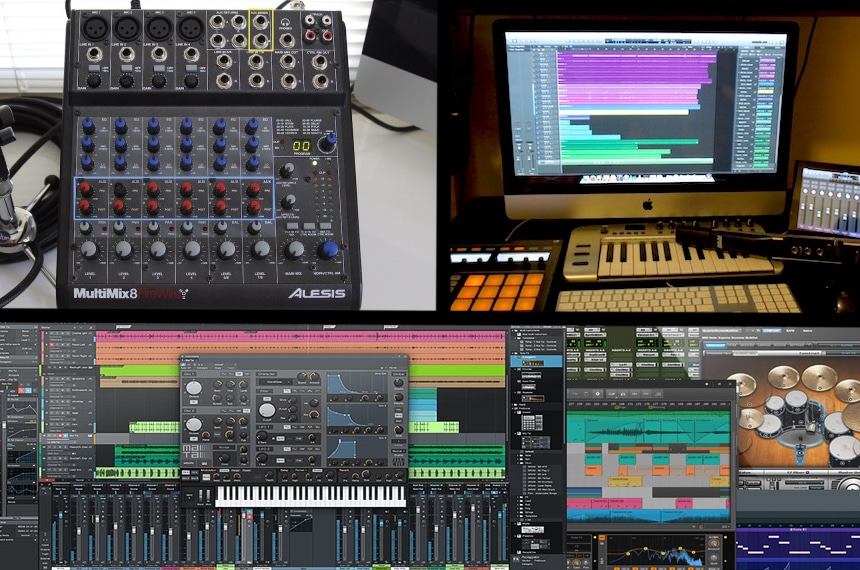
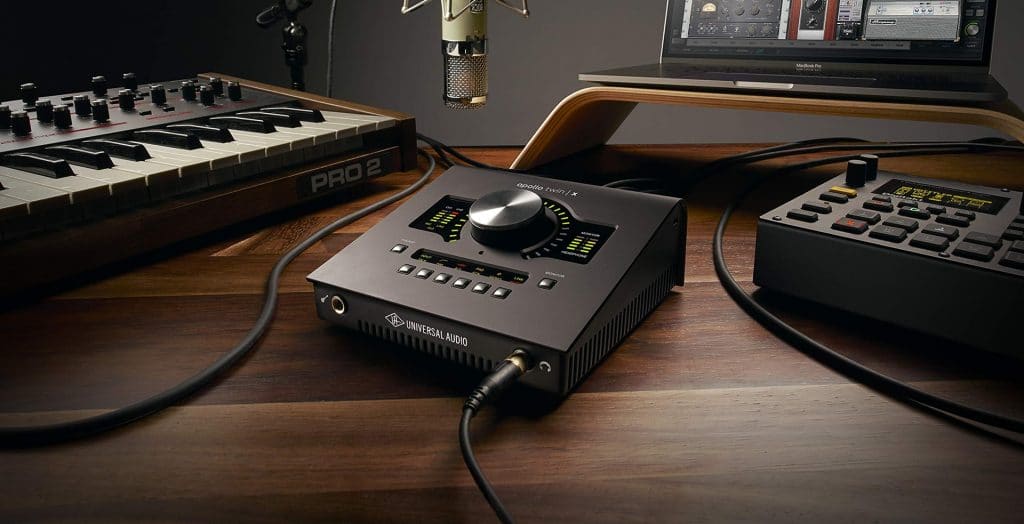
To start recording the output of a mixer and to learn how to connect the audio interface to an external mixer, you will need the following:
You will also need the correct power cables. Your mixer will probably require power, and some audio interfaces also need a power supply.
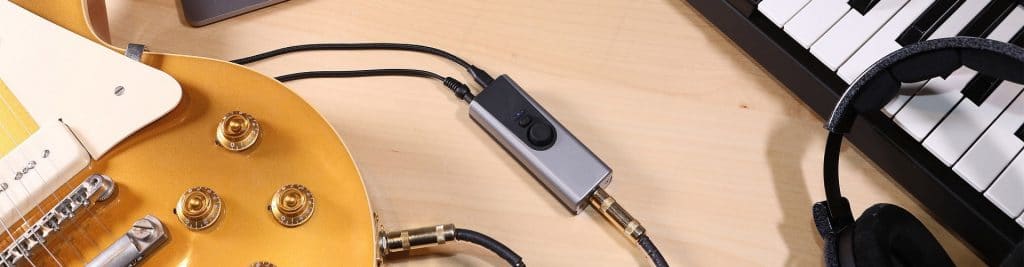
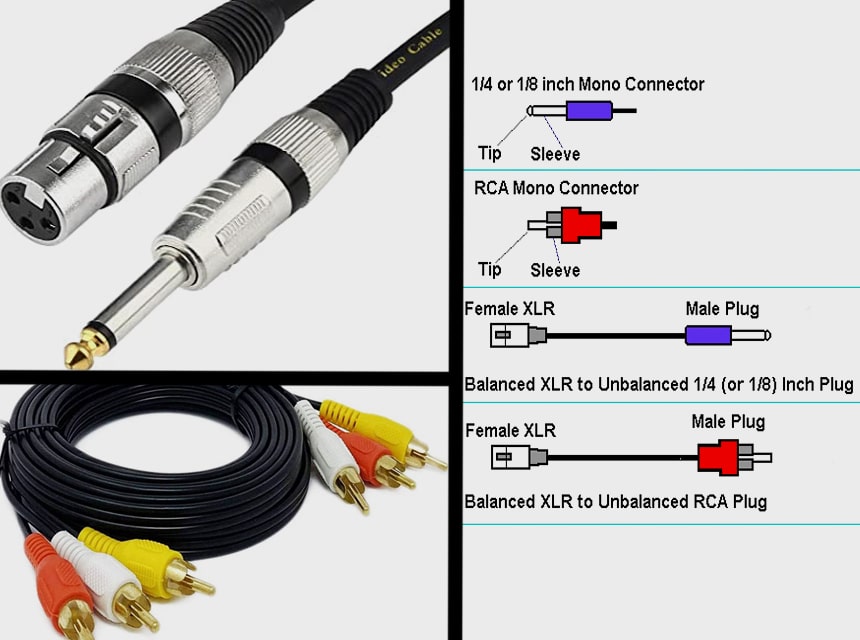
Next, you need to consider cables. There are three main options, ¼ inch cable, RCA cable, or XLR cable.
Of course, as well as all of this equipment, you will need the knowledge of how to connect an analog mixer to an audio interface. Read on to explore the best methods to connect your interface.
Asking “How do I connect a QSC mixer to an audio interface?” is very different from asking “How do I connect a DJ mixer to an audio interface?” The principles are the same, but the equipment in question is very different, which means that you need some knowledge of the types of mixer.
A DJ mixer will have outputs that you can connect to a speaker or to any other suitable music equipment, including an audio interface. Similarly, a mixing desk such as an analog mixer will allow you to take the audio signal via an aux out or one of the main outputs and send it to the interface.
All of this sounds expensive, right? Actually, you don’t have to spend a fortune getting an audio setup. You can even find specific budget audio interfaces that allow you to save a bit of money.
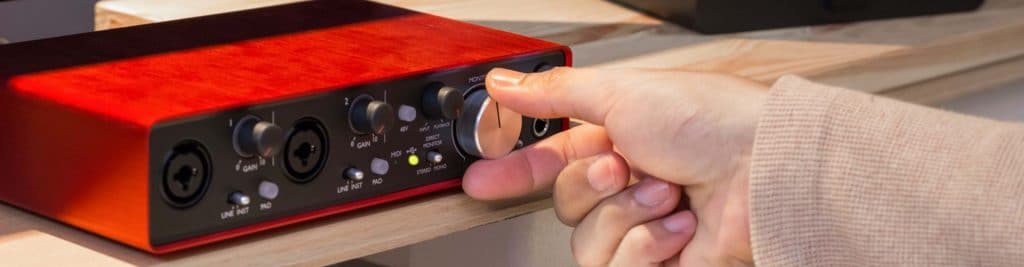
You will use your mixing board or mixing desk to set the levels. It is important to recognize that if you are just taking the audio from the overall output of the mixing desk, then you will not be recording each of the tracks. Instead, you will be taking one overall feed of the audio. This is ideal for things like recording a DJ set because you don’t need a recording of every channel. However, if you are recording a whole drum kit, for example, it means that you have to get the recording 100% right from the off. Any errors will be permanently recorded, and you won’t have the ability to EQ Trusted Source Equalization (audio) - Wikipedia Equalization in sound recording and reproduction is the process of adjusting the volume of different frequency bands within an audio signal. The circuit or equipment used to achieve this is called an equalizer. en.wikipedia.org a kick drum or snare drum individually afterward, for example. Those audio tracks will be linked.
The steps to connect the mixer to an audio interface for recording include:
Keep in mind that if you have an interface and desk that supports it, you can take multiple audio feeds from each of the channels. This means recording different microphones or instruments through the desk individually.
Next, it’s time to connect the audio interface itself to the computer. This is usually the simplest and most straightforward of the tasks.
The task will probably be even simpler if you have a modern interface made in recent years. Many modern audio interfaces either do not need a driver to be installed, or the driver automatically installs as soon as you plug in the hardware. This means that it can be ready to go, sometimes within seconds of being connected to your computer.
You can look in your computer’s hardware setup to see if the interface has been recognized Trusted Source How to Check a Computer Sound Device | Small Business - Chron.com How to Check a Computer Sound Device. You can check your computer’s default sound device by playing any audio file. However, the Windows speaker configuration tool offers additional flexibility in testing your devices. The tool can test every installed device, not just just the default one, and it plays tones … smallbusiness.chron.com , but many people decide to go straight into the DAW to see if this is the case.
If there are multiple outputs and inputs on the interface and you want to record individual channels from the mixer, you may have an additional task. You need to route all of the individual inputs to new tracks in your software. This way, you can record vocals separately from guitars or different audio tracks separately. When you are looking at how to connect the audio interface to an external mixer, you may just want to take one overall feed. Alternatively, you might want to take 24 different audio feeds and have full control over all of them, just like in a professional recording studio.
If you need to troubleshoot, you should always consult the manual of the audio interface. However, one of the usual culprits, when there is a problem, is the driver. Sometimes, the driver does not get installed automatically. You may have to insert a disc or go to the manufacturer’s website to find a suitable driver for either Mac or Windows. Reinstall the driver and see if this then means that you can use the interface as intended.
Other problems can be traced to wires or power supplies and the incorrect settings on your mixer or interface. Check that the gain controls are off and that phantom power Trusted Source Phantom power - Wikipedia Phantom power, in the context of professional audio equipment, is DC electric power transmitted through microphone cables to operate microphones that contain active electronic circuitry. It is best known as a convenient power source for condenser microphones, though many active direct boxes also use it. en.wikipedia.org is off on the interface, as you will not need this for taking the audio feed from an interface.
As you can see, there are multiple different methods that get you to the same end result. Your equipment plays a big part, and different analog mixers and interfaces have their own quirks. Some can record in multiple channels, some can’t. Some make it easy to take the audio feed from a DJ mixer whereas others are better for large, 16 or 24 track mixing desks.
The exciting aspect of all of this is the fact that you can record in the comfort of your own home, and make a home studio that will do an incredible job and yield some professional results. Ensure you know how to connect a mixer to an audio interface to get the ideal results and isolate different channels.