Last updated: May 30, 2026
At some point in your guitar-playing career, you are going to want or need to record yourself. One reason for this could be that you want to playback the recording and evaluate your playing prowess. This can help you pick up on mistakes that you usually miss while playing. You’ll also be able to track your journey as you progress from an amateur to a pro. Another probable reason is that you want to share your music with friends, family, and fans.
Whatever the case, you don’t need to pay for an expensive studio session to record yourself. Instead, you can purchase recording gear, learn how to record acoustic guitars, then start doing it at home. Notably, you needn’t break the bank to acquire recording gear as there are some affordable options in the market. Also, remember that the guitar you’re playing will also affect the sound in the recording. As such, it should be on your to-do list to get a top-tier acoustic guitar. There are affordable, high-quality acoustic guitars in the market as well.
 If this is not the first time you’re playing the acoustic guitar, you may have realized that your location heavily impacts how sound carries. In the same way, your recording will obviously be affected by the location as well. That said, you will be looking to achieve something different as compared to when you’re performing.
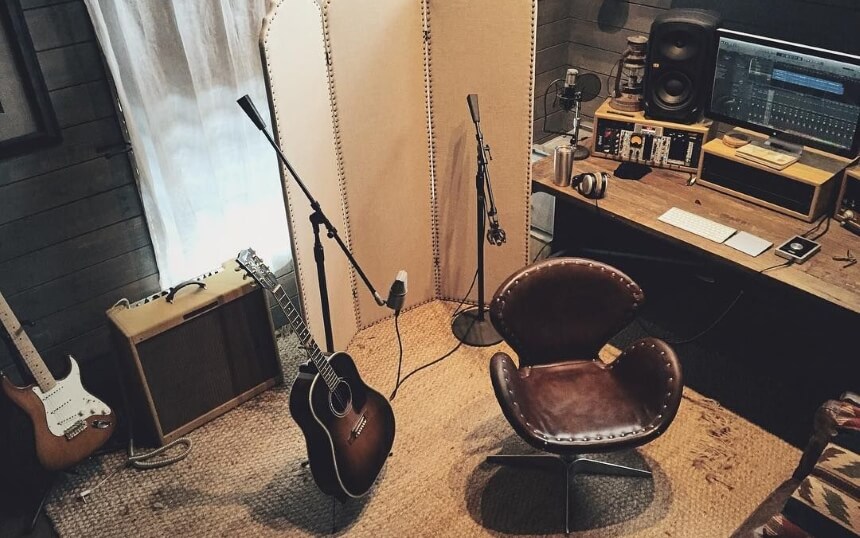
Start by avoiding reflections in your sound. While sometimes they sound fantastic as is the case when playing in front of a crowd, they will be hard to control and can make the recording sound worse. As such, you may want to avoid large rooms with lots of hard surfaces.
You can use one of the rooms in your house with furniture as it absorbs sound from the guitar and makes it sound better on the recording. If you have a little extra wiggle room in your budget for equipment, you can choose to add acoustic foam to your recording room. It plays the same role as the furniture and is made specifically for that purpose.
Avoid small rooms as well. This is because the low-mid range will sound completely different on the recording from what you intended it to be.
After you’ve found the right room, you’ll need to find the right spot in the room. Being a musician, you can probably tell when the sound is lacklustre and when it is good. Experiment with different positions in the room while you listen keenly to the guitar. When you find a position you feel works best for your sound, you can set up your recording station.
Also, remember to account for ambient sounds. We don’t have to remind you that recording next to a noisy road or a noisy construction site can lead to bad results. If you can’t do anything about this, it might be better to invest in sound-proofing.
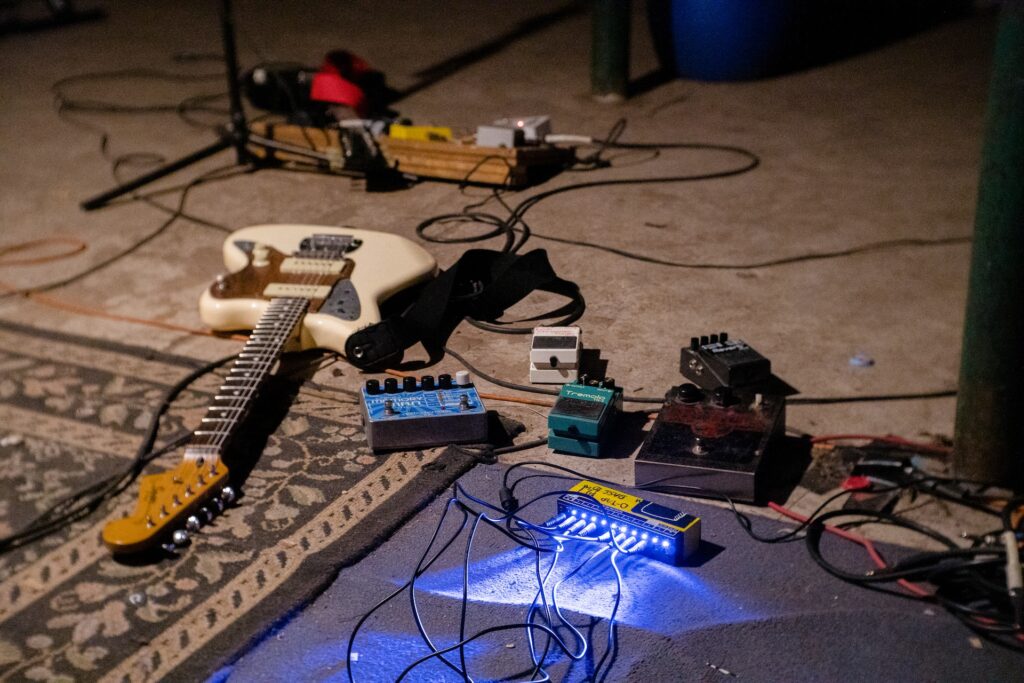
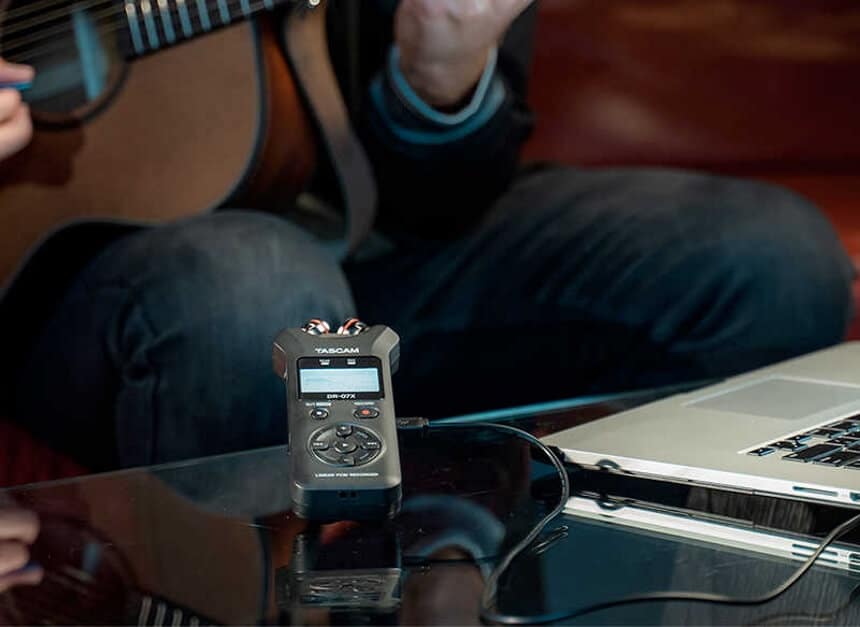
 Assuming you opted for the home recording option, you will need to invest in some essential gear. This includes the guitar, a microphone, a preamplifier, an analog to digital converter, a digital recorder and finally the disk drive. These pieces of equipment all have specific roles in recording the guitar.
While these gear pieces are available as standalone devices, most audio interfaces come with mic preamps and audio converters built into them. As such, buying one can help you de-clutter your recording space. Worth mentioning is that your computer likely has a lot of these components built-in. However, it is relatively limited in its ability to capture sound, and the gear mentioned above should improve its capabilities.
Additionally, it should be a good idea to invest in an adjustable mic stand. As we will discuss later in this write-up, the microphone’s positioning is of the utmost importance. Consequently, the mic stand’s ability to help you fine-tune the positioning of the microphone may be invaluable.
Lastly, make sure you’re using new strings on a well-tuned guitar to get the best output in terms of sound. The steps for tuning a guitar are outlined here just in case you need to do it yourself.
 There are two types of mics in the market, and these will likely affect the results of your recording session. They are the
condenser
Trusted Source
Microphone - Wikipedia
The condenser microphone, invented at Western Electric in 1916 by E. C. Wente, is also called a capacitor microphone or electrostatic microphone—capacitors were historically called condensers. Here, the diaphragm acts as one plate of a capacitor, and the vibrations produce changes in the distance between the plates.
en.wikipedia.org
and the
dynamic
Trusted Source
Microphone - Wikipedia
The dynamic microphone (also known as the moving-coil microphone) works via electromagnetic induction. They are robust, relatively inexpensive and resistant to moisture. This, coupled with their potentially high gain before feedback, makes them ideal for on-stage use.
en.wikipedia.org
microphone. Professionals prefer going with condenser microphones. This is because of their higher sensitivities that allow them to record higher-frequency information from the guitars.
There are two types of mics in the market, and these will likely affect the results of your recording session. They are the
condenser
Trusted Source
Microphone - Wikipedia
The condenser microphone, invented at Western Electric in 1916 by E. C. Wente, is also called a capacitor microphone or electrostatic microphone—capacitors were historically called condensers. Here, the diaphragm acts as one plate of a capacitor, and the vibrations produce changes in the distance between the plates.
en.wikipedia.org
and the
dynamic
Trusted Source
Microphone - Wikipedia
The dynamic microphone (also known as the moving-coil microphone) works via electromagnetic induction. They are robust, relatively inexpensive and resistant to moisture. This, coupled with their potentially high gain before feedback, makes them ideal for on-stage use.
en.wikipedia.org
microphone. Professionals prefer going with condenser microphones. This is because of their higher sensitivities that allow them to record higher-frequency information from the guitars.
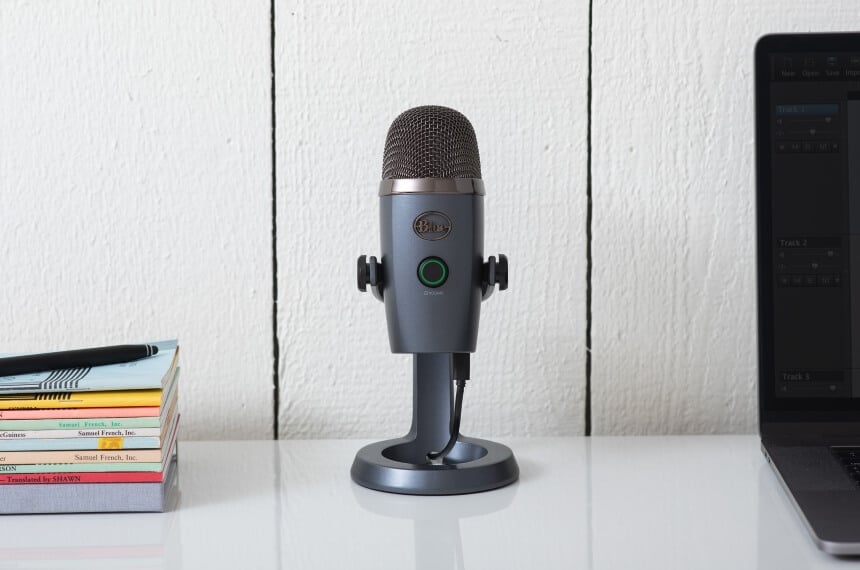
According to most reviews, one popular condenser microphone is the Blue Yeti USB mic which has up to four different audio pickup patterns and onboard audio controls. Additionally, it’s easy to position this mic however you want.
Nevertheless, you can opt for a dynamic microphone as well. They are versatile, which means they can be used for almost all your recording needs, and they are often the more affordable option. Also, if the rhythm you’re playing is dynamic enough, the condenser mic may not be able to pick up all the notes. As such, this is one scenario where the dynamic mic will work better.
After you’ve come to a suitable conclusion on the mic type to buy, you’ll then need to decide whether you’ll be using a one-mic or a two-mic setup. If you choose the one-mic configuration, you minimize the chances of phasing issues in your recording. After all, the music signals will be coming from one source, and so there won’t be any timing differences.
Also, finding the right placement for one mic can be complicated. If you add another one, you increase your problems in this area as well. Alternatively, a two-mic setup also has specific benefits. The most significant one is the extra sound depth and width.
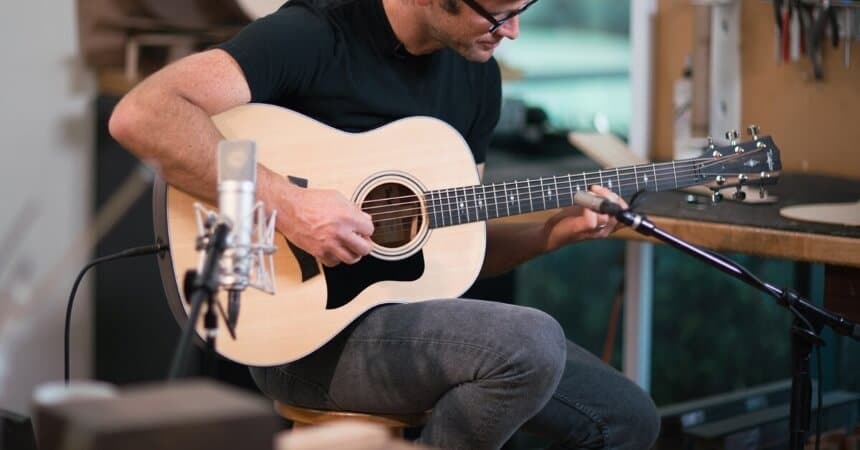
To the untrained musician, it may seem like you don’t need to put a lot of thought into where you place the mic. After all, you do know where the sound comes from right? Wrong. The sound does come from the soundhole. However, if you place the mic near the hole, you risk picking up fret noise. Additionally, acoustic sounds interact with the room, and if you put your mic right next to the guitar, you’ll miss out on that.
The right distance from the instrument can be anywhere between six and twelve inches. As such, you start with a six-inch distance placement then you can push it further until you find the position with the best recording output. The mic placement will also depend on whether you’re using one or two microphones in the setup. You can learn about the different configurations below.
For this setup, locate the area between the 12th and 14th frets. This should be where you place the mic although you must remember to maintain at least a six-inch distance. This is where the sound is most balanced. Also, how you angle the mic will affect the sound recorded.
If the mic is angled towards the neck of the guitar, you can expect a thinner sound. Conversely, if it is angled towards the soundhole, the sound recorded will be fuller. Additionally, you can pick up the sound of the pick or your fingers depending on what you’re using to play.
Alternatively, you can choose to record the body of the guitar instead of placing the mic between the 12th and 14th frets. If you choose to do this, the lower end of the sound spectrums including mid-tones and heavy bass are what will come through most in the recording.
 Learning how to record acoustic guitars with two mics requires that you familiarize yourself with the correct placement configurations of which there are two: one is the spaced pair configuration while the other is the coincidental option. The spaced pair is known as the A/B configuration in some circles. As for the coincidental pair, it also goes by the X/Y name.
With the spaced pair configuration one mic will be between the 12th and 14th frets while the other will be facing the soundhole or the body. For the best results, you can turn off one mic at a time so you can adjust the other one. This will help you ensure that each mic sounds good in the recording.
Phasing can be quite a problem when you’re using the spaced pair configuration. That said, there is a way to minimize this called the 3:1 rule. It recommends that the distance between your two microphones be three times the distance from the mic to the guitar. As such, if your mic is six inches from the fretboard the other mic should be around 18 inches away.
For the coincidental pair (X/Y) configuration, each microphone will be placed at a 90° angle in relation to the other mic. Please note that the mic diaphragms need to be as close together as possible. This all but eliminates the phasing issue common in the A/B configuration.
Besides that, you can also eliminate having to struggle with the X/Y configuration altogether by getting a specialized solution such as the Zoom H4n Pro portable recorder. The unit has built-in stereo speakers set up in the X/Y configuration and easily plugs into your computer.
Also, the two microphones will be placed where the body and the neck of the guitar meet. Notably, the 90° degree angling will allow one mic to pick the thinner sounds from the neck of the guitar while the other mic will record the warmer sounds from the body.
The real work begins after you’ve configured your sound recording setup and includes four steps, namely: tracking, editing, mixing and lastly mastering. We explain what you’re supposed to do in each of these steps in the section below.
 Tracking is where you actually record yourself playing the guitar. You can attempt this a few times to get the best take possible from your recording session. Notably, during tracking is when you find the biggest need for a quiet room. Any external sounds such as a car hooting outside your window can get on your recording and make things harder for you during editing.
Some of the disruptive sounds can also come from inside the room. You may shift a bit on your seat or tap your feet as you’re used to doing on stage. These sounds may be picked up by the mic and increase your workload later on in the process.
In some cases, you may be recording your vocals alongside your guitar, or you may add other instruments to the mix as well. Notably, there aren’t any rules against recording all the instruments and vocals together. However, this does complicate your mixing and editing processes unnecessarily. You will also be limited in how far you can push the sound as you’re editing.
We would recommend that you record the vocals and acoustic guitar individually. This makes it easier to clean up mistakes so that by the time you get to overdub the guitar with the vocals, the sound is already impeccable.
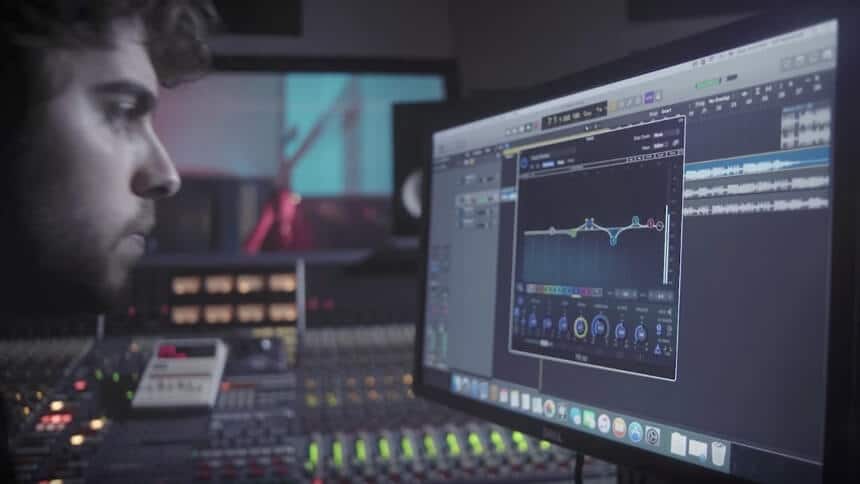
When editing, you listen to all parts of the recording for mistakes and correct them. This process involves playing the audio on repeat for as many times as you need to. You’ll notice when the notes and the timing are off as well. Additionally, you’ll hear some noises you were unaware of during the recording session.
Notably, this is where the multiple takes come most in handy. You can pull some parts from the other recordings and use them to correct mistakes in your main one. This may include replacing notes that don’t work for you. Additionally, you can use editing to remove unexpected noises such as a chair creaking.
Lastly, you may need to trim some sections of the recording if they don’t hold any musical information. Often the trimmed sections are at the beginning and end of the recording.
Once you’re done editing the individual recordings, you can then mix them. You set the levels of the various instruments in the recording and equalize them so that one sound doesn’t overpower the others. This is also where you add effects to suit the overall sound of the tune.
Depending on the number of sounds in the recording, this part of the process could be as simple as adding reverb, or it could be incredibly complicated. Mixing also involves adjusting levels in the various parts of the song. If done right, you put emphasis on particular instruments when you need to so the song has better balance.
Additionally, you can check for clipping throughout the whole song before you export it. If that checks out, ensure there’s enough headroom in the faders. This can be anywhere from 3-6dB of headroom. Your mastering engineer will thank you for this as it makes his work easier.
Next, make sure the sound is perfect by playing it on different devices. It could be your home theatre system, your phone, studio monitor speakers and more. If the sound checks out in all these devices, you should be good to go.
Lastly, ensure you export your song file in a lossless format. This way, it retains all the musical information from the mixing process. Your mastering engineer will also appreciate having more information to work with.
 The last step is mastering the sound. For this, you may need to outsource and get a more experienced mastering engineer. The goal is to polish up the audio to make it more acceptable to audiences. As such, the engineer will play around with EQ and the levels to see if any part of the song can be improved.
Also, since the engineer wasn’t around when you were recording editing and mixing, they will be unbiased towards your sound. Consequently, they will find it much easier to catch mistakes and correct them. By the time the audio is sent back to you, it will be ready even for radio.
Additionally, there are automated services that can take on the job of mastering your audio. Since they are just algorithms, they might not pick up on some of the issues humans can. However, if you want a quick turnaround to your project, this is the way to go.
Your human mastering engineer may have backlogged projects and thus may take a while before they actually start working on yours. On the other hand, the algorithm can likely start working on yours as soon as it receives it.
If you don’t have the budget for a mastering engineer whether as a human or an algorithm, you may need to settle for doing it yourself. For this, your room has to have impeccable acoustics. This is so the song doesn’t end up sounding good in your mixing room but bad everywhere else. As such, investing in some acoustic panels may serve you well in the long run.
If you still don’t have enough money for that, the next best thing is a high-quality pair of headphones. Notably, there is headphone compensation software available that should make your headphones sound like you’re in a room.
Once you have that in place, the next logical step is to take a break from the song to get the mix out of your head. It could be a day, two or even a few months. This will allow you to have fresh ears the next time you listen to it. The longer your break, the better.
Get a reference track of a song you think is well mastered and listen to it. This will give you a reference point on what a well-mastered song sounds like. After that, listen to your track for the first time and note down any mistakes you might notice. This may be in terms of the high end, the low end, and all other aspects of the track.
You may then listen to the track a few more times although you’ll note you’re not catching as many mistakes as the first time. You can even use reference tracks to check for things you don’t hear in your track that you would like to add.
Additionally, looking at a graphic analyzer may help you pick up on some things you don’t notice with your ears. After that, add some compression to the tracks to control the dynamics. Be careful not to overdo this.
Next, you can start correcting all the mistakes by using EQ and a multiband compressor. Notably, you’ll rarely ever have to use the latter, but it is a powerful tool if needed. You can enhance the mix if you need to where you’ll tweak the saturation, stereo widening and volume automation.
Finally, you limit your song, so it sounds even louder. Of course, you’ll have to do a last round of checks to confirm everything is in order. Admittedly, mastering seems incredibly complex, which is why we recommend going to a professional in the first place. However, once you learn to do it well, you can save yourself lots of money in the long run.
As shown above, some parts of recording an acoustic guitar are challenging while others are not. That said, if you get the hang of it, you could save some money and grow exponentially as a musician. Also, now that you know exactly how to record acoustic guitars, you can decide whether going to a professional studio is worth it or not.