Last updated: April 05, 2026
Mixing templates are a great way to improve your productivity in the studio—they can streamline your workflow and help you complete more projects. Similar to the old-school approach of mixing on an analog console, mix templates can also help you create more consistent mixes with a cohesive sound.
However, with so many plug-ins and routing options to choose from, it can be tricky to know exactly what you should include in your mixing template. In this blog, we’ll show you how to create a mix template that has everything you need to start pumping out better mixes, faster than ever.
A mix template is a blank session in your DAW that you can use as a starting point for mixing projects in order to save time and reduce non-creative work. Most templates typically include preconfigured busses and channel routing, along with key plug-ins and processors that you plan to use.
However, these are just a starting point. Don’t feel as though you have to use every plug-in in your template, or that you can’t experiment with new ideas.
The main benefit of using a mix template is to streamline your workflow by setting up all of the things that you typically use in a mix. After creating and saving your template session, you can either import the session data into a new session with the audio files you want to mix, or import the audio files into the template session and save a copy.
While everyone’s mix template will be unique to their specific workflow, most templates share a similar setup. It’s also worth noting that your template will likely change and evolve over time as you pick up new plug-ins and develop new techniques.
Let’s take a look at some of the most common things people typically include in mixing templates.
Your specific mixing template will vary based on the type of music you make, the equipment you use, and your workflow. But before you start loading plug-ins and spinning knobs, it’s important to set up the foundation of your mix with some simple bus routing.
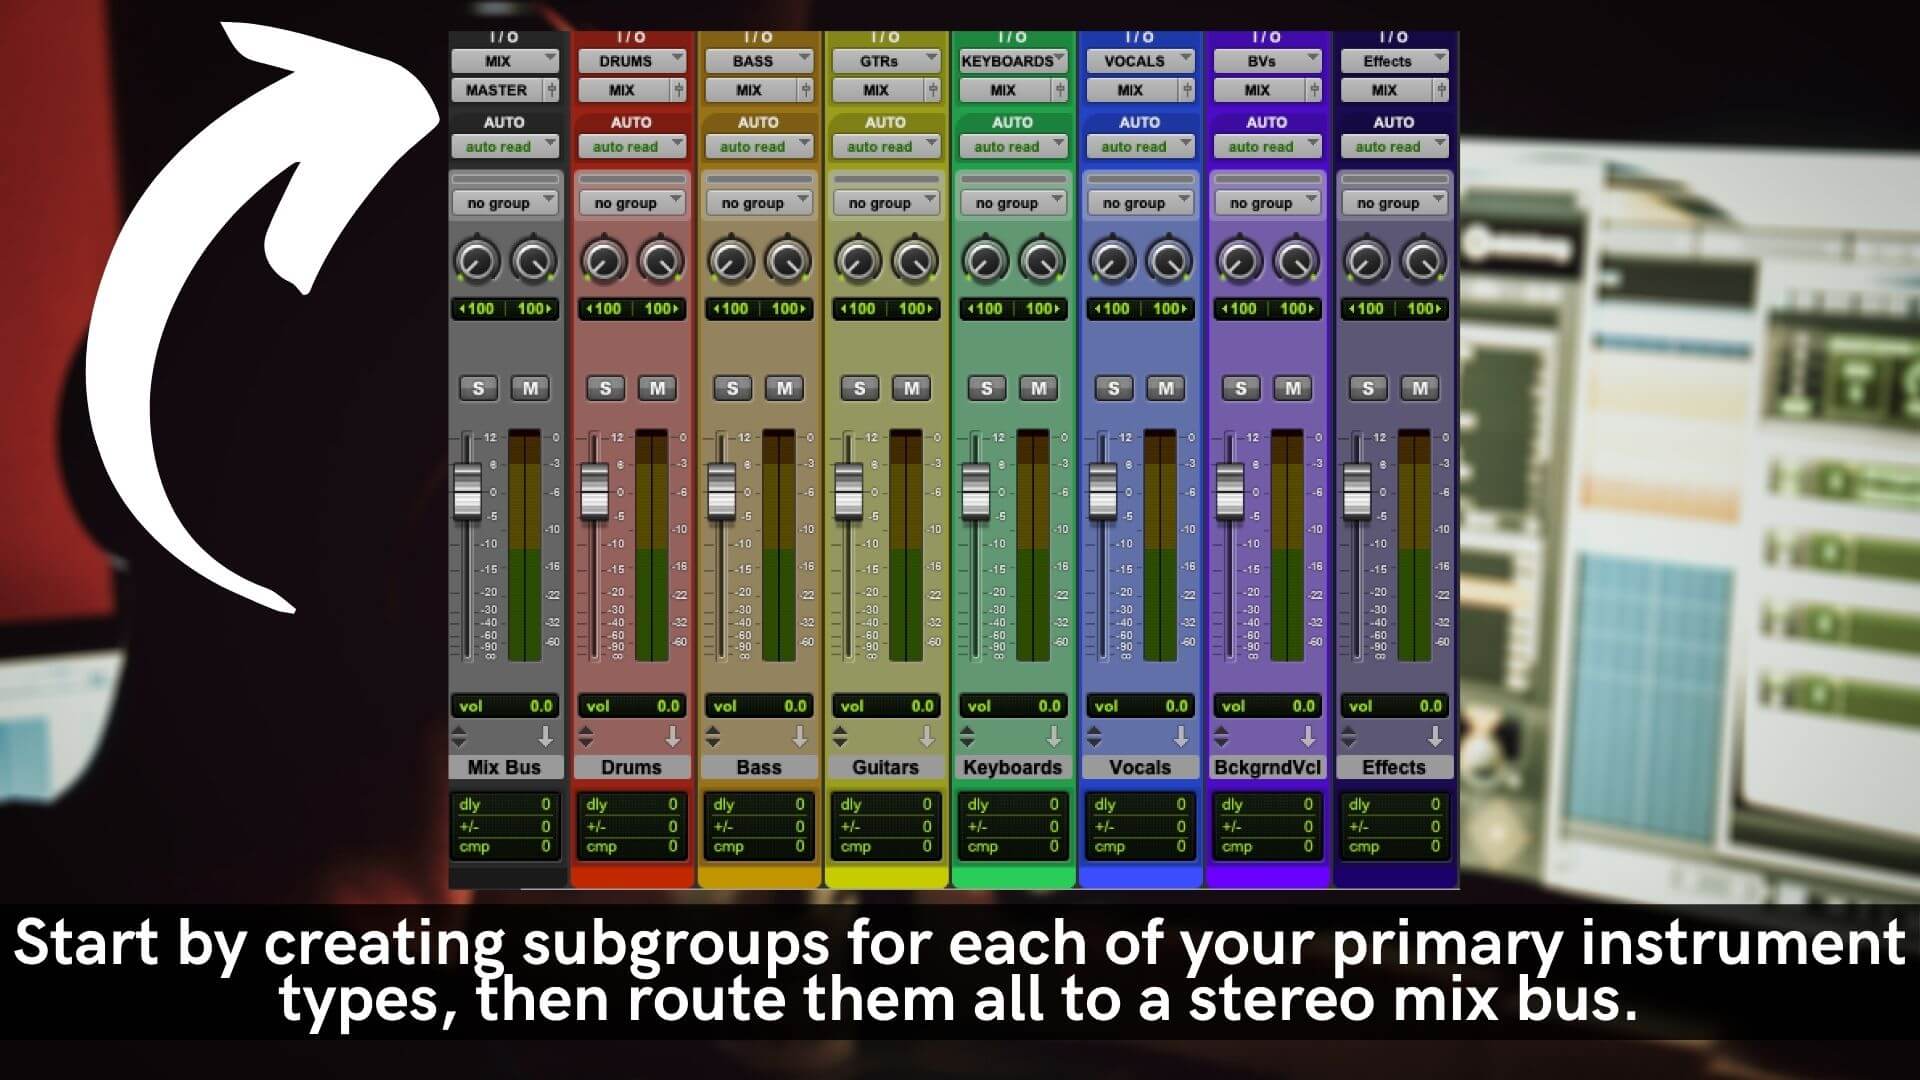
Start by creating subgroups for each of your primary instrument types. Again, this can vary greatly depending on your specific workflow, but typically, I create busses for drums, bass, instruments (guitars, keys, etc), vocals, and effects.
Next, create a Mix Bus and route all of the instrument busses to it. This will act as your “master fader” for the session. Anything you do to this track will affect the whole mix—so be careful!
It’s also a good idea to “solo-safe” these busses so that any time you solo a channel track, the instrument bus, and mix bus are also soloed, enabling you to hear the track without any extra clicking.
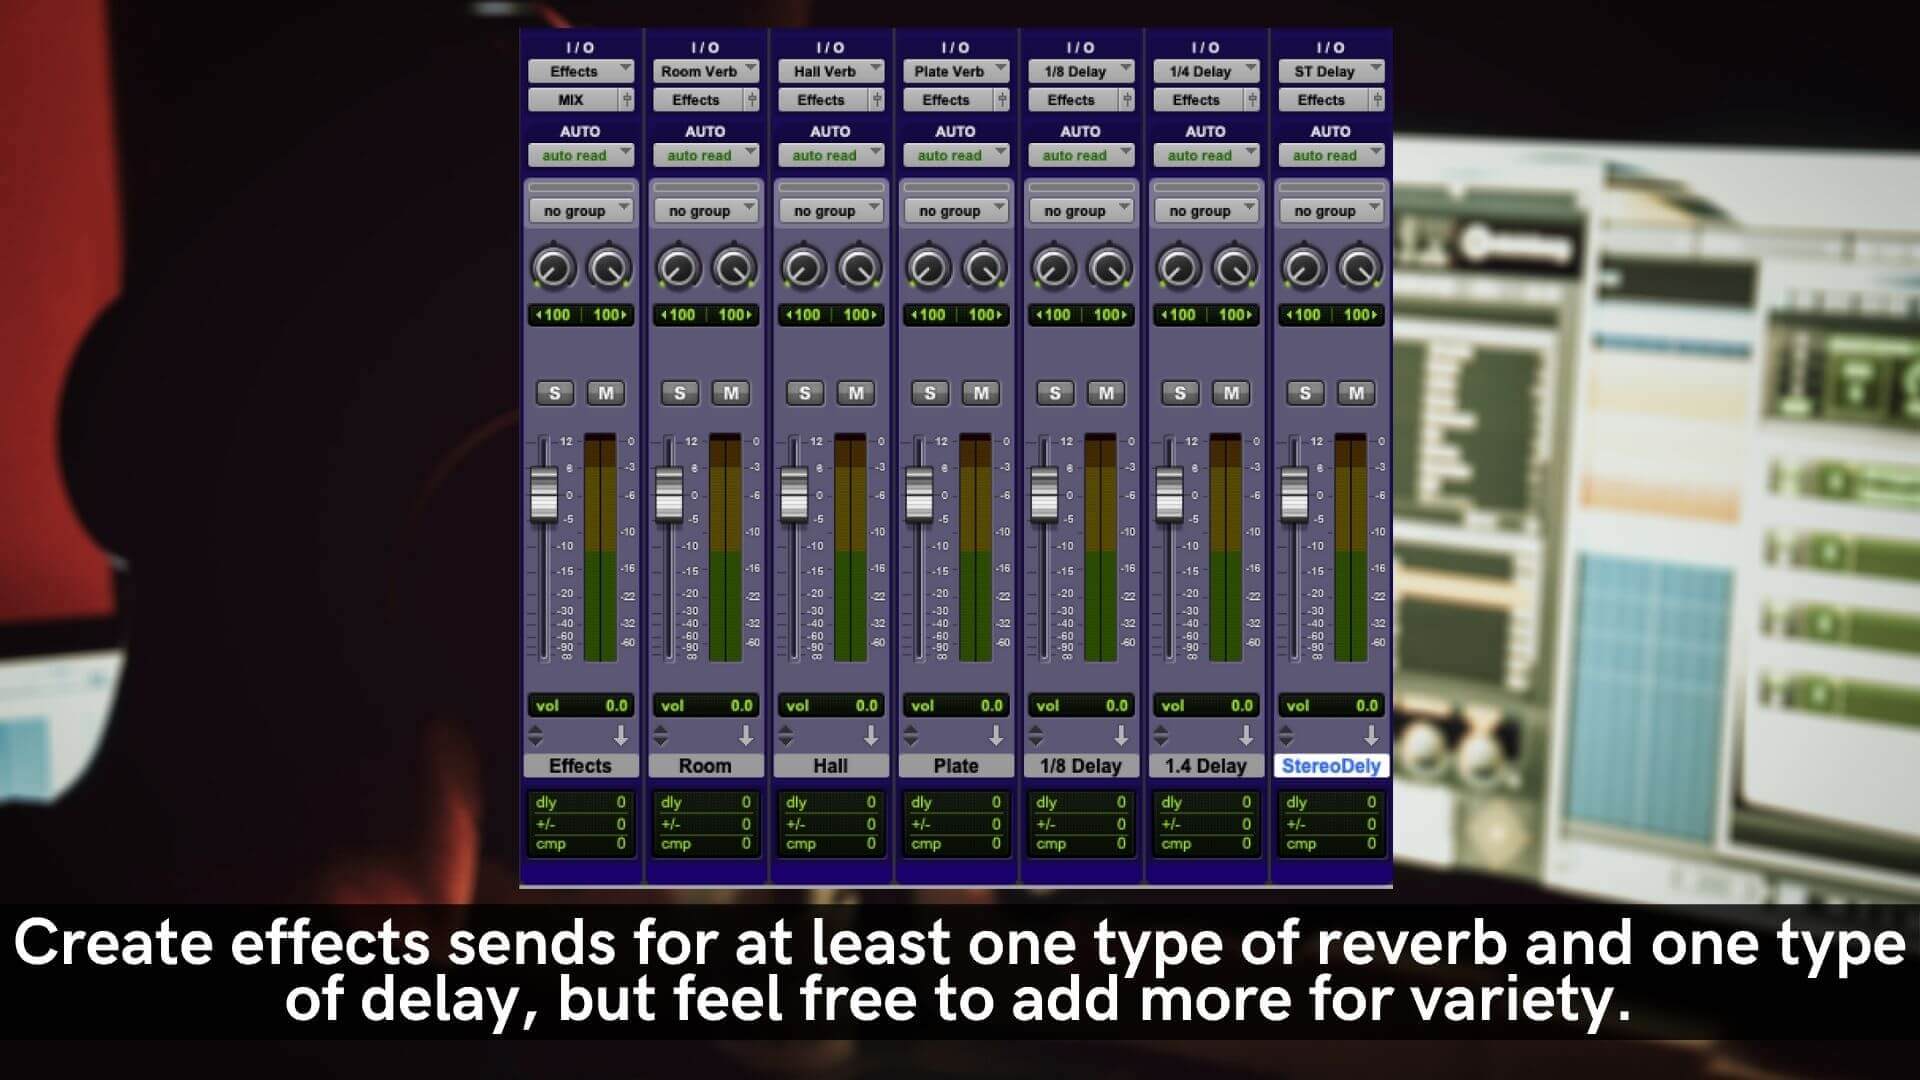
Next, create any effects sends you think you might use in your mix. Typically, this includes at least one reverb and one delay, but some engineers like to include multiple effects just to have everything ready to go when they need it. Having to stop and create a new track, add a plug-in, and find the right setting can seriously disrupt your creative flow. The less you have to think about while creating, the better.
Some engineers like to create one or two sends for effects and load them up with a bunch of different types of plug-ins. For instance, you could create a reverb send and add plug-ins for the room, hall, plate, and other types of reverb so you can test out different types until you find the sound you like. Or you could create separate sends for each type of reverb—just in case you want to use more than one type per song.
After creating sends for all of the effects you typically use in a mix, route them to the effects bus so you can easily control the overall level of effects in your mix.
After creating and routing busses and effects in your template session, it’s time to add the plug-ins that you use most often. It’s important to note that these plug-ins should just be used as a starting point. While it’s common to use the same plug-ins from mix to mix, and sometimes even the same approach, no two mixes will use the exact same settings on every track—especially if you work with multiple genres.
Instead, start with subtle settings that you can tweak as needed. It’s also a good idea to de-active all plug-ins to preserve processing power and prevent yourself from unintentionally processing tracks. Once you start mixing, simply enable each plug-in as needed.
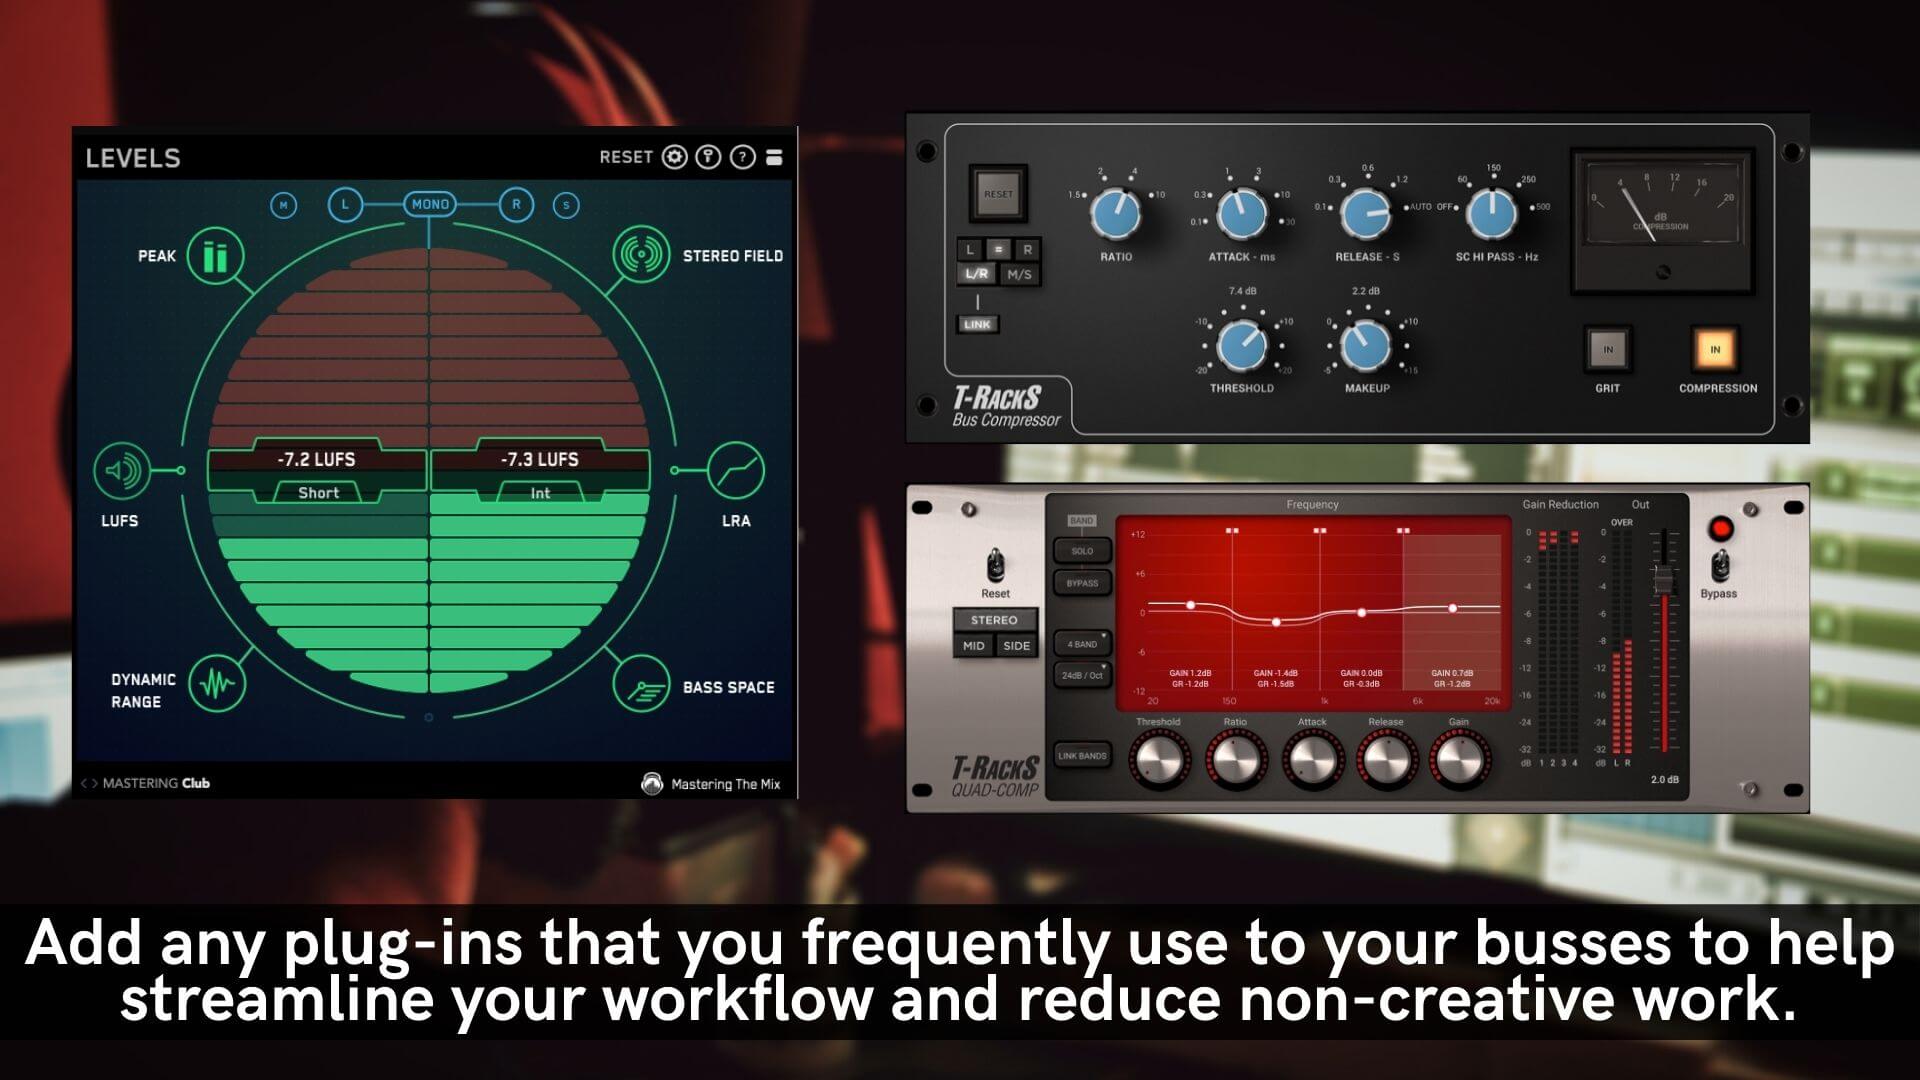
What type of plug-ins should you include in your mixing template? Well, that depends on your style, but typically, I like to include basic plug-ins that I know I’m going to use every time. For example, on my mix bus, I always use include the following plug-ins:
You can create similar signal chains for your instrument busses, and even individual channels to save time. For instance, I have a lead vocal channel in my template that has my go-to vocal chain loaded up and ready to go. I can easily swap out different plug-ins by activating and de-activating different modules to get the sound I want.
When you import your session files, start by organizing your audio files. It’s not as fun to talk about as parallel processing or side-chain compression, but organizing your tracks can do more to improve your session than you might think.
When you lay out your tracks the same way every session, it makes it easier for you to process things. Common tasks start to become second nature. At a certain point, you’ll no longer have to think about what track the vocal is on—you’ll develop muscle memory by using the same approach every session, which can seriously streamline your workflow.
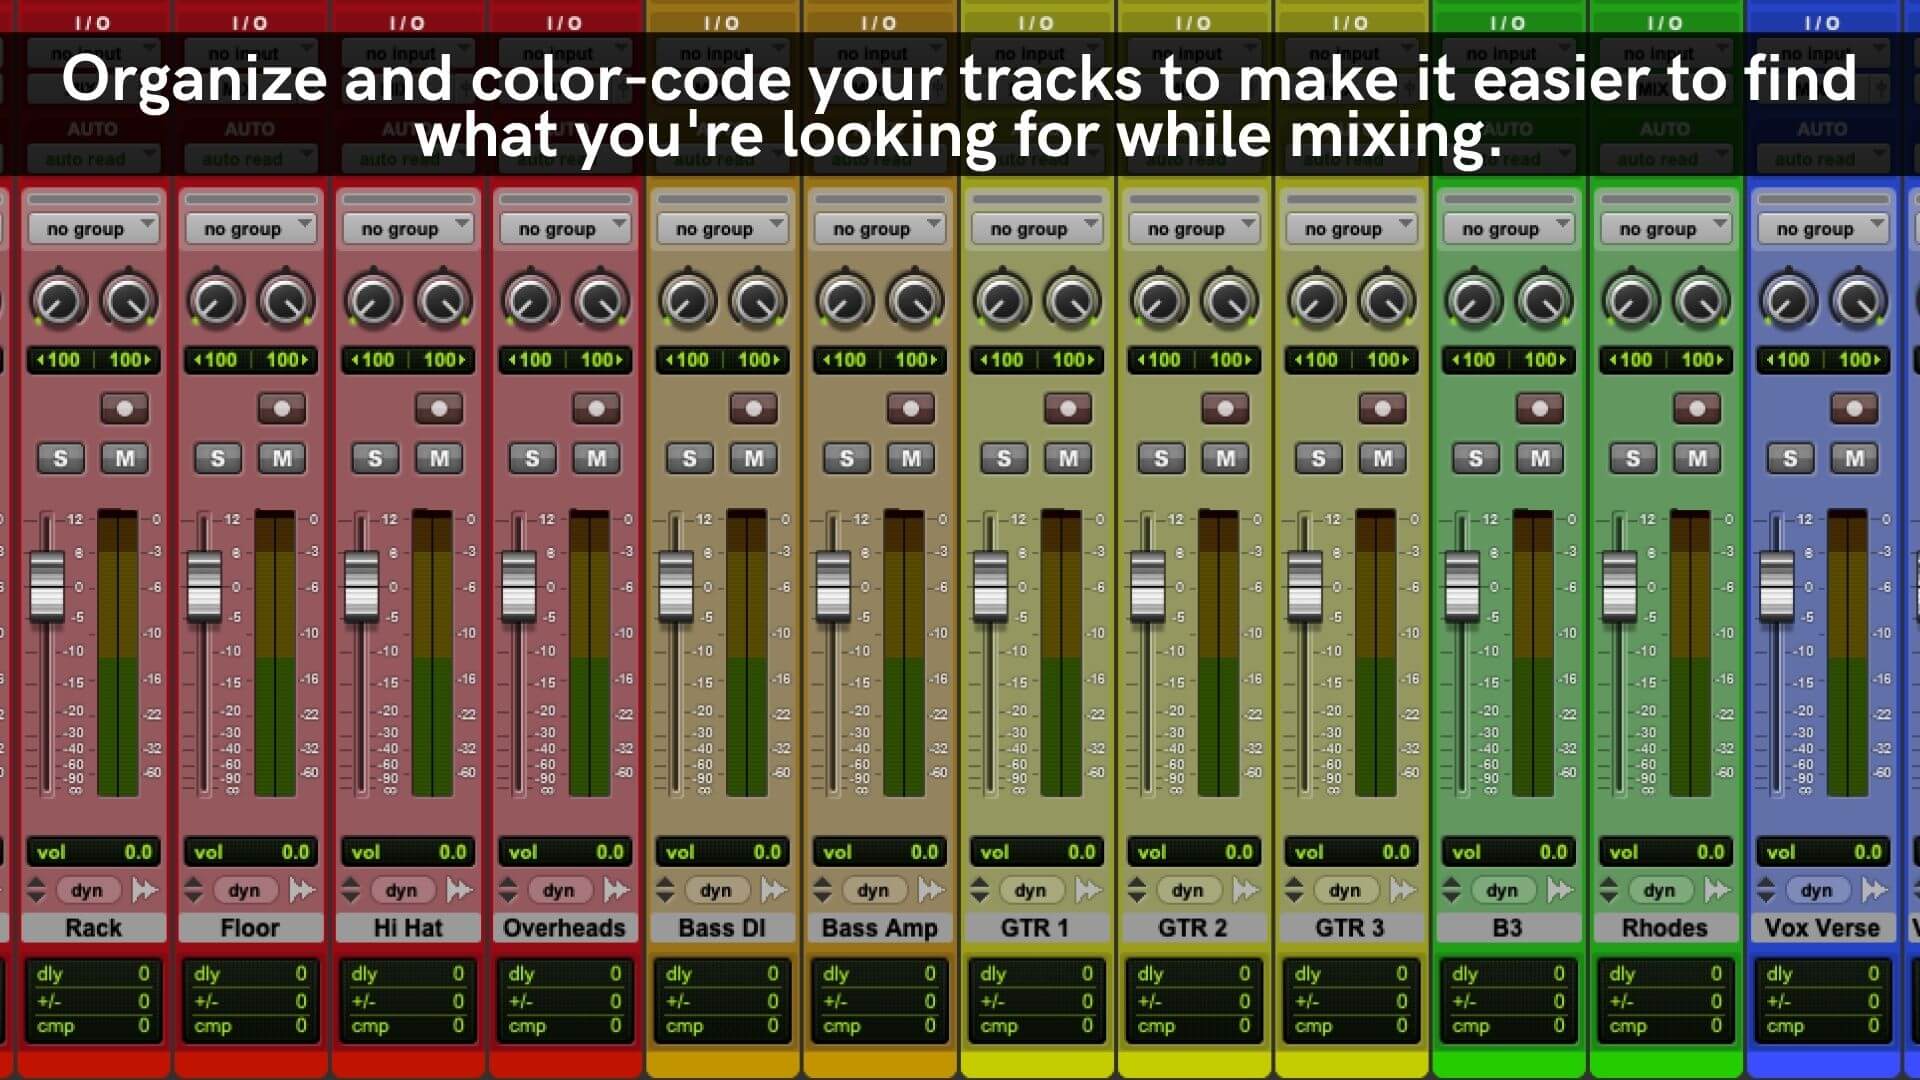
Start by organizing your tracks the same way every session. I use the order I outlined above, with the Mix Bus as the first track in the session, followed by instrument busses, then effects.
Next, group the individual channels with their respective subgroup. For instance, After all of my busses and effects, I group all of the drum tracks together, followed by bass, guitars, keyboards, then lead and background vocals. By using the same setup every time, it makes it easier for me to find what I’m looking for.
It’s also a good idea to color-code your tracks. It doesn’t matter what colors you use, as long as you’re consistent. For instance, I like to color all of my drum tracks red, bass tracks orange, guitars yellow, keyboards green, lead vocals blue and background vocals purple. This helps me easily identify tracks just by glancing at them.
You can also color coordinate your instrument busses using the same colors as the channels to help your brain associate a certain color with a certain type of track.
Follow these tips to create a simple mix template that’s sure to streamline your workflow!