There are many people out there who love music that has been mixed by a DJ and they often wonder, how to use a DJ mixer.
A DJ or a disc jockey is not only responsible for playing music, but they also exhibit the skills to properly mix different songs. In order to mix music and create an exceptional sound, DJs use mixers that help blend different audios to create something new. By mixing different music, DJs are able to add sequences and transition to their music.
If you are someone who is into DJing and wants to learn how to use a DJ mixer, then this article is just for you. This article will be covering up on what a DJ mixer is and how it is used in different contexts.
So let’s get started!

Before you get into the process of mixing, it is essential to understand the equipment that you will be working on. A DJ mixer is an essential tool that all DJs must own if they want to mix their own music.
A DJ mixer makes use of different audio inputs and merges them together. Apart from merging, the mixer allows you to modify the frequency of the music accordingly.
DJ mixers come in all sorts of shapes and sizes. Here are some of their hardware and key features that you should keep in mind before buying.
A DJ mixer has the following hardware:
The input is essentially the sound source that needs to be mixed. Different types of mixers can use different sources for their inputs. For example, some DJ mixers use line-level devices Trusted Source Line level - Wikipedia Line level is the specified strength of an audio signal used to transmit analog sound between audio components such as CD and DVD players, television sets, audio amplifiers, and mixing consoles. en.wikipedia.org as their input source. This can include connection to phones, controllers, and so on.
Other than that, some DJ mixers have their own microphones which allow for a direct source of the sound input. Some mixers are able to connect to computers through digital connections or via USB, in order to gather sound. With different options available, you can literally add any sound possible and use it for mixing.
Next up, we have the mixer itself. This hardware is at the core of every DJ mixer. It is able to collect all the input and allows you to modify and adjust the sounds. A mixer allows you to change the frequency and volume of each sound. This is where all the magic happens and new music is created.
Lastly, we have the output. An output allows you to listen to your end product after mixing. There are many different outputs that a DJ mixer can have. Some mixers can have booths connected to speakers, while others can have headphone connections. This particular hardware is essential for you to test out your final products.
While you can find all sorts of mixers in the market, there are some key features that are common to most DJ mixers:

DJ mixing can get complicated at times, but it is the basics that every DJ must master. The following guide will help you on how to use a DJ mixer properly and with the right steps.
Before getting into the mixing process itself, you need to ensure that your mixer is set up properly. To set it up, you have to plug in your output and input it into the mixer. Make sure that each input is connected to the correct channel. For mixers with 1 or 2 channels, you simply have to connect them in a line while ensuring that each plug goes into the correct connector.
If you are using a mixer with 4 channels, then you connect each channel on the correct side. For the mixing process to start, it is absolutely essential that you get this step right.
Apart from the inputs, you also have to ensure that the output is connected correctly and your power lead is in the correct plug. A correct setup also protects your mixer from any electrical damage.
Once you have set up the mixer properly, it is time to adjust the volume of your setup. To fix the overall volume of the output, you make adjustments with the master knob. For the volume of each channel or input, you make adjustments with the channel faders. Before mixing, make sure that all the knobs are adjusted at the 12 o’clock position. You can change that once you have started mixing.
As you start playing your music, the volume should be adjusted at a gradual pace. Keep increasing the volume until you have reached your required volume. Ensure you listen to your output to get the correct volume.
After adjusting your volume, it’s time to get acquainted with the controls.
Most 2 channel mixers come with crossfaders as well as channel faders. While the channel faders control the volume for each channel, the crossfaders are responsible for cutting between channel sounds. If you move the crossfader in the middle, it can play both inputs at the same time. And if you want to play either input over the other, you must push the fader to its side. Some mixers have curve adjusting knobs that help you adjust the fade speed.
Next up, we have EQ adjustments. The EQ setting is usually on the top of every channel fader. Each mixer can have a different number of EQ bands in it. However, these segments help with the trimming and volume adjustments for the sounds. The bands remove any kind of distortion and smooth out the music by helping adjust the frequencies.
While mixing can be technical, it can also be fun with the VU meters. These meters consist of lights that blink with the beat of each tune. You can visualize your sound using these lights. Each color indicates a different sign.
For example, if your lights turn red, then it means that the master volume needs to be adjusted.
Mixing can be done efficiently while making use of your headphones. You can hear both tracks simultaneously with headphones, while the main speaker only lets you listen to one. The headphones will let you place both sounds at the same BPM (beats per minute). This lines up the tracks while you start the mixing process.
Each headphone comes with a cue or a mini crossfader. By turning this knob, you can adjust the channel volume you hear in your headphones. You can even equalize the tracks and ensure that sound quality is not compromised while mixing.
As a DJ, you should have active ears and be receptive to how your output is coming out to be.
While you may have now figured out how to use a DJ mixer, you must get the proper mixer. While 2-channel mixers are ideal for beginners, 4-channel mixers can be complex and are preferred by professionals. 4-channel mixers basically have the same features as 2-channel mixers, but they come with some additional features, such as:
This booth control especially comes in handy when the mixer is being used for big parties and functions. With the help of the booth control, you can connect extra outputs to the mixer and control them with just a single knob. The Pioneer DJ DJM-900NXS2 is a great 4-channel mixer with effective booth control.
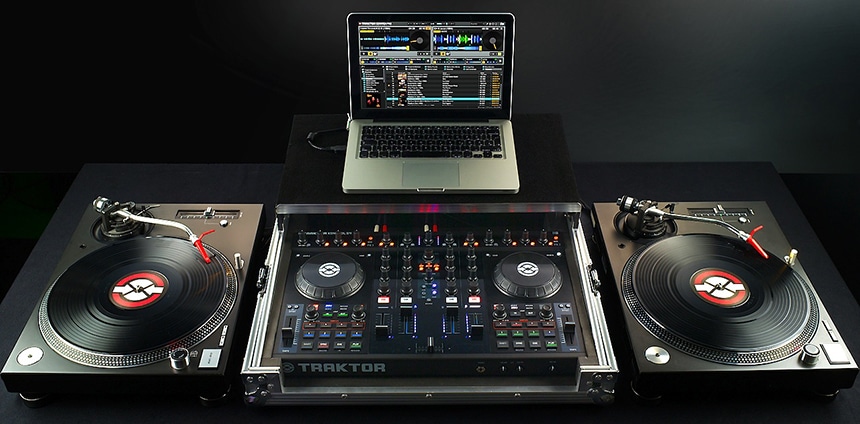
4 channel mixers can add an extra layer to the tracks using their effect panels. Commonly known as the FX feature, this helps add echo, delay, reverb, and much more to your track. If you are looking for a mixer with all these features, then you should consider the Traktor Kontrol Z2 DJ Mixer.
This feature is common to both 2-channel and 4-channel mixers. However, 4-channel mixer microphones come with higher functionality. These microphones allow for high-quality input. The price of the mixer does increase as you get this additional feature.
With a microphone, you can add echo to your track or even customize your own voice by using the EQ functions.

DJ mixers come with different types of software. Each app/software has its own features and functions:
You need to see if each software’s compatible with your mixers. If the software offers your desired setting functions and effects, you should definitely opt for it. Get specific software for your mixer. This software will soon teach you how to use a DJ mixer app.
While it may have seemed complicated at first, you must have realized how easy it is to use a DJ mixer. This article helps you figure out how to use a DJ mixer.
For successful and proper mixing of tracks, you must first ensure that you have figured out the function of each and every part of your mixer. Once you get the hang of it, you need to start with the mixing process.
Each knob and button represents a different but very vital function. As you go along the way, make sure that you keep on practicing until you perfect your mixing skills. Good luck, and have fun!