Last updated: May 05, 2026
They say that you can make happy mistakes and discover something wonderful in them. However, your pedalboard is not one of those things you can afford to make mistakes with. You can either buy a premium model or learn how to build a pedalboard yourself if you want to give your guitar that exciting range of powerful sounds you have been waiting for.
For most guitarists, a pedalboard doesn’t come to mind until you have three or more pedals you need to use simultaneously. While there are lots of commercial options that you can rely on to transport and set up a chain of pedals, none offers as much versatility and potential as a DIY pedalboard.
This article will cover the dynamics of setting up a fantastic pedalboard for your guitar and how to make sure that every component is tuned and chained to perfection. While at it, we will also gain tips on how to achieve different sounds, such as the Rolling Stone’s iconic 60’s rock effect Trusted Source Potent Pairings: The Sound of the Rolling Stones | Reverb News In honor of the seemingly immortal rockers, let’s take a look at some of the gear the Rolling Stones used to create the sounds on some of the most crucial tracks they’ve given us over their wild roller coaster of a career. reverb.com .
 Building your own pedalboard is a big commitment both in terms of time and money, so it’s natural to want to justify whether you actually need a pedalboard. You may already have one of those commercial units or soft-carry cases with Velcro on them. Speaking from experience, however, we can say that you probably need a new, customized pedalboard more than you realize.
These are some of the benefits of having a custom pedalboard that really makes all the difference.
If you love to switch playing styles and genres of music, you likely need to change the pedals you use as well. You could have a board with fuzz, wah, overdrive, and clean boost pedals for soul and blues or a setup with delay, tremolo/vibrato, fuzz, and multi-effects pedals for the country.
In any case, the idea of this kind of setup is to make the top section removable to allow for different boards that could be swapped and configured within minutes. This alone could make a homemade custom pedalboard worth all the trouble.
Any boards with less than premium-level build quality have trouble with upgrades either due to inadequate power supply, extra outputs, or just limited physical space on the board. You can make your custom pedalboard with upgradeability options to ensure that future changes will be easy and pain-free.
If you’re moving from free-standing pedals to a pedalboard, you will likely want to make the best of this opportunity to maximize accessibility. For starters, you can have multiple rows of stepped levels set at an angle so that those you use most are closest, while the others will remain conveniently located a little farther away but remain easily reachable.
In particular, you can have a raised frame instead of a flat model, which will allow you to hide the power supply unit, cable runs, and other space-eating components underneath the board instead of on top of it.
In addition to a premium power supply unit, you can also install much better cable runs and plugs designed to reduce the overall impedance. Some cheaper pedalboards have long cables and common ground switching with the audio signal, which can create ground loops and thus feed noise into the sound output.
Compared to soft-carry cases designed for portability, a hard-case pedalboard holds everything firmly in place. Your patch leads, cables, and other components that would otherwise be knocked and twisted about in transit will be better protected in a good pedalboard. That’s dollar savings all around.
If you are just starting off and don’t even have the pedals yet, here are some must-have pedals that you can start with on your board to help you gain your footing. After that, you can expand your inventory of pedals at will.
There are hundreds of pedals out there from different brands and with different effects. However, every guitarist should have these five types of pedals.
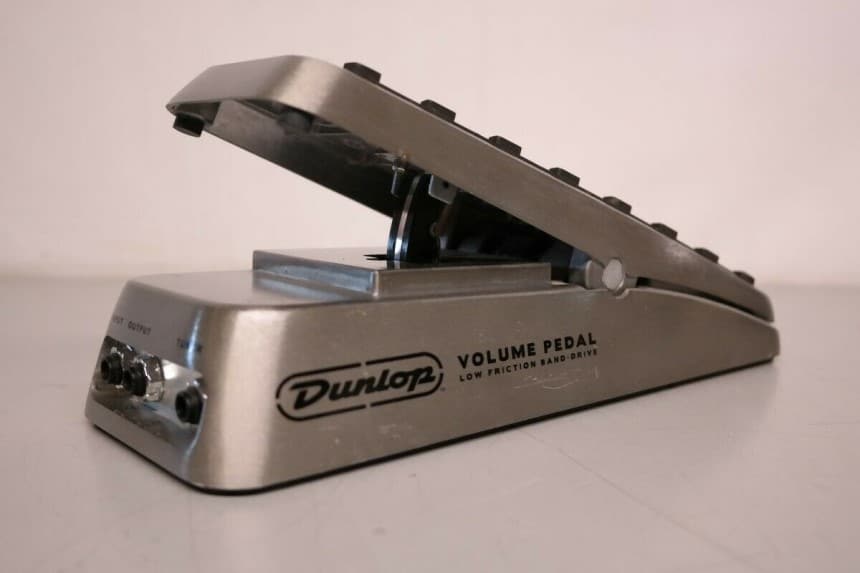 Your guitar and amp are already equipped with knobs to control the gain, so why have a pedal for it? For one, it gives you an easily accessible master volume control as you play. Because of its usefulness in various applications, this pedal is an absolute must-have for serious guitarists.
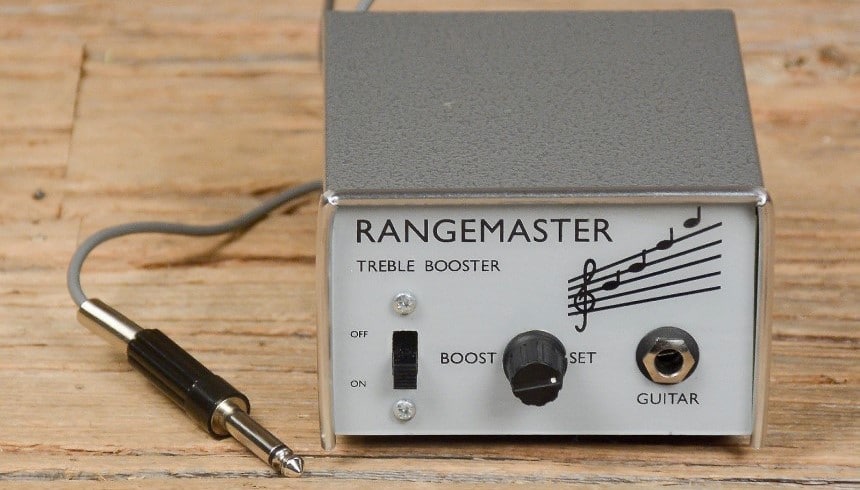 This pedal raises the treble sounds, especially if your guitar is prone to darken its bass sounds.
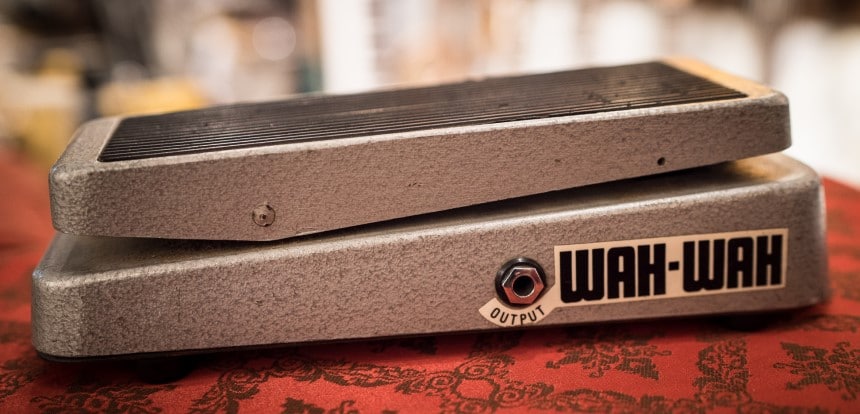 The wah-wah pedal is a controlled Q-filter that works by “opening” up your guitar to give a sound that sounds very much like vocals. This effect was popularized by legends such as Hendrix, but many manufacturers have come up with their own that sound slightly different.
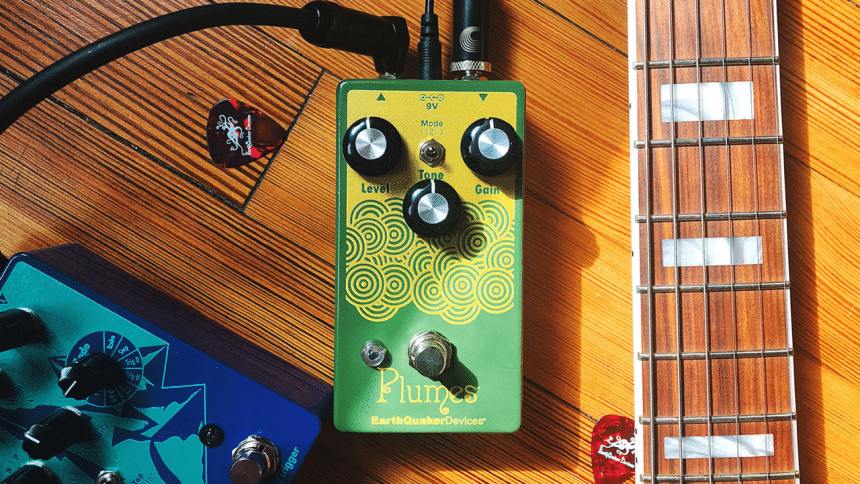 Taking your amp to overdrive is probably one of the most popular ways to achieve delightful distortion and adds a unique weight and depth to your guitar’s sound. An overdrive pedal gives you the control you need to perform this feat at any volume to the desired effect.
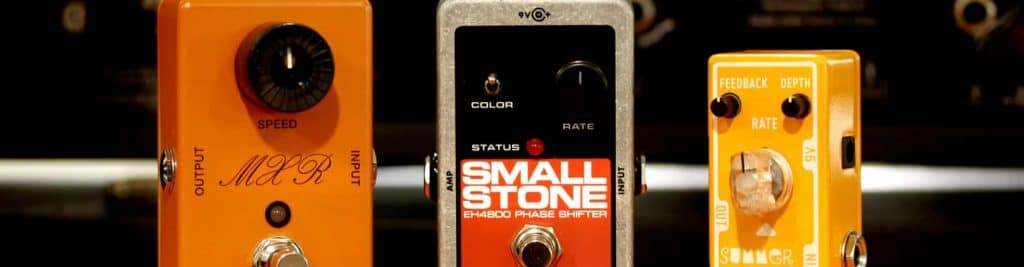
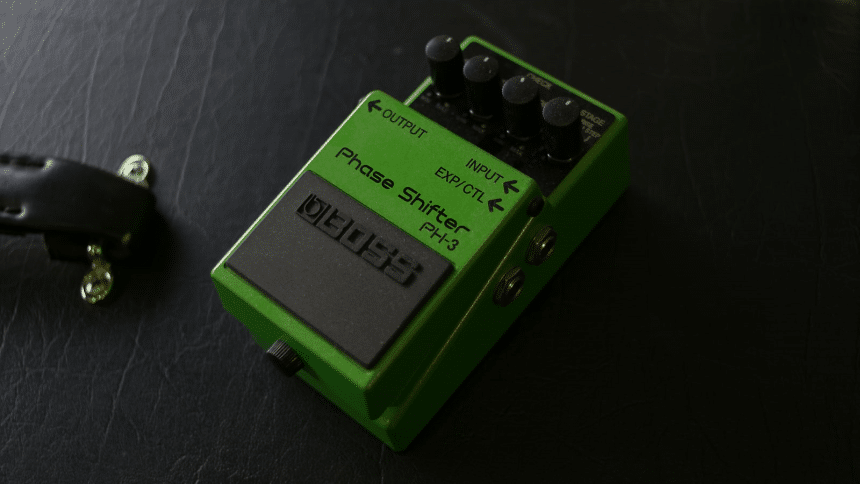 As one of the earliest pedals ever created, the phase shifter is used to create a shimmery, swirling sound effect popularly found in Van Halen recordings. This classic sound is available to every guitarist thanks to these phaser pedals, the best of which is arguably the indomitable Dunlop MXR Phase 90.
The MXR Phase 90 is battery-powered and comes with a simple, single knob. Its simplistic construction and reliable functionality have made it a staple, while its build quality ensures that it will last forever, even on road trips. No wonder it has graced the stage for almost every major guitarist we know.
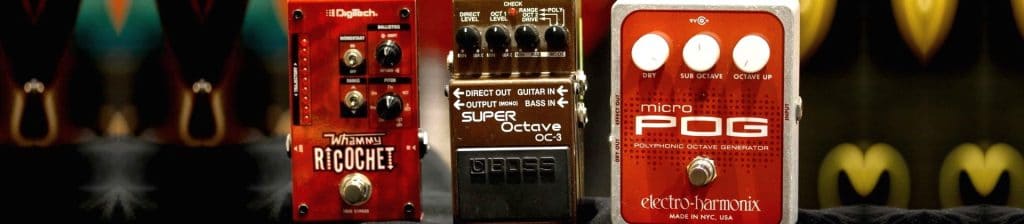
 If you want the best bang for your buck, there is no better investment than a multi-effects pedal. One of the most advanced units, such as the Eventide PitchFactor Harmonizer, offers tonnes of preset effects, both new and classic. This particular pedal can offer four voices of diatonic pitch shifting and up to 1.5s of stereo delay, which alone helps to replace a few pedals from your board.
The best harmonizer pedals can do much more than that, though. Check out this review to learn what other options are on the market and why we think they might be a good choice for you.
With all those benefits of a custom DIY pedalboard in mind, it will be easier to make the decision to go ahead and build it yourself. The process of building your own pedalboard is not difficult, as you will soon see from this comprehensive guide. All you will need are a few supplies and a way to chain them up effectively.
You can buy a pre-built pedalboard frame or make one yourself – Sweetwater has a wonderful video on how to do that Trusted Source How To Build a Pedalboard | Guitar Lesson - YouTube Grab your guitar pedal gear and join Mitch Gallagher and Don Carr, as they walk you through building a guitar pedalboard. www.youtube.com . Once you have the frame in place, the job of purchasing and assembling the components begins. Let’s tackle this step-by-step.
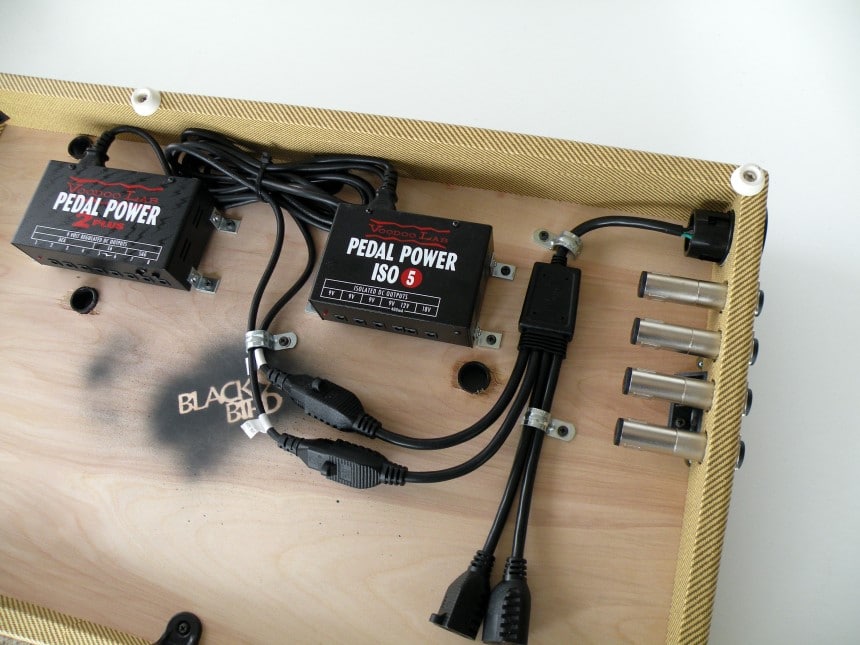
Except for battery-powered pedals, most other units operate on some form of low-voltage or DC power. You can often choose a pedal to suit the power supply you already have, so it shouldn’t be an issue to find a good 6V, 9V, 12V, or even 12V power supply unit, depending on your needs.
The current draw of most pedals is relatively low, usually lower than 100mA. The only case you might need a more powerful power supply is if you wanted to install a power supply controller, which can use up to 450mA of current.
The important thing is to ensure that you match the power requirement of the different pedals to either AC or DC as indicated. The easiest way to fry your pedals is to get this critical point wrong, even if you do get the voltage and current right.
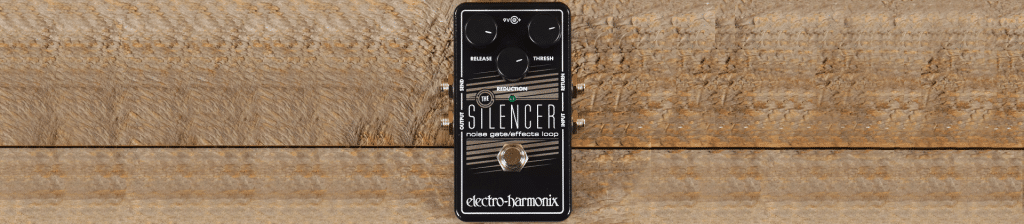
If you want a clean signal free from noise and buzz, it is also a good idea to have isolated power taps for each of the pedals. In other words, the circuit for each of the pedals should have an isolated power supply without common group loops between the pedals. This reduces the hums and buzzes that can result from interconnected power supplies.
Power supplies of a lower quality tend to daisy-chain power supplies with a common ground loop. This makes it easier for short circuits, circuit noises, and analog delays to propagate and multiply in the circuit, which can result in poor-quality sound.
The final consideration, as far as power is concerned, is to make sure you use the best power connectors. You can have 2.1mm or 3.5mm barrel connectors, depending on the type of pedal. Some are tip-positive, while most are tip-negative, so it’s also good to keep that in mind.
The next step is signal control, where you can choose to use true-bypass pedals, buffers, or both. Buffers are designed to take a high-impedance signal and convert it into a low-impedance signal that will flow more easily through the circuit, thus strengthening the signal and help to reduce current restrictions.
These so-called “buffered-bypass” pedals have a buffer that remains on even when the pedal is not being used, which means they are always buffering. On the other hand, true-bypass switches operate the pedal as if it weren’t there when it is switched off, which can cut the overall system impedance and improve the flow of power.
Buffers and bypass switching is considered in the same breath because both are related to maintaining signal integrity within the circuit. True-bypass buffers aren’t necessarily better, but they can reduce or even eliminate the need for a bypass.
The low-voltage, high-impedance signal generated by your guitar pickup is susceptible to high-frequency signal loss. A low-impedance signal is less affected, which is why either a bypass or buffer can do the job. Whether you have true-bypass pedals or install buffers, the goal is to reduce the overall capacitance to a signal as close to true as possible.
The difference is that even if all the pedals are true-bypass switched, a lot of cables and plugs in the system will still retain a high level of impedance. This is why a good quality buffer placed strategically is a good decision. Buffers are usually placed first on the signal chain to allow them to clean up the signal first. However, they should come after fuzz pedals if you have them because these need to interact directly with the guitar strings. If you don’t have true-bypass pedals, the buffer should go to the other end of the circuitry.
 Having talked about reducing impedance and improving the quality of the output signal, you will understand the importance of ensuring that you only use premium cables to keep it at a minimum. In particular, the first cable in the signal path. It is highly recommended that you use the shortest professional cables you can find to keep the signal strong.
In particular, you should use premium patch cables such as Fender, Emie Ball, or Stagg. These super-short cables are made to length, which means that you will have to place the pedals in order and link them all up one after the other.
Talking about pedal order, there is a specific signal order that you need to follow to set up your pedalboard. Sweetwaters has a detailed article Trusted Source What is the Best Pedal Order? Check out the What is the Best Pedal Order? page at Sweetwater — the world’s leading music technology and instrument retailer! www.sweetwater.com about this, but in short:
Most amplifiers today come with a built-in effects loop, which allows you to patch in some effects the preamp. They are best used for effects where you want to use the gain channel to raise the distortion while preserving the amp’s original “clean” voice.
You will also not need to worry about effect loops if you are just using your amp clean signals. If you must use the effects loop, you will recognize the port with its characteristic marks “Send” and “Return.” You can connect your EQ, modulation, delay, and revert on the effects loop while the rest, such as wah and fuzzes
Some stereo pedals are superior in that they have stereo outputs, which means you can use two amplifiers to play or record stereo sound. However, these pose another challenger when setting up your paddles.
It’s rare that you have all your paddles being true stereo. Even if they are, they most likely still use a mono input system. That means it may be difficult to place subsequent stereo pedals in sequence unless both retain the same place, stereo inputs, and outputs.
Every stereo pedal that comes after the first stereo pedal must be true stereo, and it also requires a different isolated amplifier to make it safe and reduce noise from the risk of common ground.
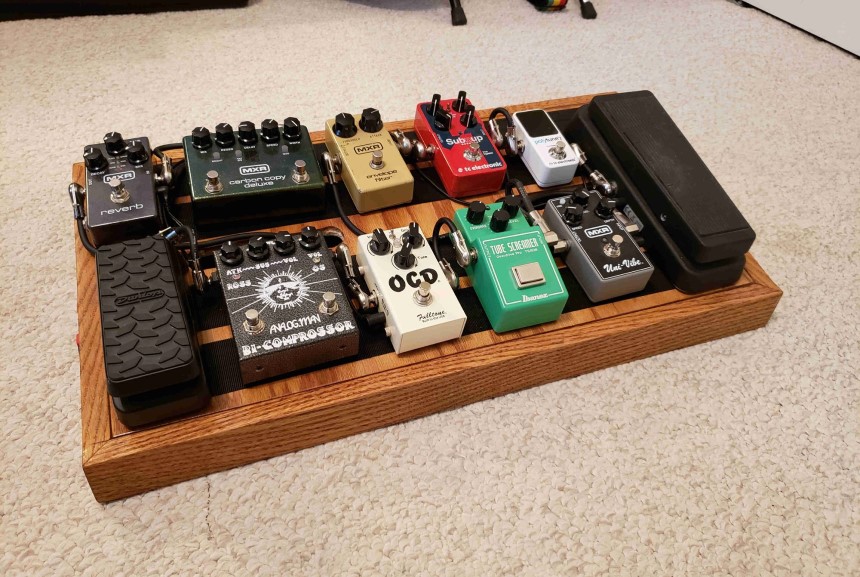 The actual way you attach the pedals will vary depending on the type of pedalboard you create and the pedals themselves. You can use everything from nylon ties to mini bungee cords to Velcro pads, but homemade pedalboards tend to use simple solutions such as 3M Dual Lock Tape to help hold the pedals onto plywood of whichever material the board is made of.
You can also use screws to have a semi-permanent fixture, especially if you don’t swap out pedals that often. Either way, changing the pedals on your pedalboard shouldn’t take more than a few minutes with the right tools.
Pioneers like Jimi Hendrix used pedals to elevate their music to new heights. Some of these pedals were of their own making and quite primitive, but they did the job. Today, you too have the chance to redefine you’re playing by using any of the hundreds of pedals available today.
The moment you have more than a few pedals, though, you will need to start thinking about a very good pedalboard. Such a board serves as the base for all your pedals and holds everything together, including the power supply and cabling.
Unlike commercial pedalboards, though, custom boards will be more versatile and produce much better sound results if you are diligent in setting them up. This guide on how to build a pedalboard has given you the basic knowledge to get the project completed, so don’t be shy. It’s time to elevate your music and do so in style.