Now that you’ve got your new trumpet and a few basics under your belt, it’s time to start thinking about maintenance. All instruments need occasional maintenance work, and you need to learn how to clean a trumpet to properly maintain yours.
Fortunately, cleaning your trumpet isn’t difficult. It may be a little time-consuming, though, so you should give yourself plenty of time.
A good goal is to give your trumpet a deep clean about once a month. Your mouthpiece will need cleaning more often than that, but it doesn’t take nearly as long.
If you’re a student trumpeter, you should try to clean your trumpet at minimum once per term, and once over every long break.
Cleaning your trumpet is about more than making sure it looks good. A thorough clean is important for keeping your trumpet functional. Sticky valves and stubborn slides will make your life more difficult every time you play.
It’s also important for your health. There’s a lot of moisture and grease that can build up in your trumpet over time. You don’t want to be exposed to the bacteria and grime that can make your trumpet home every time you play.
Regular cleaning will keep you, and your trumpet, much healthier.
Things You Will Need to Clean a Trumpet
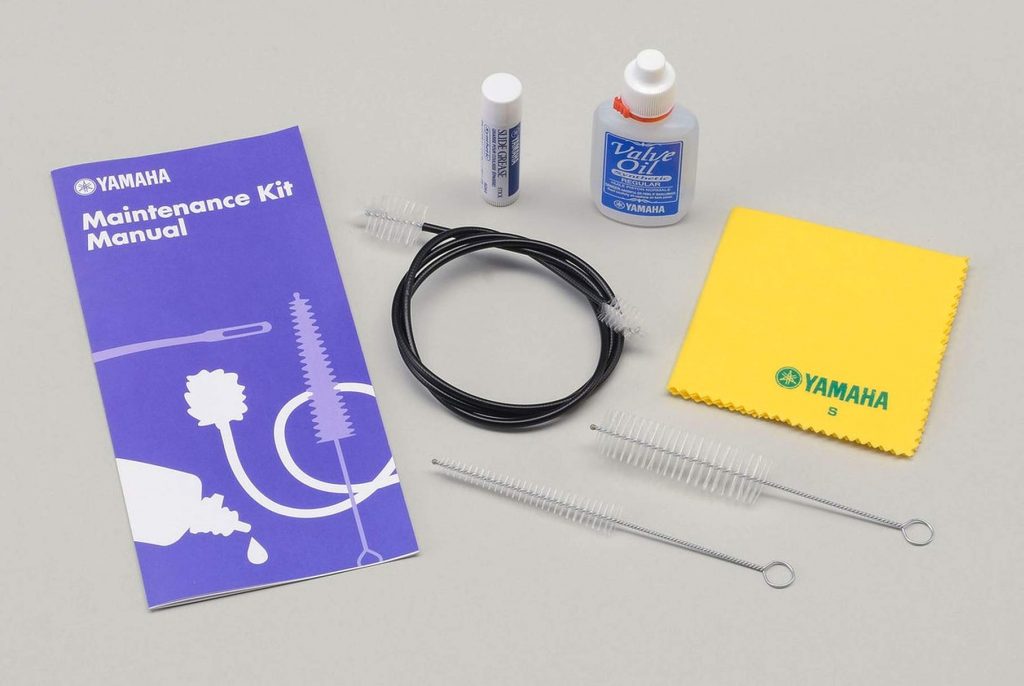
Before you can learn how to clean your trumpet at home, you need to have the right supplies handy. You’ll need several towels, and it’s a good idea to have both small and large towels available. You need to have either a large washbasin or a clean bathtub. Either way, you need to have access to lukewarm water.
There are a few options for soaps. Any soap you choose should de-grease the instrument, and it needs to be bleach free.
You’ll also need a polishing cloth. Your polishing cloth needs to match your instrument, so if you have a lacquered instrument, get a lacquer polishing cloth. If you have a silver trumpet, make sure you have a silver polishing cloth.
Trumpet snakes are easy to get and usually affordable. Don’t use a regular drain snake or a snake from a different instrument. Both the size and the softness of the bristles have to be right to clean your trumpet without damaging it.
The last thing you’ll need is grease. There are two different types of grease you need to get your hand on, valve grease and slide grease. There are specialty versions of both, and your instrument will perform it’s best if you use grease that has been formulated for brass instruments.
However, if you live somewhere without a music specialty store, it may be easier to replace your slide grease with something else. You shouldn’t replace your valve grease; your valves need to be treated with the specialty grease.
One of the most common replacements for slide grease is petroleum jelly. It works reasonably well and is suitable for most learners but isn’t a good substitute for professionals or students at the collegiate level.
If you’re lucky enough to have a music store nearby, they should stock all the specialty items you need to clean your instrument. They’ll likely even have a trumpet cleaning kit that has everything you need for the first several cleanings.
Don’t worry though, we’ll also cover how to clean your trumpet without a cleaning kit.
How to Clean a Trumpet Mouthpiece
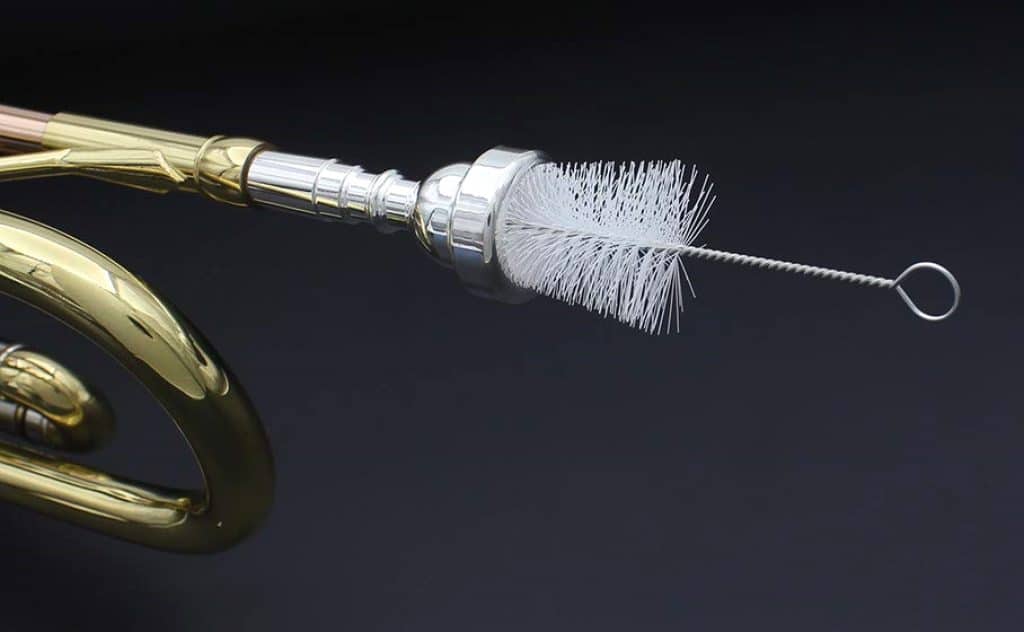
Your trumpet’s mouthpiece has the most direct contact with you. That means that it collects more moisture and bacteria than any other part of your instrument and that it’s the most likely to pass germs and bacteria back to you while you play.
To stay healthy and functional, your mouthpiece needs to be cleaned at least once a week. If you go a long time without practicing, you should plan on cleaning your mouthpiece before you play.
Many professional trumpet players clean their mouthpieces daily, both before and after using the instrument for the day.
Before you try it, however, it’s important to learn how to properly clean your mouthpiece.
Fortunately, there’s only one additional tool you need to clean your mouthpiece, a mouthpiece brush. These can be bought online, at your local instrument supply store, or may have come with the trumpet or replacement mouthpiece.
Learning to clean your mouthpiece is simple. First, remove the mouthpiece. It should come free easily. You can clean it with lukewarm water and soap if they’re available, but a spray bottle of plain water will also work.
Spray the outside of the mouthpiece with water and use either a very soft towel, or your polishing cloth, to clean any skin and oil residues off the surface.
Then use the mouthpiece brush to clean both sides of the mouthpiece. A few brushes at either end will do. A lightly damp brush will take care of most things, but you can also use a small amount of soap.
Rinse the inside of the mouthpiece with lukewarm water and set it aside to dry. Leaving it on a soft towel is ideal, it shouldn’t take more than an hour to dry.
You should consider this a supplemental cleaning for your mouthpiece. It’s important, and you need to make sure you’re cleaning it at least once a week. But you should also include your mouthpiece when you’re deep cleaning your trumpet.
How to Deep Clean a Trumpet
The first thing you need to do before cleaning your trumpet is check to make sure you have everything you need. That means plenty of soap and lots of space for cleaning and drying the instrument.
Gathering Supplies
One of the most overlooked things is the state of your bathtub or washbasin. If your bathtub isn’t clean, your trumpet won’t be clean either. You should also avoid soaking your trumpet within 24 hours of cleaning your bathtub with any harsh bathroom or bleach-based cleaners. That’s because bleach and other harsh cleansers will damage the finish on your trumpet. You should also make sure the tub has been rinsed at least once since it was cleaned to remove any of the cleaner residues.
Next, make sure you have several towels. You’ll need at least one large towel, suitable for placing at the bottom of your bathtub or washbasin. You’ll need another large enough for the trumpet and all its parts to rest on while it dries. One or two other smaller towels will also help.
You’ll also need a table to disassemble, dry, and re-assemble the instrument. Make sure you have your polishing cloth, trumpet snake, valve grease, and slide grease at hand.
You may want a small plastic container to hold the valve felt and springs and another to soak the valves and slides in if you don’t want to put them in the bathtub with the rest of your trumpet.
Disassembling Your Trumpet
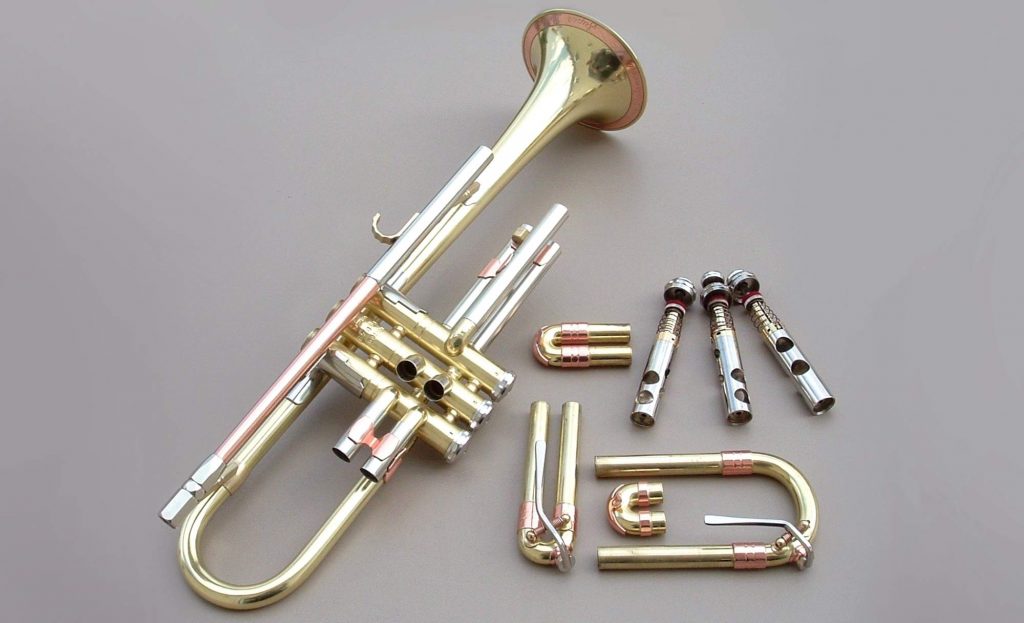
When you’re learning to properly clean a trumpet, it’s very important to make sure you’re fully disassembling your trumpet.
Start by removing the slides. Start with your main tuning slide, then remove the 1st, 2nd, and 3rd slides.
Some trumpets have a small screw holding the 3rd slide in place. Take the screw completely off before you remove the slide. Make sure to put it in a safe place so you don’t lose it while the rest of the trumpet is soaking.
The next step is removing the valves and valve caps. As you remove the valves, check to see if your valves are numbered. Most are and will have a small number facing toward you if you were holding the instrument in playing position.
If you don’t have numbers, it’s especially important to keep track of which valve goes where and might mean that you need to wash them separately.
After you’ve removed the valves, gently unscrew the valve caps. Pay attention to whether the caps stick. If they do, you may want to apply a small amount of grease later.
You should also remove your mouthpiece.
Disassembling your Valves
Two parts of your valves should not be washed with the rest of your trumpet – the felt, and the springs. Disassembling your valves is one of the most important steps learning how to clean trumpet valves.
You can’t wash (or grease) the felt because the moisture will cause the felt to swell up and de-form, changing the way the valve operates and making it more difficult, if not impossible, to play.
The springs can also degrade if they’re exposed to moisture, so it’s important to take those off as well.
This whole process is easy since both the felt and the spring can be accessed simply by unscrewing two caps from the valve. The felts and springs are the same across all three valves unless you’ve replaced one. Just set them aside somewhere safe where you aren’t likely to lose them.
Soaking/Cleaning the Trumpet
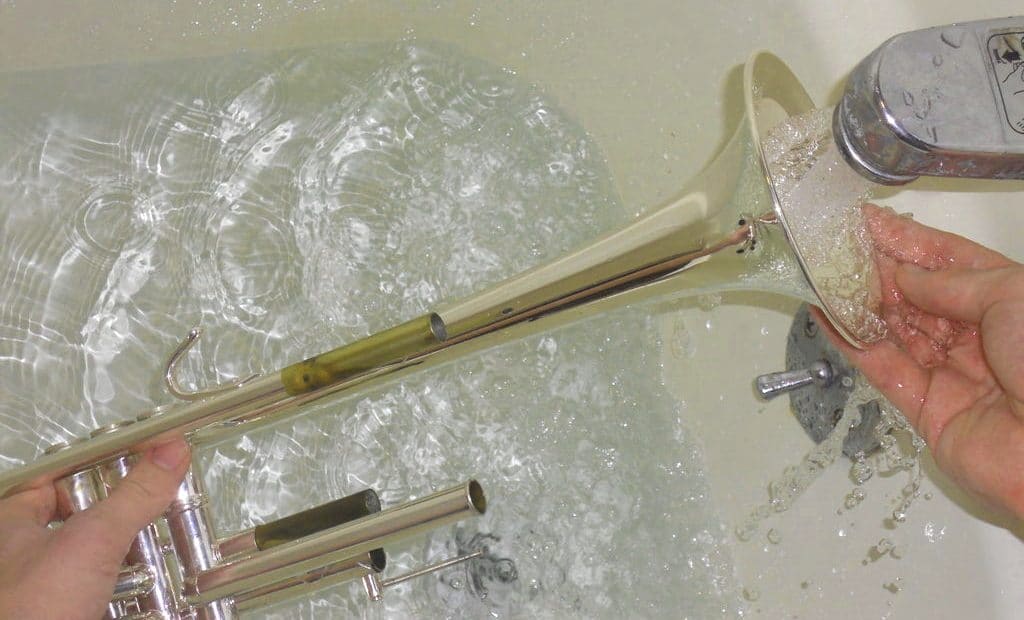
Next, take the disassembled pieces of your trumpet to the bathroom. Run enough lukewarm water in the tub to mostly cover the horn. Cold water won’t damage your trumpet, but also won’t clean it as effectively. Water that’s too warm can damage the lacquer, leaving your trumpet more vulnerable to additional damage.
After you’ve run the water, sink a towel into the water so that it lines the bottom of the tub. It’s easier to put the towel in after running your water since it won’t fold or move due to the water pressure from the spout.
You should add a reasonable amount of soap to the water as well. Remember, your goal is to remove as much grease as possible so that the dirt and bacteria accumulated in it can be washed away. Your soap is the main de-greaser in this process.
Leave all the trumpet parts (except the valve spring and felt) in the water for about 10–20 minutes to soak.
Grab your trumpet snake when you come back. The order you clean your trumpet parts in doesn’t matter, but you need to make sure you clean all of them.
Use the trumpet snake to clean all the tubes in your trumpet. That includes the main body of the trumpet, all the slides, and all the slide attachment points. Don’t, however, clean the valve cylinders or the valves themselves.
If you don’t have a snake, you may be wondering how to clean your trumpet without a snake. The most important part is cleaning the connections, which can be done with a finger, a soft washcloth, or even a paper towel as long as you don’t overwork the fibers.
Thoroughly rinse every tube with lukewarm water from both ends, whether you cleaned it with a snake or without one.
Your valves and valve cylinders are too delicate to clean this way. If there is any grease left in these areas after soaking, gently clean them with more soap and your fingers. Never use any abrasive scrubbers, or even rough cloth, on these parts of your trumpet.
Once you’ve cleaned everything, you’ll need to rinse the trumpet in cold or lukewarm water, and try to get as much soap out of the instrument as possible.
Make sure you also scrub your mouthpiece before rinsing it.
After you’ve rinsed everything, set the instrument aside to dry on towels for 1–4 hours.
Greasing and Re-assembling
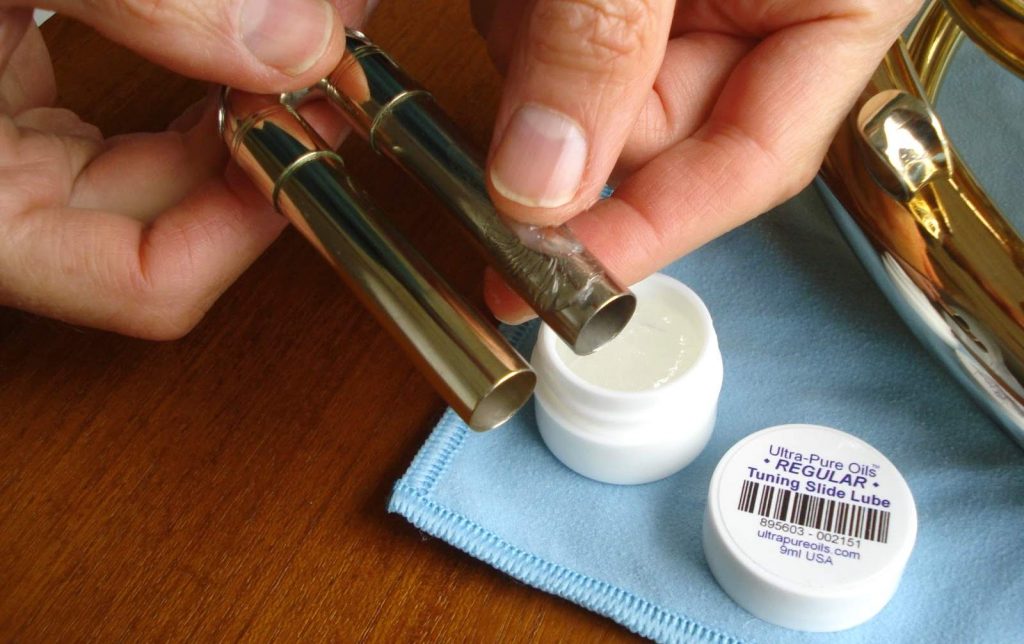
Next, you’ll re-assemble the trumpet while it’s dry. Start by re-assembling the valves, putting first the springs and then the felt back in their proper place. Set the valves aside.
Next are the slides. You should grease the attachment points on each slide. Especially if you’re using specialty slide grease it won’t take much, just a drop or two on each side. Match one side of the newly greased slide to its appropriate attachment and move it around in the tube. That will grease the inside of the tube as well as the slide.
Do the same with the other side of the slide. Repeat this process for all the slides.
Next, you’ll need to replace the valves. Grab your valve grease and lightly grease the bottom portion of the slide. Remember, the felt should never be greased, and only the bottom part that goes in your valve cylinder needs it.
Again, you only need 1–2 drops of valve grease to get the job done.
Slide the valves back into their appropriate cylinders. Valve one is closest to you when you’re in playing position, valve three is furthest away. Turn each valve slightly to the right until you hear a click. That click tells you that the valve is in the right place.
Lastly, you’ll replace the valve caps. If the caps were tight when you removed them, adding a tiny amount of valve grease to the threads will keep them looser. Be careful not to cross-thread the caps, and don’t force them on. It’s okay if it takes a couple of attempts to get the alignment right.
After everything is re-assembled, try blowing through the trumpet without your mouthpiece. Air should move freely through it and make a slight sound. Silence or air pressure can both indicate that one of the valves in misaligned.
Polishing
The last step you should take is to polish your trumpet. You should also build the habit of running the polishing cloth over it to remove fingerprints after you play, but if you want to maintain the finish, you should use a specialized polish.
This is where how to clean a silver trumpet and how you clean a brass trumpet can vary a little. The type of polish you use needs to match the type of trumpet you have.
Check out the basics once again in this video:
In Conclusion
Now that you’ve learned how to clean your trumpet, hopefully, you’ll also see why it’s so important to clean it regularly. This isn’t a chore you should skip, but thankfully there is a lot of down-time while your instrument soaks and dries that you can get other things done.
Remember, you should clean your mouthpiece at least once a week, your trumpet once a month, and everything you clean your trumpet with should also be clean itself. If you keep those things in mind, you’ll keep your trumpet in fine working order for a long time.


