 Last updated: June 03, 2026
It’s easy to envy master violinists for their ability to tune a violin by ear in seconds. However, you too can learn how to properly tune a violin and build your skill just as much with only a little patience and a few tools.
When you are learning, it is particularly important to always play an instrument that is in tune as your ears become accustomed to how a perfectly tuned violin sounds. That’s why it is good practice to always check that your violin is in tune before practice, and even during practice if it sounds off. That is the basis to developing a good ear and the foundations to solid skill.
When learning how to tune a violin for the first time, your teacher will be very helpful and even tune it for you a few times. However, learning to tune your own violin is a necessary skill you need to master sooner than later.
There are many easy ways to tune a violin for beginners. Various tools are available that you can use including tuners, piano, tuning fork, smartphone apps, and more. We will go through all these methods individually so that you can understand all there is to know about tuning a violin.
But first, here are some basics of tuning a violin.
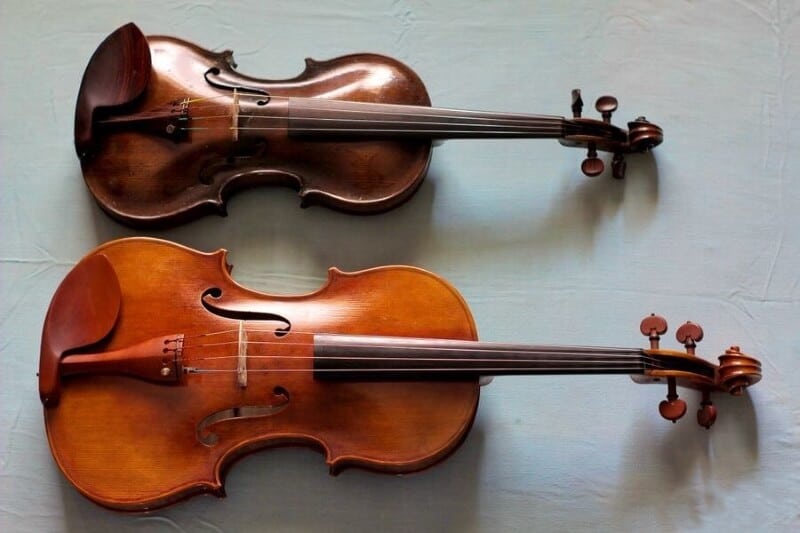
 The violin belongs to the same family as the cello and viola. These four instruments have four strings, and each is tuned at intervals of perfect fifths. In other words, the sound that each string produces should be 5 notes away on the scale.
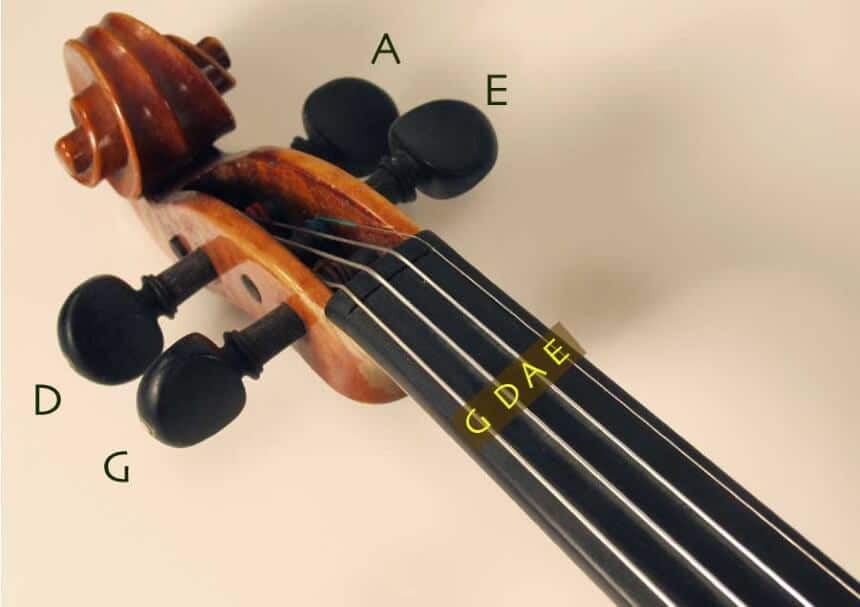
Each of the four strings is designed for a specific pitch. For a standard tuning, these strings should vibrate with a certain frequency as set by the International Standards Organization. In their appearance on the violin, from top to button, these strings are:
Here’s a pro tip: you can use the mnemonic Good Dogs Always Eat, or GDEA, to remember the arrangement of strings from top to bottom.
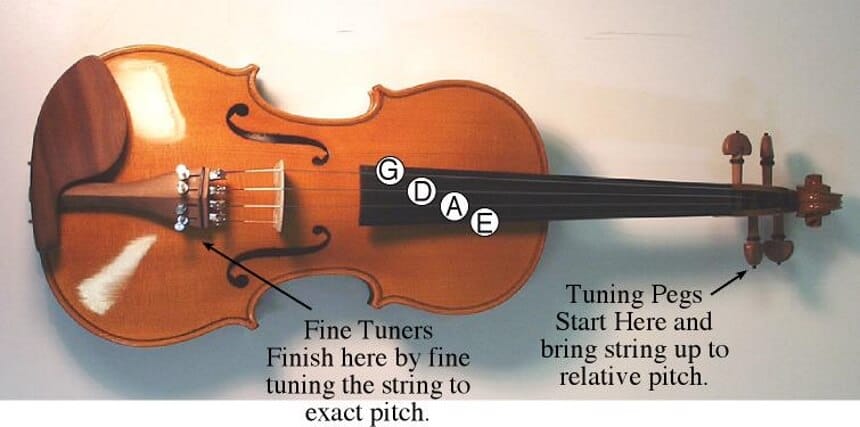
Anyway, tuning a violin is about tightening or loosening the string enough to change the vibrational frequency (and thus pitch) of each string. For that purpose, all violins come with pegs for large pitch adjustments, and most also have fine tuning pegs for small pitch adjustments.
Turning these pegs increases or decreases the tension in the strings, which then varies the pitch produced. A slack string tends to produce a low or flat tone, so tightening either the pegs or fine-tuning pegs makes it go higher or sharper. The opposite is true of strings that are too tight.
One more thing you should know about tuning a violin is that you should always start with the A string first followed by D, G, and E. A is used to provide a reference tone with which the rest must match. That’s also because the tension of each string affects all the others and holds the soundpost in place. Following this order will help you maintain balance in the four strings.
 The pegs are used to tune large differences in the pitch of the string because they move a lot for each rotation. Each string is fixed to its own peg, and you can figure out which is which by following each string to its peg.
There will be two pegs on each side: one side (topside) has the D and G string pegs, while the other holds the A and E pegs. Rotating the pegs clockwise tightens the strings, while rotating counterclockwise loosens them. There’s another mnemonic for this motion as well, which is righty tighty, lefty loosey.
 There are two approaches to tuning. The easiest one for beginners is simply plucking the string being tuned and comparing it with a reference note from a tuner. Plucking produces a clear, consistent tone that is very easy to compare with the reference tone. It is especially useful when using a digital tuner or a piano.
However, plucking the string does not give a sustained note, so it may be necessary to repeat the process a few times. This method also makes the string start out high and subsequently falls by a few octaves to produce a flatter tone. That makes plucking unreliable for highly professional playing. Even a slow digital tuner won’t be able to provide an accurate reading.
The second method is by playing a long note with your bow. It involves playing a long, steady tone and simultaneously adjusting the tension using the pegs until it sounds just right. This method is preferable because it is more accurate and will help you attune your ears faster to the sound of the strings.
Advanced violinists are partial to this method because it is faster, especially when they are tuning to the standard A provided in an orchestra. They can then tune the rest of the strings using relative tuning. Some expert violinists give their opinions on the two methods on the discussion forum at Violinist.com Trusted Source Tuning secrets of the Pros We amateurs are pretty sure that you Pros have some private snickers at our expense. Probably from when we walk in the door carrying our cases. A bit more on the serious side, what tips do you have on the fine points of tuning the violin by ear? www.violinist.com , from which you can pick up some tips.
In any case, when strings are too much out of tune, it is always easier to start by plucking to get close then complete the job by bowing. That is how advanced violinists always do it.
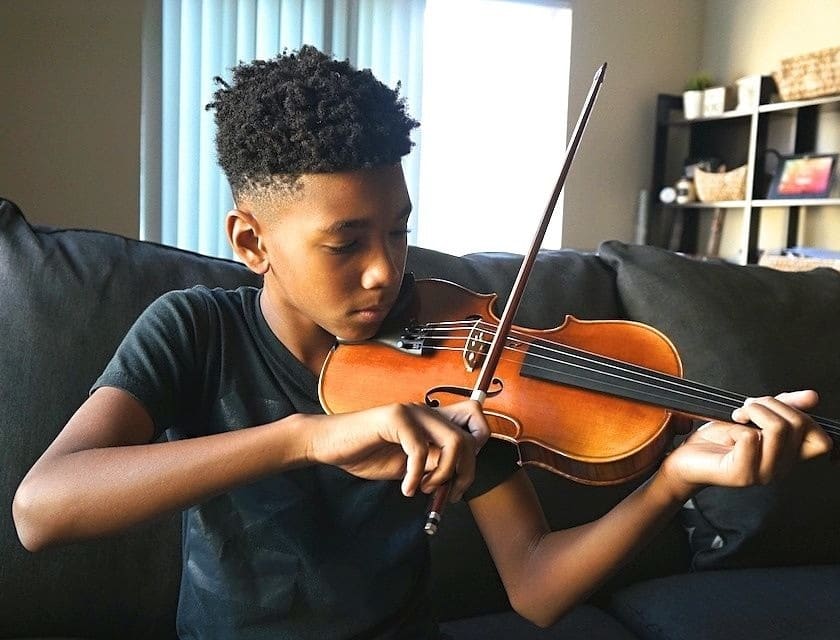
When tuning your violin using the pegs, always hold it in a playing position next to your face. Get hold of the pegs with one hand and play with the other, all the time checking with the reference note.
If any of your pegs is slipping, damaged, broken, or having difficulty twisting, it is likely that the peg is not fitting properly or is not lubricated. Your teacher should be able to help with this.
Cheap violins are notorious for peg slippage, falling pegs, and myriad other problems. As a beginner, you won’t do yourself any favors if you start off with a problematic instrument.
From what customers on Amazon are saying, the Cecilio CVN-300 Solidwood fitted violin is a great instrument to start with. It is very affordable, solidly built, and has a warm sound to it. At the very least, you won’t have significant peg problems. However, you will likely need to get better bows later to complement it.
Talking about violin pegs, you are not likely to use them a lot as a beginner. They are mostly used by advanced violinists who can make the tuning and locking in one smooth motion. Until you have perfected the art of tuning with the left hand quickly with a single smooth motion, it will be much easier to use the fine tuners.
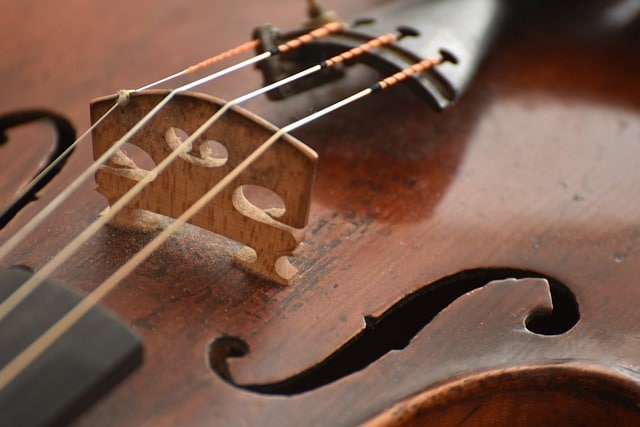
Finer tuners are little screws on the bridge that pull the strings taut with every clockwise turn. They do this in very small motions so that every turn changes the pitch by not more than an octave. These small adjustments make this method the easiest way to tune a violin.
Violins for students typically have a fine tuner for each string. The process to follow is very similar to the one above when tuning with the pegs, except that this time you will use the left hand to adjust the small fine tuners while playing with the right.
Because they are screws, the fine tuners can exceed their maximum turns or come off completely when loosening. In the first situation, you need to completely loosen the screw until it is almost coming off the bar, then use the pegs to tighten it up initially until the note is almost right. You can then complete the tuning using the fine tuner.
If the fine tuner comes off the board, simply screw it back in. In some violins, overtightening the finer tuners can also damage the board below, so be sure to maintain a feel for the degree of extension.
Whether using the pegs or fine tuners, the process of tuning a violin relies heavily on a tuner device that will supply the reference pitch. The most common tuners include a piano, digital tuner, tuning fork, and relative tuning.
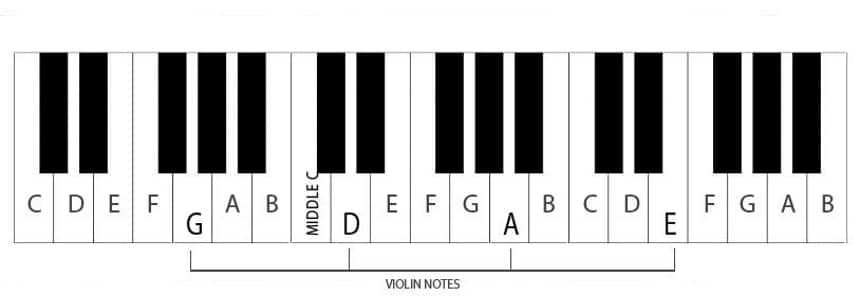 Because it is both a stringed and percussion instrument, a piano is one of the best ways to tune a violin. So long as it is itself in tune, a piano (or a keyboard) will provide clear notes with which to tune your violin either by plucking or using the bow.
For starters, play the A note on the piano and listen keenly to how it sounds. Then, play your string and try to pick up any difference in the pitch. Use the fine tuners slowly and repeat until the pitch matches that of the piano.
One the A string is properly tuned, it is advisable to complete the rest of the process using the relative tuning method described below. That is because a piano’s strings can also go out of tune, and using it as a reference for tuning your violin note for note might cause them to go out of tune in reference to each other.
Relative tuning is the process of tuning the rest of the strings in relation to the now perfectly tuned A string. It is generally performed by more advanced violinists who have practiced how to tune a violin by ear. They can pick up the subtle but clear differences between the perfect fifths and how well they mesh with each other.
With relative tuning, you play strings A & D together and adjust D while playing A until you notice the clear resonant sound of the two notes forming a perfect fifth. Then, play D & G together and adjust G in the same way. Complete tuning by playing A & E strings, and tuning E with the reference A.
At the end of the process, all four strings will be in tune relative to each other. It does require that you have a very good ear to pick up the subtle differences and know from memory how each string should sound.
Even if each string’s individual notes sound slightly off, at least the whole instrument will be in tune relative to itself. This is how groups of players manage to remain in tune. In orchestras, the lead violin or oboe plays the true A and everyone tunes their instrument to it in this manner.
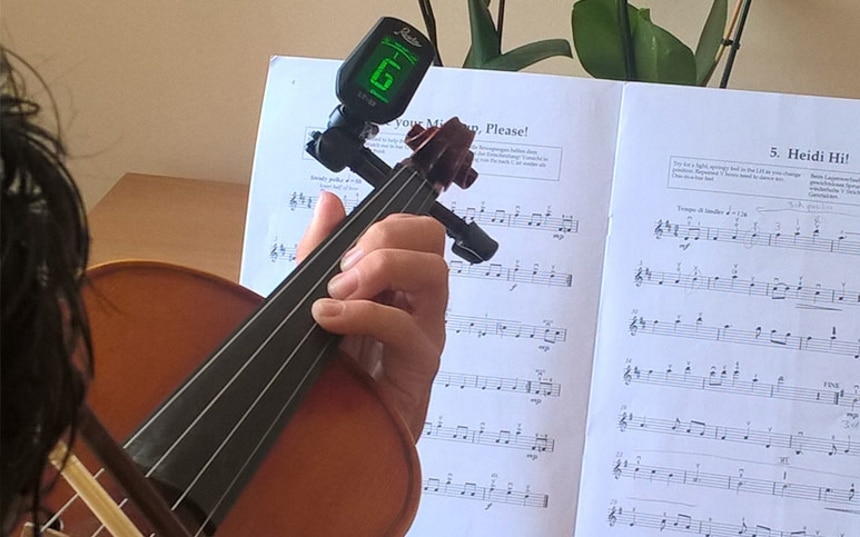
Thus, relative tuning is an important skill to have, one that you will pick up in good time. In the meantime, you will find it easier to use a digital tuner, chromatic tuner, or other visual tools.
As a beginner, you will first learn to tune your violin with a digital tuner. These work by playing tones at a specific frequency to act as a reference tone. They also listen as you tune your instrument and show you visually how close you are to the right pitch.
Digital tuners come in different forms. There are smartphone apps of various types you can use to check your tuning, there are online websites and Youtube videos playing these reference notes, and you can also buy a variety of electronic devices.
Laurie of
Violinist
Trusted Source
How to Tune Your Violin
Sometimes it’s just easier to have your teacher tune your violin for you. But as an aspiring violinist or violist, you will need to learn to tune it for yourself, and the sooner the better.
www.violinist.com
seems to prefer a simple metronome chromatic tuner. You can pick up a similar one such as the Kliq Metropitch, which is professional-grade and very accurate. Current users love it for its affordability and effortlessness. Most think it’s a joy to use, but you need to understand that it can throw you off because it is a chromatic tuner.
Electronic tuners can be chromatic or non-chromatic. Chromatic tuners will tune to any note, not just the ones expected from a particular instrument. Non-chromatic tuners are limited, say, to the violin or guitar. For example, a violin’s chromatic tuner will be limited to g3, d4, a4, and e5.
When tuning a string that is too out of tune, it is easy to get confused when using a chromatic tuner because it will assume you want to tune to the nearest perfect fifth instead of the tone you are actually aiming for. That’s why you need to bring your strings as close as you can to the pitch you need before using a tuner as a reference to finish the job.
Despite this, electronic and digital violin tuners are perfect because they are always true. Even professional violinists use them sometimes to achieve a very high level of precision. One of the most accurate ones is the clip-on digital tuner, which senses even the lowest vibrations of the violin using a contact microphone.
 In a noisy environment, a clip-on tuner provides an easy and accurate way to check the tuning of your violin strings. As the name suggests, you simply need to clip it onto the headstock of your violin.
The inbuilt contact microphone picks up the string vibrations through the body of the violin. From there, all you need to do is pluck or bow each string and check how close it is to the intended pitch. Then, you can adjust the pegs or fine tuners accordingly.
One of the most popular clip-on tuners for violins is the Snark SN5X. It has become a darling for many violinists because of its simplicity, accuracy, affordability, and durability. This is the kind of tuner you can use to tune each of the strings note-for-note.
We already mentioned something about A string at 440Hz being the internationally recognized standard for tuning. However, not everybody agrees to this, and some kinds of music might even require a different kind of tuning. These are the alternative violin tunings you might think about one day as a veritable pro.
Other less common kinds of alternate or cross-tuning are listed here on Wikipedia Trusted Source Cross tuning - Wikipedia Cross tuning or cross-tuning (aka scordatura) is an alternative tuning used for the open strings of a string instrument. en.wikipedia.org , including:
Alternate violin tunings find their applications mostly in folk or country music or to facilitate droning.
There is a lot more to tuning a violin than perfect fifths and resonant tones, but this guide will get you the jumpstart you need to be tuning your instrument like a pro. Practice makes perfect, and you will soon have the skill to tune by ear as well.
More importantly, you need to have a premium quality violin and maintain it meticulously. Ensure that it holds its tune as well as possible by keeping it away from high-temperature fluctuations, handling it gently, and tuning it every now and then when playing. Keep your ear sharp, and you will soon learn how to tune your violin by the ear like the pros.


Great! very helpful.