Last updated: April 27, 2026
A violin is a stringed instrument that dates from antiquity in the 16th century. Although it has gone through a few modifications since its invention, luthiers Trusted Source Luthier - Wikipedia A luthier is a craftsperson who builds and repairs string instruments that have a neck and a sound box. The term was originally used for makers of lutes, but it came to be used already in French for makers of most bowed and plucked stringed instruments such as members of the violin family (including violas, cellos, and double basses) and guitars. en.wikipedia.org still use the same ancient methods to craft the modern violins. In fact, the first violin ever made is pretty much similar to the present day one. There’s only a slight difference with the 17th century variations that had longer necks and fingerboards. Otherwise, how a violin is made, the materials and tools are relatively the same.
Violins are mostly made from wood. Spruce and maple are the most popular types of wood used because of their lightweight yet dense nature. Some parts of the violin like the tailpiece are made of plastic. As for the tools, there’s nothing out of the ordinary required except a few specials like the purfling cutter and a bending iron. A luthier’s tool kit essentially has the basic routine carpentry tools like chisels and saws. Read on for some more interesting facts and useful pointers on how a violin is made.
The violin, also known as the fiddle, is one of the most modern string instruments played by a bow. It features a hollow wooden body and four strings. It is made of different types of wood and can be strung by either, steel, gut, perlon, or synthetic strings. Other than drawing a bow across its strings, the violin can also be played by plucking its strings with fingers. The violin is essential in various musical genres, but they are more prominent in the Western classical tradition. Lately, the instrument has become incorporated in multiple non-western music like Iranian and Indian music.
The origins of the instrument are controversial, but most historians agree that it was first crafted in the 16th century in Northern Italy. Andrea Amati is believed to be the genius behind the invention of the first true violins. He was also the founder of the famous Cremona school of violin making.
In the following 150 years, Amati’s family members took the violin a notch higher in terms of perfection. They made some modifications to improve its sound and projection. It not only became a popular musical instrument but also an admirable work of art. By the 17th century the violin had spread out to all European countries. At this time, it was the inspiration for the invention of other string instruments like the viola. In the 18th and 19th century it became world famous.
Although Europe and Asia are popular for having several factories that produce violins on a large scale, the finest violins are handcrafted by individual luthiers that use the same methods employed by the classical Italian violin makers centuries ago.
Most of the tools needed for violin making are similar to those used in hand woodworking and carving. A violin maker must develop the skills associated with using, making, and maintaining sharp edged tools. Some of the tools and jigs used in violin making include:
 A luthier would need to have three types of planes in his kit; a block plane, thumb plane, and jack plane. The block plane, preferably the flat sole block plane is used for finer work like reducing the violin’s rib or fingerboard height. A steep angle block plane would suffice, but for denser wood like ebony a lower blade angle is recommended.
The block plane is also used to shape the ribs of the violin. It is used as a scraper, with its blade ground to a steeper angle. Do note that you would have to get a spare scraper blade o use the block plane this way.
A jack plane is an all-purpose plane and is used to join the plate halves because it is long enough.
A thumb plane is also used with violin plates and 2 or 3 sizes round sole should suffice.
 You’ll need two types of gouges; the long handle gouges and the scroll gouges. The long handle gouges will help ease the tedious carving of the plates. The scroll gouges carve the different stages of the scroll’s volutes.
One of the most popular gouges and chisels set that you might want to consider is the SCHAAF Full Size Wood Carving Tools Set. It features 12 canvas case gouges and chisels made with high-quality materials to hold an edge for a very long time. Whether you’re a beginner, hobbyist, or professional, you will make the most out of this toolset.
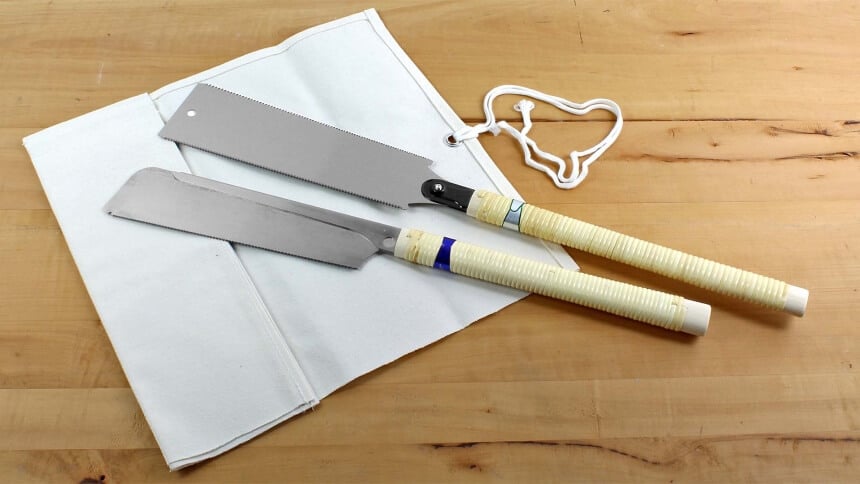 You would need a coping saw and a gyokucho saw. A coping saw with a lightweight build and sufficient depth is recommended for cutting the outline. One that comes with screws for adjusting the blade’s tension is much better as it allows for precision work. Also, ensure that the saw’s blade is thick enough, about 1.5mm. The ‘rounder’ the blade’s profile the better.
A gyokucho saw is a Japanese razor saw. It is highly recommended because it is an all-purpose saw. It has 2 sides with coarse and fine teeth that you can use on both soft and dense kinds of wood.
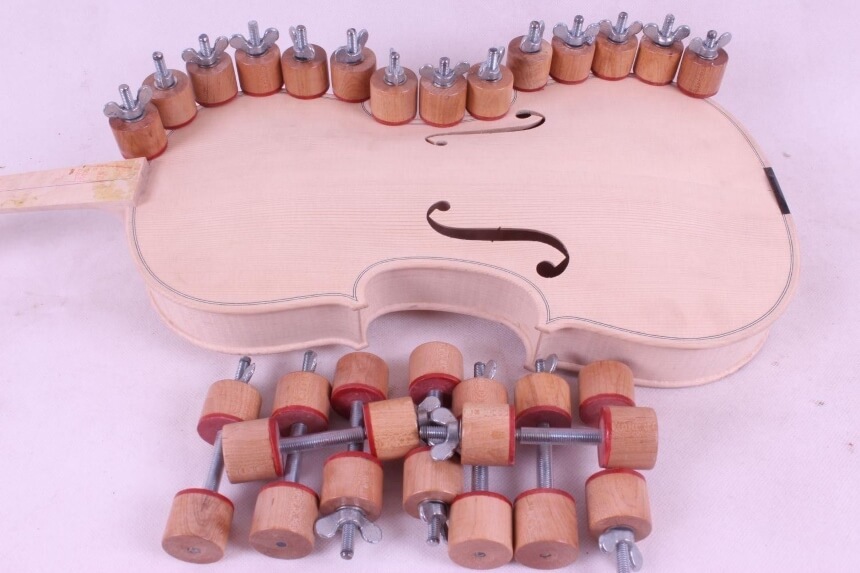 The essential clamps needed to make a violin are a lining clamp, a C-clamp, and a Bass bar clamp. The lining clamps are just wooden clothes clips reinforced with a rubber band for a better grip. They are used to glue the linings.
A bass bar clamp is a wooden clamp used to fix the bass bar in position while it is being glued onto the top plate.
A C-Clamp set is a must-have. The clamps are used for gluing the plates, fingerboard, and neck. Ensure you get top-notch quality clamps.
 Precise measurements are key to making a violin that produces great sounds. Some of the measuring tools needed to achieve preciseness include; a compass, dividers, a steel ruler, and a caliper. You will use a 30cm steel ruler to measure nearly everything in the entire violin making process. A compass with an adjustable radius and a divider will come in handy when you need to transfer the measurements onto the wood.
 A peg hole reamer and a peg shaper are some of the special violin making tools. A peg hole reamer reams the peg holes to an exact angle while a peg shaper creates a matching conical shape on the peg as the one reamed on the pegbox. Ensure the peg shaper has adjustable blades to avoid unnecessary tearing of wood when shaving the peg.
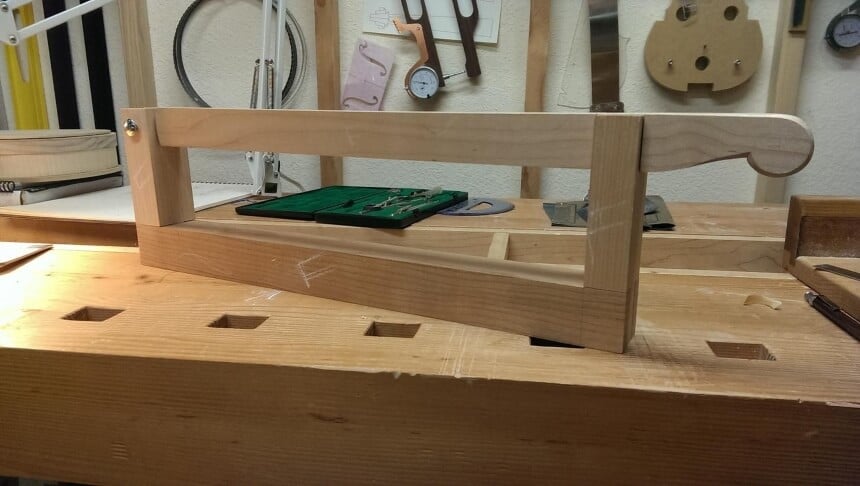
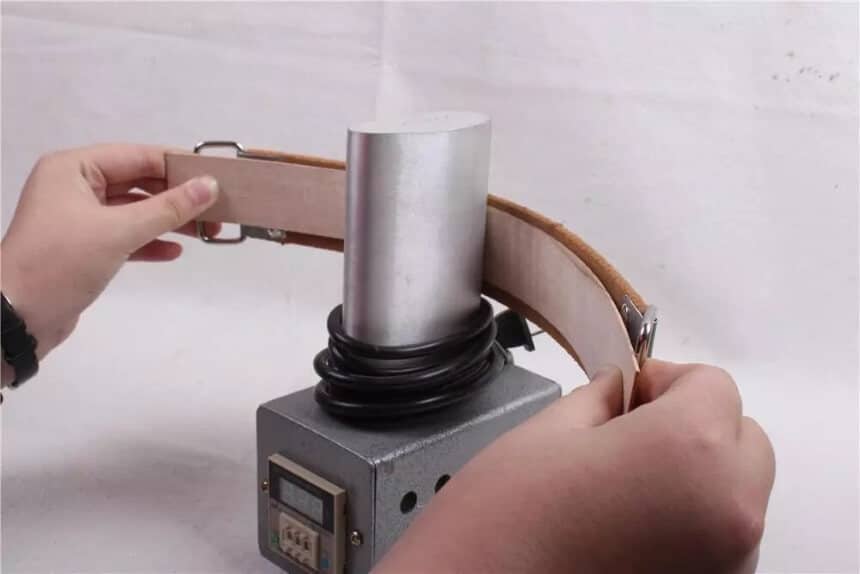 The bending tools needed to make a violin are the bending iron and a bending strap. A bending iron, when heated at 300 degrees Celsius will bend the purflings, ribs, and linings. You can build a bending iron yourself but it must meet some requirements. It shouldn’t stain the wood and its radius must be optimal. Also, it should be able to catch heat quickly and stay hot for a reasonable amount of time.
A bending strap is a strip of very thin metal wrapped around the bending iron at its radius. It has handles on each end and it is necessary for holding the bent piece of wood in place.
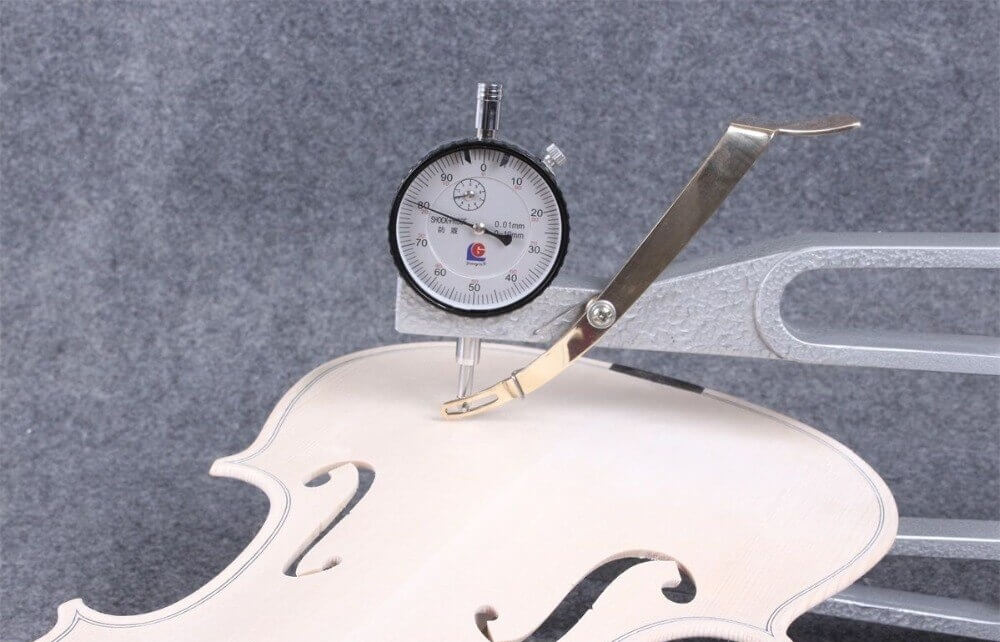
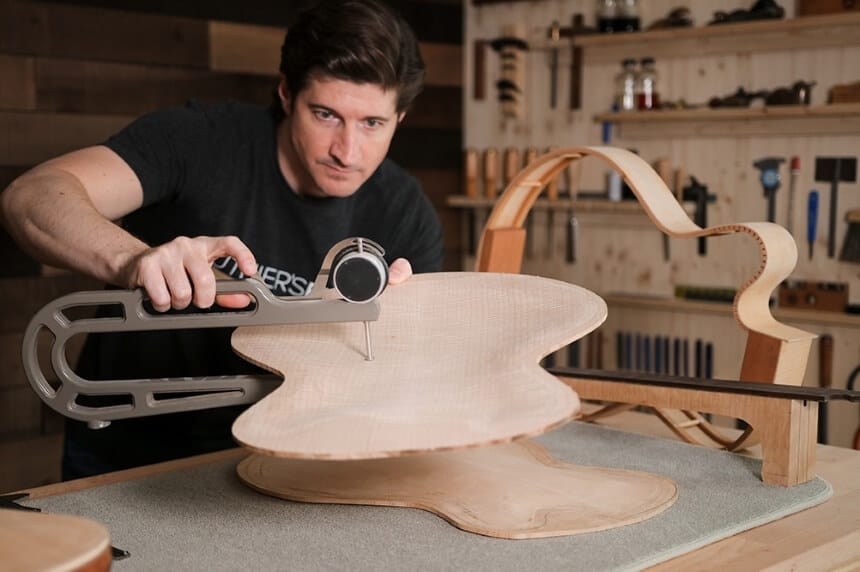 This is used to measure the plates’ thickness during their graduation. You can make your own thicknessing caliper or buy one.
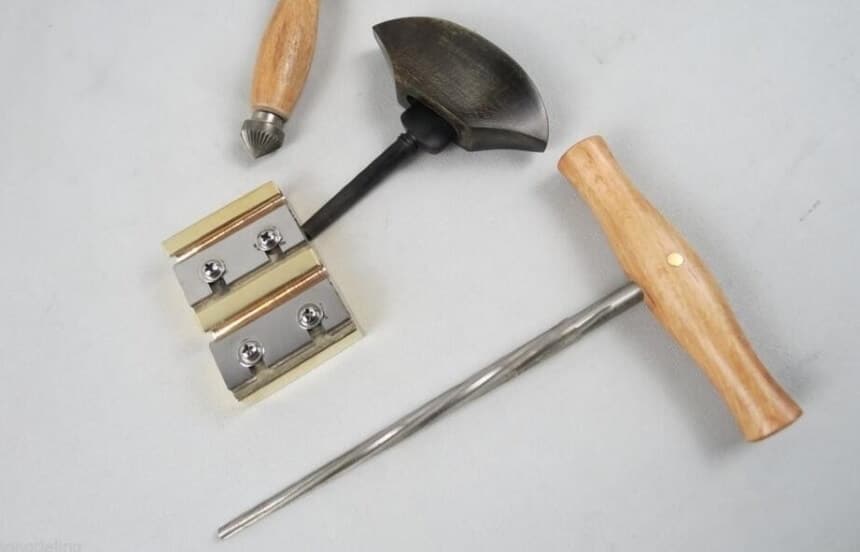
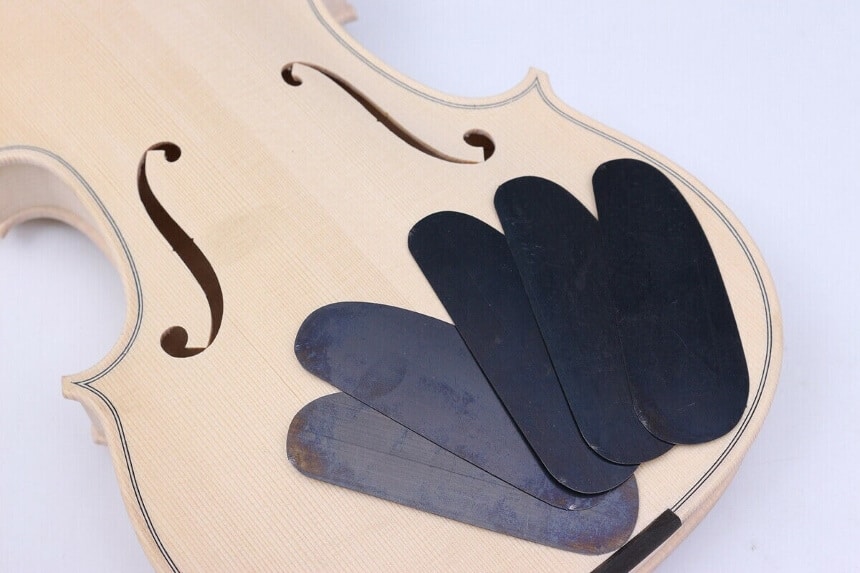 This is another must-have, especially for finishing the rib stock, the neck, the fingerboard, and the plates. Scrapers come in different shapes for different tasks. For instance, the rectangle one is used for anything flat like finishing the rib stock.
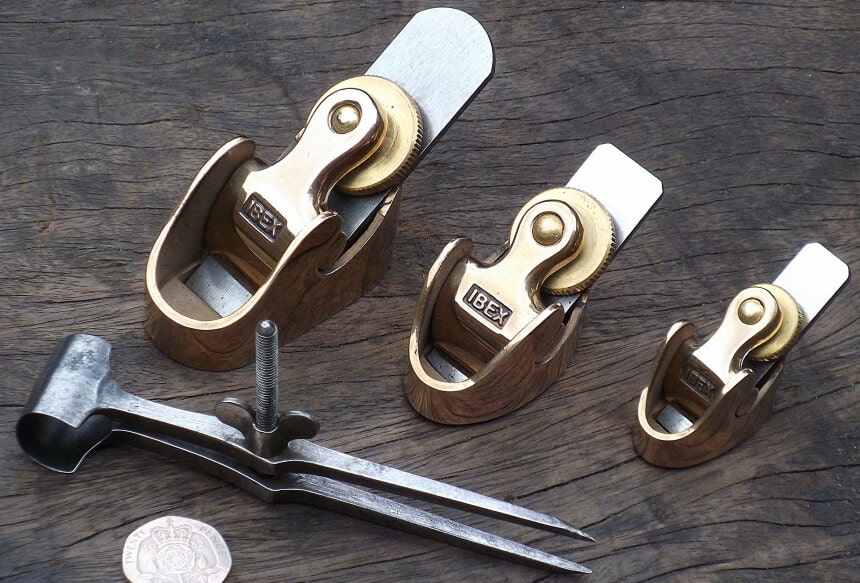
 The purfling marker lives up to its name by marking the purfling channel parallel with the plates’ contour. It has more than 2 blades but its sole purpose is to mark and not to cut. You can cut with a regular or beveled knife. When the purfling channel’s walls are cut too deep, wood waste is left inside and a purfling pick is used to remove them.
F-hole cutters aren’t that necessary but they produce clean holes. For flexibility, you can have them in a range of diameters.
 This is a universal holder that can hold different sizes of violin plates. It holds the plate while it is being carved hollow.
 This is a tool used to punch holes in a plate. The holes should guide you when you’re hollowing out the plates.
 These include the soundpost setter, inspection mirror, soundpost gauge, and soundpost retriever. There are various types of soundpost setters. They put the soundpost in position. The inspection mirror helps you to inspect the insides of the instrument as well as setting the Sound post.
The soundpost retriever comes in handy when you need to remove the soundpost after it has fallen to the bottom of the plate.
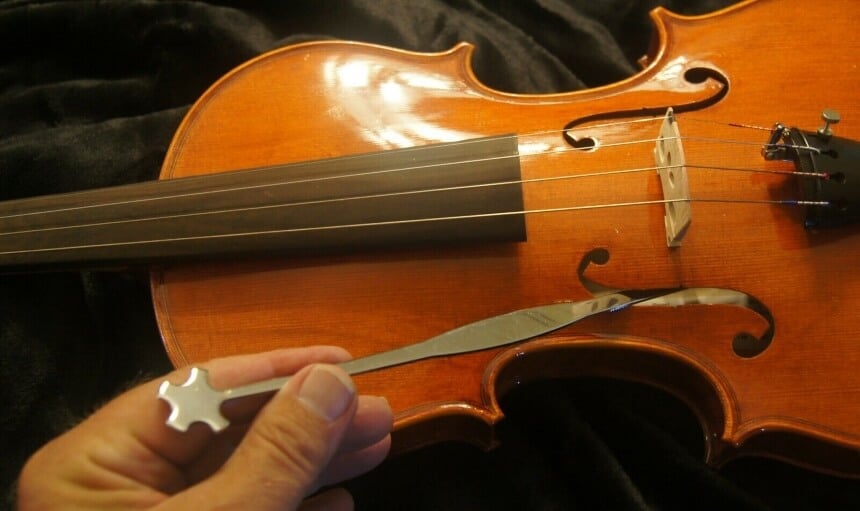
The soundpost gauge is a crucial tool that you can use to measure the area where the soundpost should be installed so that you know the exact length to cut.
A UV cabinet is used to tan the wood or cure the oil varnish. Btw! The Sunnyside Corporation 87332 Pure Raw Linseed Oil is one of the best oil varnishes you can get for the perfect finish on your violin. It is meant to be applied on raw wood only. On top of giving wood a high-quality finish, the oil penetrates deep to protect the wood by increasing water repellency and weather resistance.
 Violin craftsmanship takes a lot of time because of materials selection and preparation. A typical luthier can only make about 5 or 6 violins per year. The overall quality of a violin and the sound it produces is mainly determined by the materials used to craft it.
Wood is the main material used in the construction of a violin. Once the species of wood has been selected, its wood parts have to be conditioned for as long as 10 or even 50years. This helps prevent the effects other wood drying processes like kiln drying, which would compromise the violin’s build quality.
Maple is used to make the backplate, rib, scroll, and neck.
Spruce is used to make the front plate which is the most important part of a violin as it influences the overall sound quality. The spruce is used to make the front plate because of its unique acoustic characteristics that have uniform grain orientation. The European spruce and the Engelmann spruce are the most preferred species. A typical violin has its front plate made of two pieces of spruce glued together.
Ebony and Rosewood are used for making the fingerboards and pegs. These parts of a violin require high density and super durable wood species. Ebony is an averagely dense wood hence preferred for making a violin’s fingerboard, chin rest, scroll box and tailpiece. Rosewood is a dark reddish wood and is widely used to make the pegs and tailpieces of a violin.
Brazil wood is an exotic wood species popular for making the bow. It is dark red in color and can easily be varnished. The bow is the part of a violin that causes vibration. Carbon fiber and fiberglass are other popular options for making a bow. As for the bow’s strings, a bundle of horsehair has been the prime option for centuries. However, synthetic fiber is increasingly becoming more popular for its durability.
The violins strings are mostly made of catgut strings which have been rumored to be created out of cat’s guts for ages. High-end violins are still made with strings crafted from animals’ intestines. Mostly, it’s sheep’s intestines that are used. While they resonate quality, gut strings can’t beat the modern steel and synthetic strings in terms of durability.
Varnish is also an essential material in violin construction. It affects the overall sound quality of the violin. It is said that the famous Stradivarius violins Trusted Source Stradivarius - Wikipedia A Stradivarius is one of the violins, violas, cellos and other string instruments built by members of the Italian family Stradivari, particularly Antonio Stradivari, during the 17th and 18th centuries. According to their reputation, the quality of their sound has defied attempts to explain or equal it, though this belief is disputed. en.wikipedia.org were finished by a combination of gum Arabic from trees, salt of copper and iron, and other organic compounds. Having some metallic components in the varnish has also been proven to add some special acoustic effects to the violin.
Also, the materials don’t have to be made from scratch by a luthier. They can be bought in finished or semi-finished forms and then installed by the violin maker.
Once you have gathered all the materials needed for making a violin, you can follow the steps below to make a great sounding piece for yourself. Ensure you get Balkan maple for the violin’s ribs, scroll and back, and spruce for its front. If you can’t find maple, you can use pear and cherry wood like the English luthiers did.
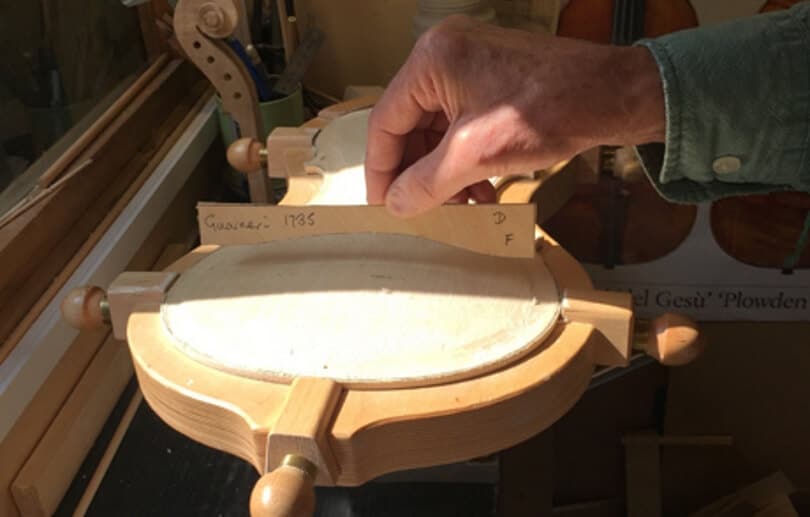
The first thing to do is get your violins measurements. Establish its arch, back, middle bouts, lower bouts, and upper bouts measurements.
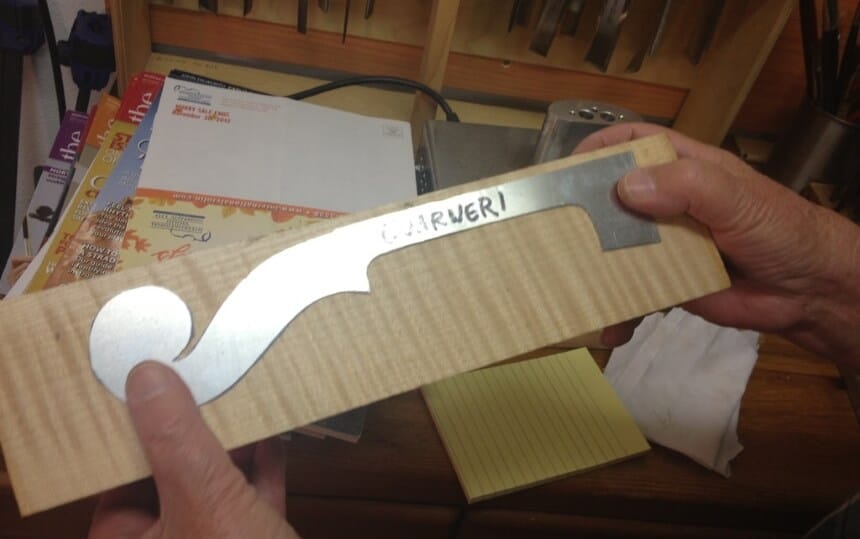
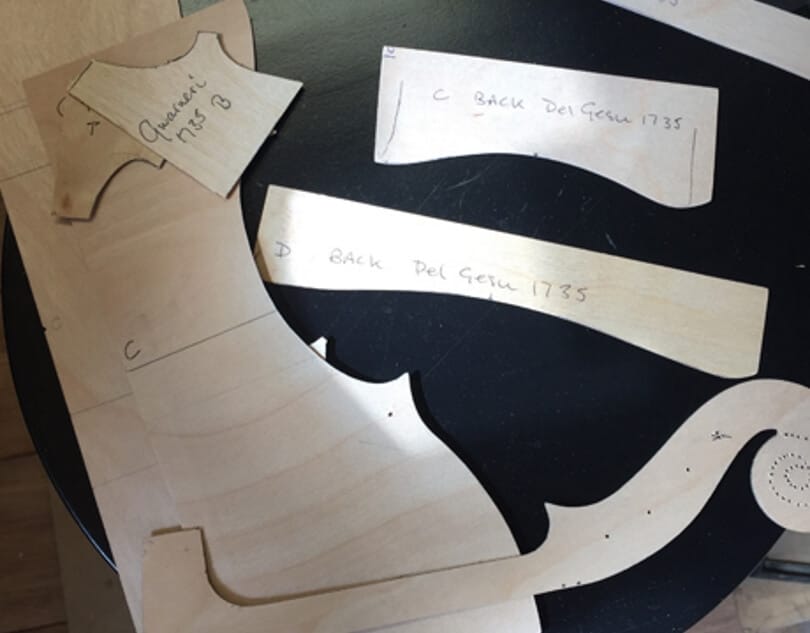 Create a template. Use card and plywood to create your violin’s template.
Use the template from step 2 to create a mould that you will use to shape the front, back and ribs of the violin. Keep the angles of the rib vertical then add the corner and end blocks. The end blocks are made of willow. For the rib linings, use lime.
To prevent the ribs from getting stuck on the mould, rub candle-wax on the mold’s edge. Also, be sure to use thicknessing calipers to achieve a good consistency for the wood you are using to make the ribs.
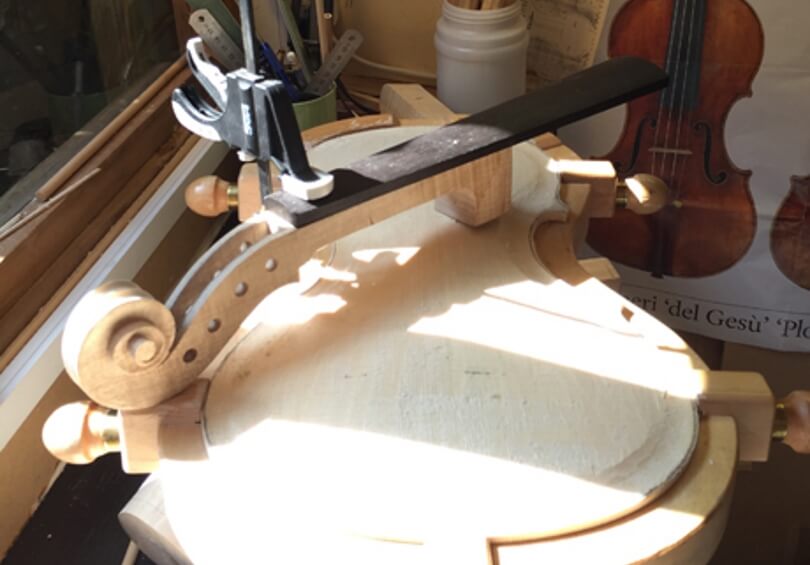
Bend the ribs on a hot iron.
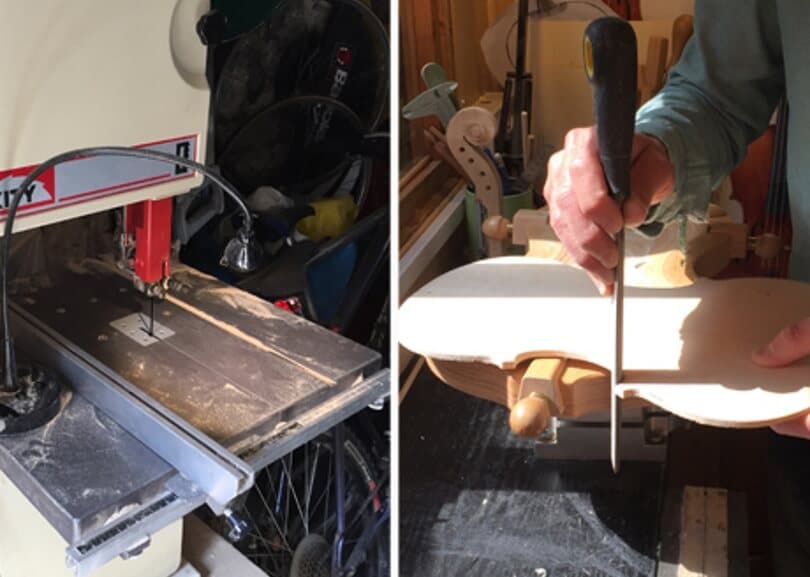 Next, cut out the shape of the violin by drawing its outline with a metal scribe. Use the ribs as a template then go round the outline with a pencil. As you go round the outline, use a washer to create a 2mm distance between the edge of the violin and the ribs.
Use a handsaw to cut out the violin’s back and file it. The edges of the pieces of wood you are using to make the violin’s back and front should be 4mm thick.
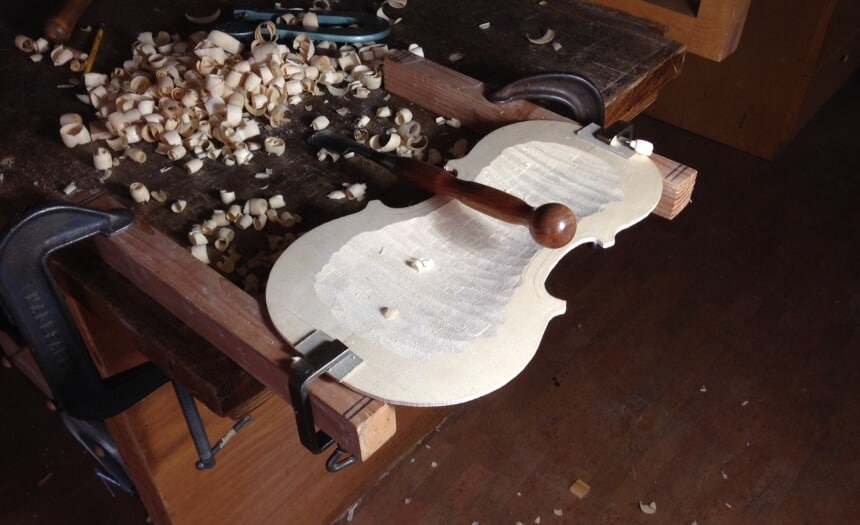
 Use a gouge to shape the back of the violin. The gouge will help you achieve a lovely rounded shape of the outside of your violin’s back. Carve it to get the shape you desire, you can even use quinte, which a 5 arching template that helps you get the shape you want.
Put the linings on the ribs, remember to use lime then glue back the ribs on.
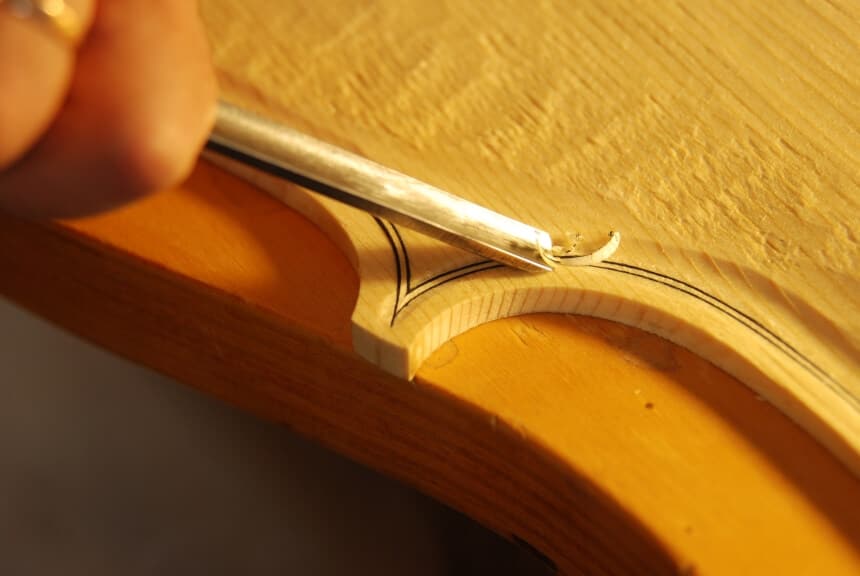
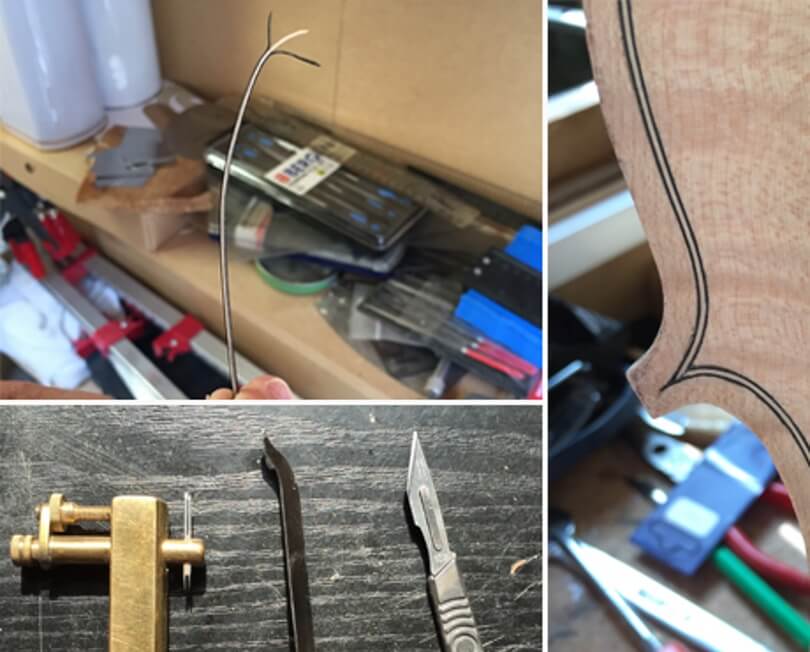 Make the purfling. The purfling is the decoration around the violin’s edge. Traditional luthiers preferred to use pear and ebony for the purfling but fibre is continuously becoming a favorite go-to for modern makers. This is because it is easier to work with and it bends without cracking.
Use a purfling marker to mark the pieces of wood you intend to use. Using the lines as a guide, cut a channel with a surgical knife until you have a channel as deep as 2mm. Go round the channel with a purfling cutter then mitre the corners into a bee sting. Fill up the channel with hot glue then push the purfling in it.
Time to take the mould out. If you used candle–wax like suggested in step 3 you shouldn’t have any trouble doing this. Use a knife to crack the mould out.
Repeat the entire process for the front of the violin. The front will be much easier because you will be using spruce or any other softwood which is much easier to work around than hardwood like maple.
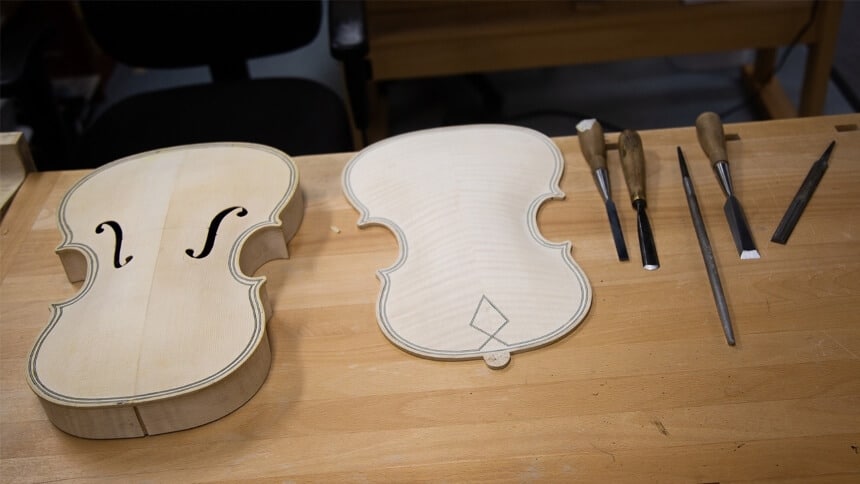
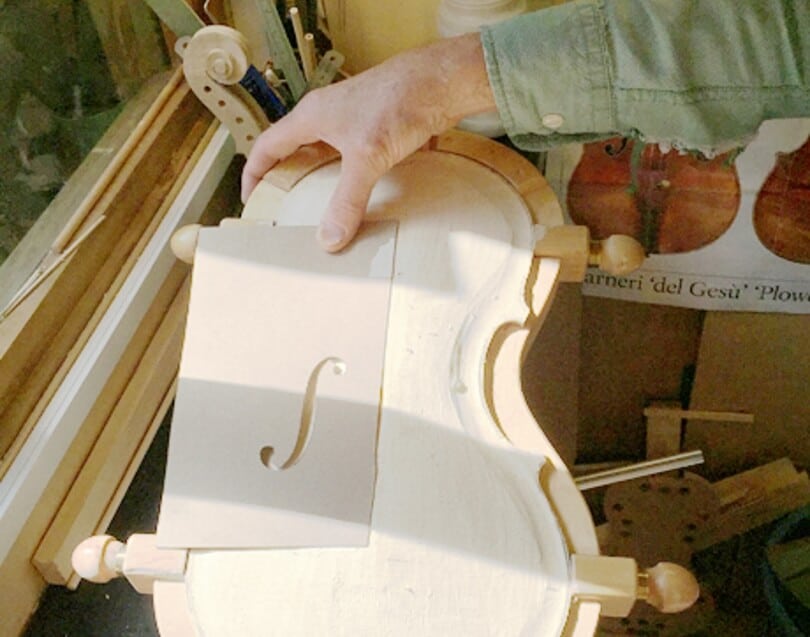 Once you have the back and the front of the violin, you can create the f-holes. It is the f-holes that allow sound to escape from the violin’s sound box. Most violins have asymmetrical violins. To make them, first measure where you’d like them to go using a compass and measurements from your template. Cut 4 holes then join them (to and bottom holes) with a template.
Attach the bass bar. The bass bar strengthens the violin and adds depth to its sound. It sits directly under the violin’s G-string and runs almost its entire length.
 Next, make the scroll and neck. Use a template and create the outline of a scroll shape with pinpricks. Drill peg holes into the scroll then cut it out with a saw. Use gouges to carve the scroll. You will notice that this is the only point you are required to do free carving. How the scroll turns out is often a good indicator for a luthier’s talents.
 After making the neck, thickness the fingerboard then attach it to the neck. This might take some time because the fingerboard is made of ebony which is a very dense hardwood. Attach the neck onto the violin’s body with a mortise and tenon joint.
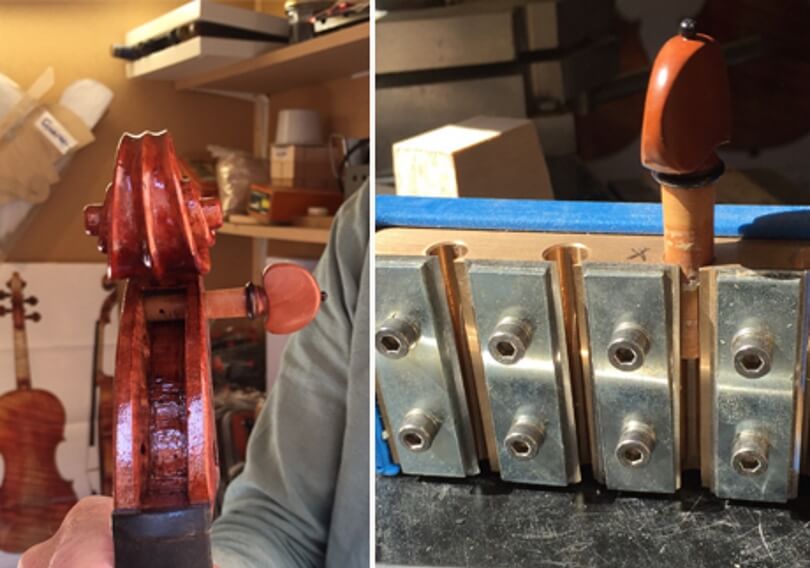 Cut and fit the pegs using a peg reamer and peg shaper.
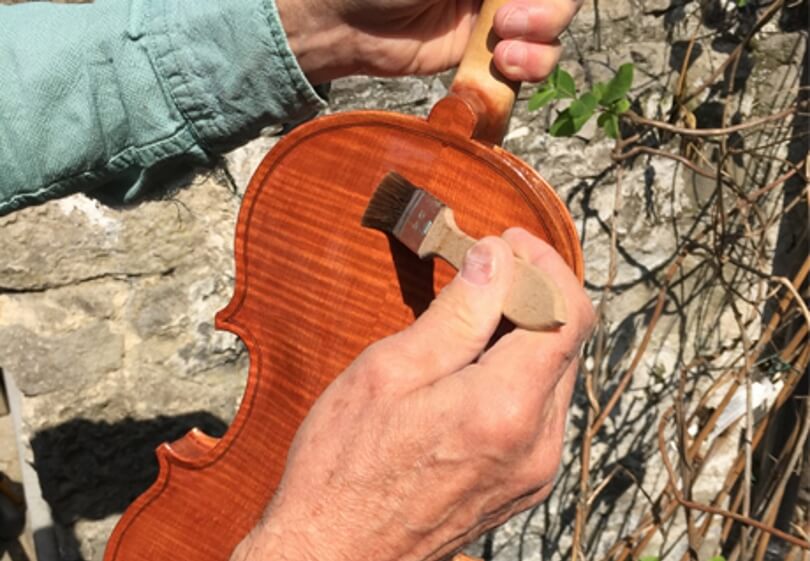 Pick the varnish of your choice and varnish the violin. Traditional luthiers preferred linseed oil and Venetian turpentine. The number of coatings will depend on the depth of color you want to achieve. You can as well put in a UV box or put it out in the sun to allow the color to develop.
So you have learned how to play violin, but you are wondering what it takes to make such a lovely instrument. We have provided a complete luthier’s guide with all the information on how a violin is made. The process applies to making all types of violin, as the design mostly depends on your tastes and preference. Also, you need expertise to be able to make some complicated designs.
Making a violin isn’t as complicated as thought by many, provided you have all the tools and materials needed. The step-by-step guide we have provided is pretty straightforward. Once you have made the violin to your liking, you can buy a case to protect it when you travel or during storage.