Last updated: June 07, 2026
Electronic drums have become more common in recent years as people have woken up to the potential of this instrument. They let you play more quietly and not disrupt the neighbors, and also give you access to hundreds, or even thousands of different sounds you can trigger from your drum set. In this guide, we explore how to record electronic drums and whether it is worth doing. People who would not have looked to record drums at home previously might have the option to do so with electronic drum kits. Some people are even looking for free solutions such as how to record electronic drums on Garageband, software that comes with most Apple devices free of charge.
To record electronic drums, you have a few different options. We explain the different methods you can use, and the different results they will give you. Some are ideal for home recording in a small home studio or even for recording drums in your bedroom.
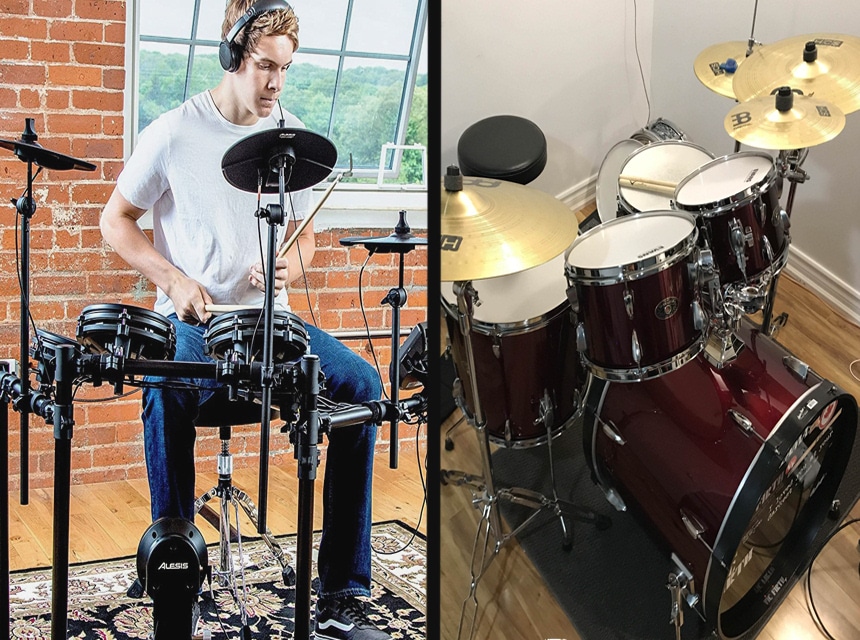
If you’ve got the choice of recording electronic drums and recording acoustic drums, which option should you take? Both have their pros and cons.
If you want the sound of a 1960s drum kit and the crisp warmth of analog then acoustic drums make this far easier to achieve. The fact that you’ll be recording acoustic drums using microphones adds to this warmth, however, it is important that you think about how difficult it might be. Some drum recording setups are really complex, needing a mixing desk (or possibly an audio interface) and at least 5 or 6 microphones. Electronic drums do not need all of this setup.
Electronic drums effectively have their own inbuilt computer. If you are looking into how to record electronic drums on PC or Mac, all you need to remember is the fact that the “brains” of the electronic kit needs to be able to communicate effectively with the computer. There are numerous ways to get the same end result with electronic drums, as you can record as hard audio, or even record the data as MIDI. It’s up to you.
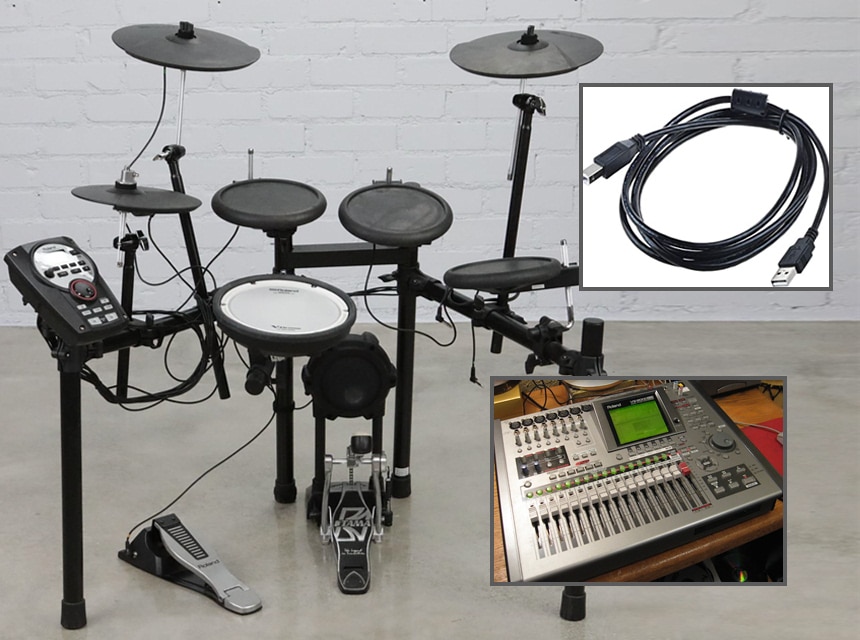
If you’re going to buy a drum set for recording regularly then it is worth investing in a good model. The best drum sets have good modules, which is the computer part of the set that has the sounds inbuilt and figures out things like triggering samples, and how loud to trigger them. A lot of these also have a USB cable that can allow you to connect directly to a computer. No need for an interface when you’ve got an exceptional electronic kit!
Some of these USB ports only work to carry MIDI signal (more on that later) but some can carry audio and allow you to record directly into your audio software or “DAW”.
What will you need to record electronic drums in stereo on your DAW?
Step 1: Connect your drum set to your computer using the USB cable.
Step 2: Set the drums as an audio input on your DAW. This should be an option within the preferences or settings if you have chosen a capable, suitable drum set.
Step 3: Load a new audio track with the input set as your drum set. Hit record, and start to play.
Step 4: When you’ve recorded the audio, you can then set effects or even make edits by cutting and looping sections.
If you are having trouble getting your computer to recognize the drum set you might have to install some drivers, but this depends on the model of drums. Many will install automatically when connected.
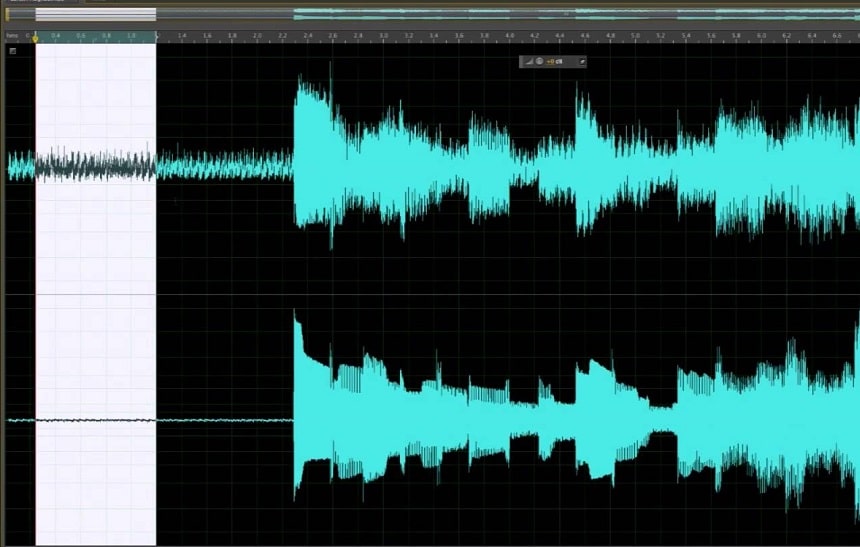
There are a few different pros and cons to consider when recording in this way. Some USB methods only record in Mono rather than Stereo. On top of this, you are relying on the drum set itself to have a good enough interface to provide a clear and loud signal to record.
Using this method, you will be recording hard audio rather than MIDI. This means that you won’t be able to make changes to the individual notes as easily, or alter the sounds like you can with MIDI data.
An audio interface is used to connect audio devices such as microphones or specific audio equipment. They boost the signal and then send the signal to the computer, to be read and recorded by a DAW. Audio interfaces are very common now and people use them for everything from podcasts to recording drums at home. You can get an audio interface for under $100, but be warned that you need to check you have enough inputs to achieve what you want.
With an audio interface, a lot of people assume you will be using a microphone, but this is usually not the best way to do things. Instead, it is better to take the audio signal directly from an output of the drum set, boost it through the audio interface and then record directly into your DAW.
In order to record electronic drums through an interface, you’ll need suitable cables as well as the interface, and the software. You’ll require:
Remember, we’re recommending that you don’t use a microphone. If you need to, you can amplify the sound of the drums using a PA system or amp and then you can mic this up, but you’re just adding extra parts to the audio chain that don’t need to be there.
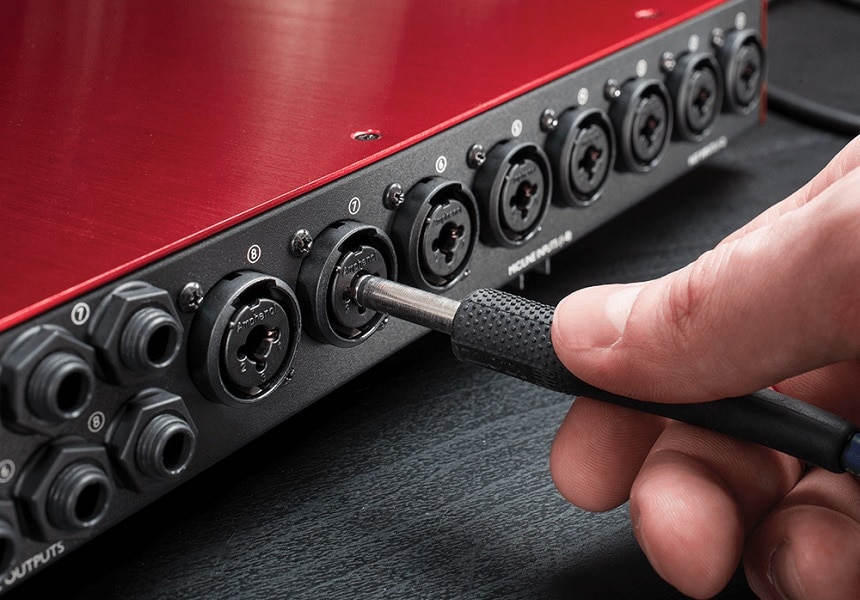
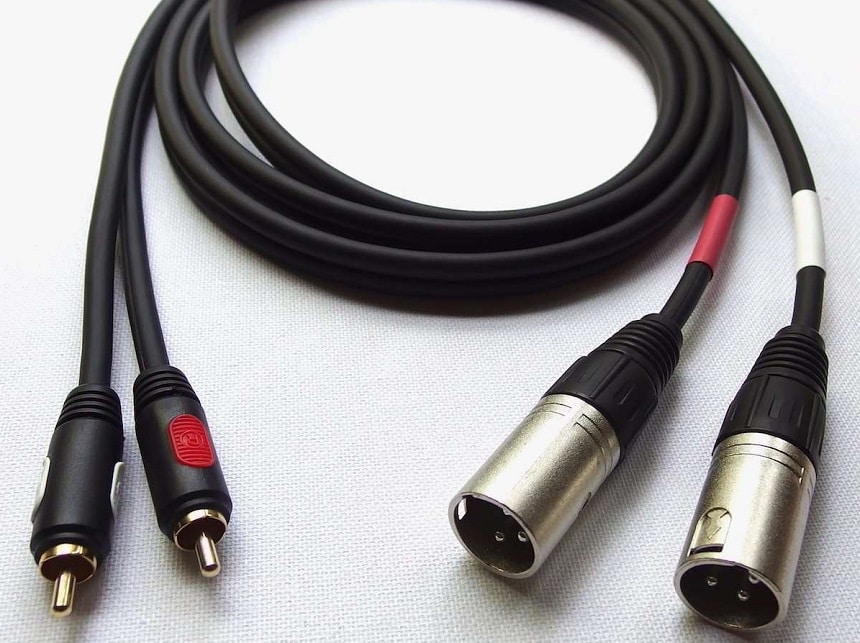
A word of warning: If the module on your drum set has a stereo output then you’ll need one stereo audio cable, usually a TRS cable which has black rings to signify the fact it is stereo. If there are two outputs, one for the left channel and one for the right, you will need two cables, that are simple jack-to-jack cables, similar to those you would use for guitar amps.
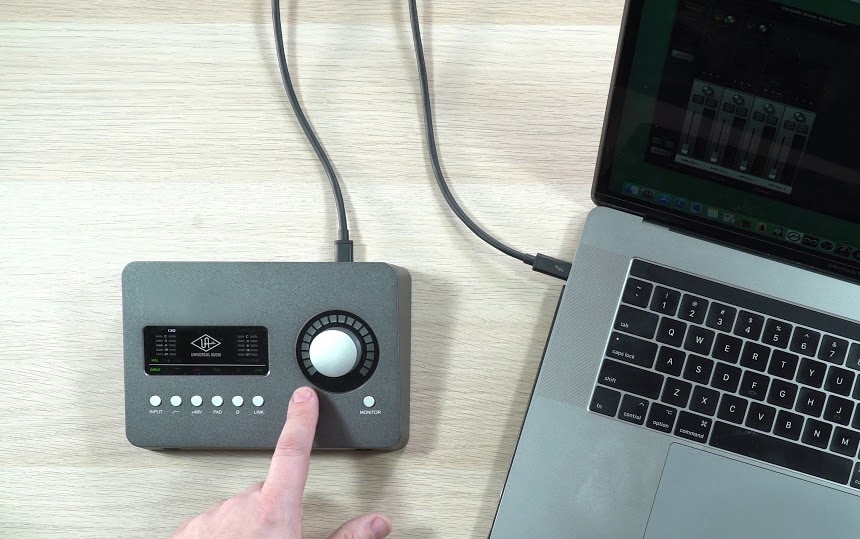
Step 1: Connect the output of your drum set to the input of your audio interface. You can connect with a ¼ inch cable or sometimes an XLR cable.
Step 2: Connect the audio interface to your computer, installing any drivers as required.
Step 3: Make sure the computer and your DAW recognize the audio input from your interface, and that you have a clear audio signal.
Step 4: Set up an audio track in your software ready for recording. Hit record, and play the drum line you need! Knowing how to record electronic drums on Ableton Live might be a bit different when compared to some other software so make sure you understand the specifics of your own DAW.
You need to make sure you have a fantastic audio interface. The Focusrite Scarlett has become a really popular model for those who only need a couple of inputs, but you’re adding something extra to the setup and if you don’t get a good interface you could end up ruining the sound.
The good thing about recording in this way is that you don’t have to worry about lots of microphones, you’re taking the audio signal straight from the drum set and recreating the sound of a full drum kit without having to use loads of microphones. Done right, this is a really simple and effective setup.
Using MIDI to record drums is incredibly popular if you’re looking to make some simple and basic home recordings. It’s a way to record the data rather than hard audio. If you are learning how to play drums on an electronic kit then there is every chance that you will already be using MIDI in one form or another. MIDI signal is generated when you hit the drum pads. This triggers a sound that you can set within the drum module. Electronic drums are basically MIDI drums.
If you’re looking to then take this signal and carry it elsewhere, you can. There are lots of DAWs and drum software that can work with your drum kit. So, the MIDI signal gets sent from your drum set to the computer, and is then used to trigger drum sounds within your DAW.
MIDI is just data, not actual sound. This has its pros and cons, as we will explore below. You need to connect your electronic drums to a MIDI-capable drum module in your DAW. For instance, if you are looking for how to record electronic drums in Audacity, this won’t be easy. Audacity doesn’t have a lot of options for MIDI. However, if you want to use MIDI to record drums and you are using something like Logic, there are plenty of virtual instruments you can connect to your drum set and trigger sounds with.
It is also worth saying that a lot of audio interfaces are capable of using and transferring MIDI signal. You can take the MIDI approach with an interface, and use a MIDI cable to transfer the audio.
What will you need to record electronic drums in MIDI format?
This may be one of the simplest ways to set up your drums for recording. You don’t need to worry about the audio, just make sure the MIDI is transmitting. This works in a similar way to other MIDI controllers which don’t actually carry any sound, they simply tell the audio module when to generate the sound.
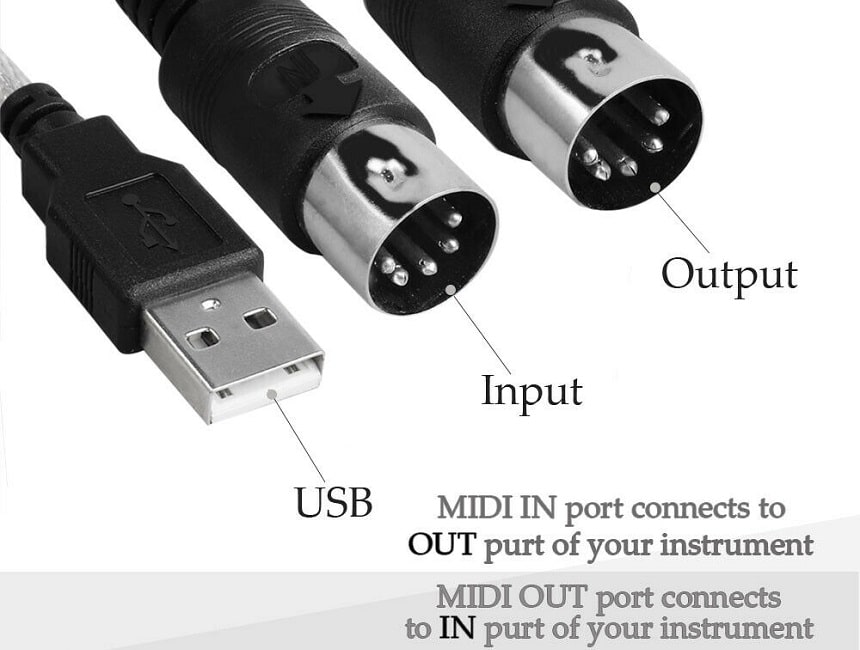
Step 1: Connect your drum set’s MIDI output to your computer. You can either use an audio interface to carry MIDI, or a USB-MIDI cable if this is supported.
Step 2: Set the MIDI input in your software as your drum kit.
Step 3: Set up a new MIDI track with a drum module or drum VST set up within. This means that you can control this drum virtual instrument using your MIDI controller, in this case, your Drum Set.
It’s important to make sure that you are getting the most out of your drums when using MIDI. If you use an interface that doesn’t support things like velocity, or you use a VST that has poor quality sounds that aren’t velocity-sensitive, then you won’t get the nuance and dynamics that you would with other methods.
That said, MIDI is such an impressive and mainstream tool. If you record a whole song in MIDI and find you’ve missed a couple of beats or that you have got your timings wrong, you can easily go in and edit the audio to make it correct. The MIDI is just data, not audio, so changing where a drum hit is within a timeline, for example, will be incredibly simple and straightforward if you know a little about music production and editing.
If you have never used MIDI for anything before then there might be a bit of a learning curve. However, a lot of us have used MIDI keyboards and controllers and this means that the transition to an electronic drum set isn’t too much of a technical problem.
MIDI can be incredibly fun, and opens up a world of new sounds, too. For example, you can use MIDI to trigger lots of different audio, and make your own choice of what sounds to use. You can change the kick drum sound after you’ve recorded, set a second sample to trigger, thicken up your snare with an extra sample. If you want to, you can even create a drum kit that triggers cat sounds! Because MIDI is just telling the computer when to trigger sounds and how loudly to do so, it is easy to then edi the MIDI signal or change the drums in question.
If you’ve never recorded before then you might not be prepared for the technical difficulties. Whether you want to know how to record electronic drums in stereo audio or as MIDI files, there is likely to be a tech hitch somewhere along the line. This is just the world of recording!
Fortunately, there are things you can do to overcome these technical problems, and a few troubleshooting tips can ensure you don’t have to spend hours trying desperately to get things to connect.
An audio interface not being recognized by the computer is a common problem. The method of setting it up will vary based on the audio interface you are using. If you’re lucky then all will go as planned. This means you just need to connect the audio interface, and it should install the drivers automatically. The driver is what effectively “shows” the audio programs how to use and communicate with the interface.
If you think it could be the driver that is the issue, you can install this via the manufacturer’s website. You may also need to update the operating system you are using to ensure the most current compatibility.
Check within the preferences or audio settings of your DAW, where you can set inputs and outputs. Your audio interface should show as an audio input.
If you are still having trouble, it is time to check the cables. Cables are often the culprit with any sort of audio issue. You may need to replace the power cable or any USB-MIDI cables you are using.
If the recordings are at the wrong volume level then you can have some issues, too. For example, if the recordings have come through very quietly then it is hard to fix this in the mix. You want a clear and loud audio signal to work with at all times.
If it is too quiet, this is likely to be down to a gain control. On an audio interface, there will be a knob or button to control the audio “gain”, which means how much the audio is boosted while it is being read in the device. Boosting from the interface gives you a clear audio signal, but if you try to boost retrospectively once you have recorded, you’re working with less data and can end up with a nasty gritty sound.
On the other side of the spectrum, you need to make sure that the gain control isn’t too loud. Excessively high settings here will almost inevitably lead to distortion, also known as clipping or peaking. This sounds horrible, especially on digital audio recordings. The clipping can become a real problem for recordings and you can’t really fix the audio once this has been laid down as a final take. You’ll end up having to record again.
This is all about getting the gain control correct. You need to make sure it is loud enough so that you get clear audio. If you have a volume meter, make sure it is not going into the red. In the red, you’ll be getting clipping and peaking. This is not what you want.
Latency is where there is a delay in the recording. If you’re using live monitoring then this can be a particular issue. If you record with latency then the drumming is likely to be out of sync. If there are a few ms of latency it can make a difference, so it is worth addressing.
You can try to reduce the buffer size, which can stop many of the issues around latency, but you need to use more CPU. This means that you might get audio dropout. There’s always a trade-off when recording.
A higher sample rate also tends to mean lower latency, so you can raise the sample rate if you want to. Once again, this puts more stress on the CPU, which you need to make sure your setup can cope with. You need a computer with plenty of ram.
Other causes for latency or lag could be a poor-quality audio interface, or not using a dedicated audio interface, rather using the inbuilt system that comes with your computer.
Hiss and static are two more of the issues that a lot of people have to deal with when they are recording. Firstly, it is important to realize that getting a clear and loud drum sound for your recording is a good starting point.
If you record audio with a hiss and you don’t have a clear and loud signal, you may have to boost the gain after recording to get a clear signal. This can drag the volume of the hiss or static noise with it.
Another regular culprit for static noise or hiss is the use of poor-quality cables. It’s amazing how many people buy excellent guitars or drum kits, but skimp on the cables that connect them. A poor-quality cable can impart a horrible sound on the recording.
There are a lot of potential root causes of hiss and noise on the recording. Make sure you don’t have any loud equipment running that doesn’t need to be. Some people even make a whole recording before realising they had the air conditioner on throughout.
Interference can add a hiss or noise, and it is important to try and keep electrics to a minimum. This is easier said than done. Luckily, good quality cables can allow you to record in that position and prevent you from having horrible electrical noise on your recordings, but they aren’t magic, so it is important to think somewhat about the position of your drum set, and what other electronic items you have around.
There are so many different ways in which you can record drums in the modern age. Electronic drums open up a lot of options for drummers, whether you are just looking to get started and learn the basics of playing, or you are looking to make some home recordings.
Knowing how to record electronic drums is relatively straightforward, but it is important that you choose which method is best for you. Do you want to record MIDI or hard audio? Do you want to be able to edit the MIDI or are you just looking to make some practice recordings to send to your bandmates? Recording electronic drums is cheaper and quicker than a lot of the ways you could record acoustic drums. You don’t need microphones, which makes it an appealing option for home studios and those who just want to make some basic recordings to check how their playing is progressing.